Choosing a sphere nurb, rigging the clavicle is the first step for the upper body. Placing the new nurb control to be just above the shoulder (using the mesh to help guide the sizing),it needed to easy enough to select but not too big.
The control's pivot is then snapped onto the Clavicle joint, which is then duplicated, grouped and then placed in the negative axis. The joints are then constrained to the nurb using a parent connection, being renamed as L/R_Clav_CTRL.
Using a new nurb circle and rotating 90 in Rotate Z, it is then grouped (off_grp), parented to the shoulder and then repositioned correctly. This Nurb is then unparented, duplicated twice and then reparented to the other joints in the arm (elbow and wrist). The new controls needed a little resizing and repositioning using the CV's (mainly the shoulder) before being connected in.
With the controls all in place, parent constraints are used for the corresponding joints.
A hierarchy for the controls is needed to allow the correct movement when they are being utilized. The controls are parented as so and renamed for the left side:
1. Wrist offset group - Elbow Control
2. Elbow offset grp - Shoulder Control
There is some errors involving the wrist joint when moving around the control, this is due to the scripting on the forearm joint. The script is changes to relate to the wrist control instead of the wrist joint :
l_forearm_jnt.rotateX = L_Wrist_CTRL.rotateX*0.5
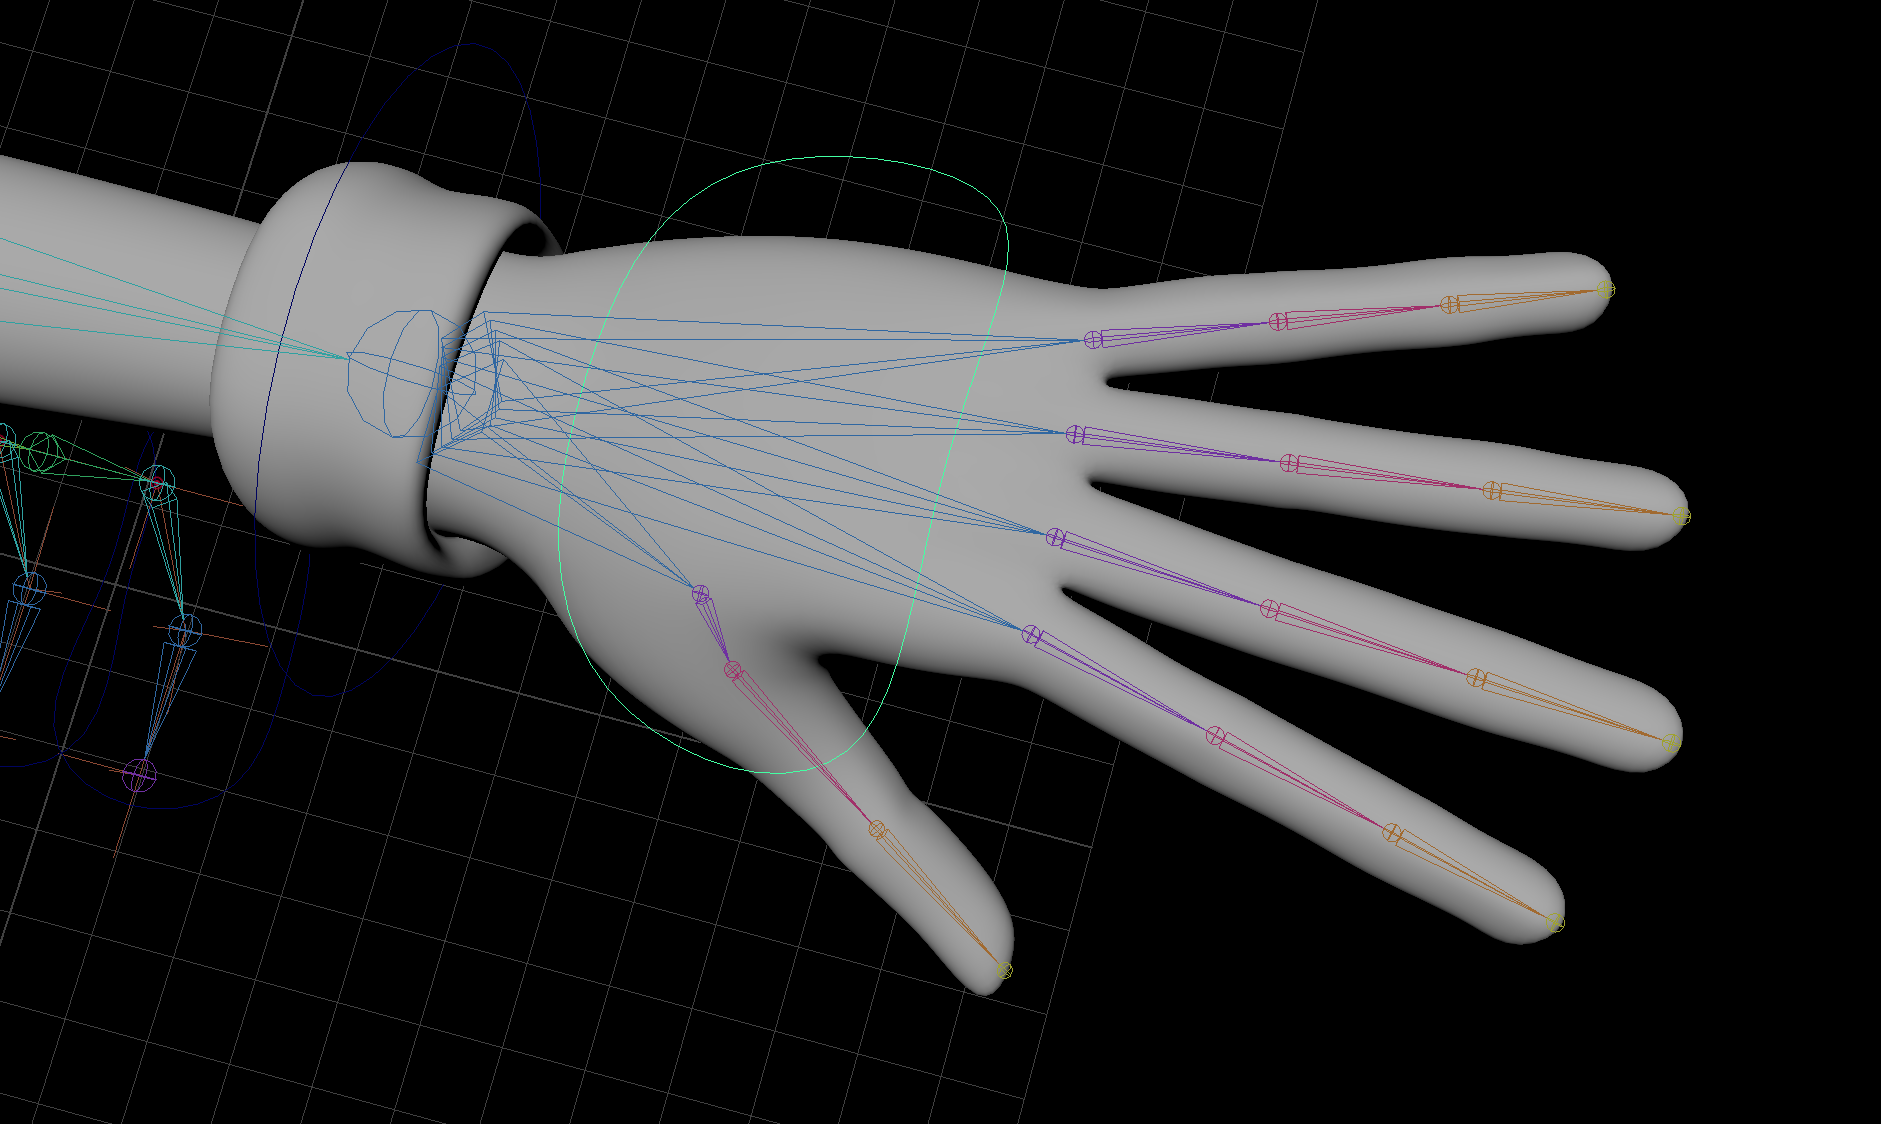
For the fingers, a new taco nurb is placed above the wrist and repositioned/resized. This is then parented under the wrist control in the hierarchy. Following this, attributes was added to the hand control for each finger and the spread/ thumb twist.
 |
| Left Arm Controls |
 |
| Hand Attributes |
These controls are then duplicated, grouped and then placed in to the negative space. Once renamed as the Right controls, the hierarchy needs to be re-established and another small change made to the forearm joint scripting again. I had a little trouble connecting the right controls in to the hierarchy, this was due to forgetting to freeze the transformations after being flipped.
 |
| Controls on Both Sides |
The connection editor was used to connect all the fingers and thumb joints to the controls on the left side first.
 |
| Connection Editor |
For the Spread channel, the Set Driven Key option was used. Placing the control as the Driver (Spread) and the base joints of the fingers (Rotate Y) into the Driven, a key awas established at 0 (neutral). The geometry helped visually to place a key when the fingers are spread apart and clinched together. Once done, the animation editor is then made into linear for each piece of animation. I feel I made the together position a bit too far apart and could have been a bit closer.
The process is then repeated for the right hand side.
The shoulder groups are then placed in a hierarchy under the clavicle joints, which in turn is parented under the chest control.
Selecting all the groups with controls in, these was placed into a new CTRL_grp and the scene cleaned up of anything that is not needed anymore. The rest in the outline is then placed into a Character_grp, which in turn is grouped under a new Master_grp.
At this point, double translates are taking place when moving the mesh/controls around the scene. For creating the Master Control (renamed as "World_CTRL"), the 4 pointed arrow nurb was best. Placing it under the character mesh and scaling up so it sits in the middle, it was then grouped together with the Master_grp. This new group is the named as "DO_NOT_TOUCH". This is to ward off anyone wanting to meddle with the rig.
The World_CTRL and Master_grp is then parent and scale constrained together. To stop the double transformation when moving, we turn off the "inherit transforms" options for the geometry and misc. group.
For the Ribbon spine, we place a scale constraint between the World_CTRL and the bind joints. This stops any strange deformation when scaling the character up or down.
 |
| Completed Rig so Far |


No comments:
Post a Comment
Note: Only a member of this blog may post a comment.