Tuesday, March 30, 2021

Premise: Animatic Pt 1 - No Sound

   Staring on the first part of the animatic, its taken more time to sort out premiere then actually create the animatic itself. These seem to be a bug which is causing premiere to not export properly and the same with media encoder, therefore I had to use another way to create the video.

  Currently there is no sound and some changes will be needed for the timing, but this is a good start. The second part will be made and then both parts placed together, ready for sound application. I will also need to think about end credits and any music that is needed.

Saturday, March 27, 2021

Premise: Finalising the Storyboard

  A more finalised version of the narrative sketches/ storyboard. As it is a night-time scene, I added tones to help get a idea of lighting. I hope to these for the animatic, but a few more drawings may be needed to help it flow better.

 Alternatively, I may just use the sketches to create a clearer picture of events and this narrative is still open for change. 

Thursday, March 25, 2021

Animation Workshop with James Holbart Pt 4: Working the Graph Editor and Defining Animations

In our final lesson with James, we went though on how to polish and use the graph editor to make our animations more effective. Its fair to say that this is not the best animation I've ever done. There is a lot of odd popping and movements that I was struggling to get rid of, but it was still fun to animate. 

I feel these lesson where invaluable. There is a lot that I have learnt from James that will help me in my future projects, along small tips on how to make really nice, refined animations. 

I aim to go back in the future and work on this animation a bit more to make it the best it can be, but at present I need to concentrate on my projects/dissertation. 

Premise: Continuing the Environment - Outline/ Greyscale

With the base outline of the room done, I was able to place some greyscale down so to gain an idea of the lighting. Some areas may need need darkening/lightening/ tidying up depending on the palette of choice. As it is a night time scene, I wanted it to be dark but so not dark that's everything becomes washed out.

Using the finalised greyscale as a base, I'm hoping to use layers/gradients to paint over the top and produce a finalised concept.
Final Linework


Greyscale
In a final talk with my character design tutor, it seems the narrative is at a good point to start pushing forwards with a story board and to start thinking about putting the animatic together.

Empathises also came on getting enough gesture work produced to really grasp my characters personalities and movements. During the modelling production stage, some areas can become a bit lost so its best to do as much as possible to keep the concept fresh. 

Sadly, I have stuck to line work. An ambition of mine is to start moving away from using line work but as the project clock is ticking away, I felt it was best to stick to what I'm comfortable with till I have some free time. This will allow me to really experiment more and push the boundaries of my comfort zone.  

Tuesday, March 23, 2021

Animation Workshop with James Holbart Pt 3: Working on In-betweens

   In today's animation workshop with James, we worked on our in-between poses. This is the current process of mine but I feel I may need to do a bit more work as the key poses are not as strong as I originally thought. The chest is also much too wobbly so this is a area that needs a lot of work, which I aim to do by Thursday ready for the next class.

Monday, March 22, 2021

Premise: Second Narrative Sketches and Script

   I have now completed the rough narrative sketches and the first draft of my script. These are still just rough, allowing for a lot of room for improvement.

  The currently sketches I aim (if the narrative is right) to clean up and use in my story boards and animatic. For the animatic, I will place a few more drawings and place notation of lighting. I hope that by doing it this way, it will save me a little time in the long run and allow me to work on other areas that need improving.

Narrative Sketches


First Draft Script

Where Do All the Socks Go S... by Kimberley Davis

Saturday, March 20, 2021

Pipeline 1: Jetpack Jones - Flexible Mouth Rig Pt 3

  For the blend shape to work, a connection between the target shape and the head geometry is needed via the blend shape options (making sure that automatic is into the Deformation order). This selected option places the blend shape node after the skin cluster, renaming it as Input_Bshape. these now has a working connection.

Active Blendshape


 For the master control, selected joints groups are placed into the following new groups:

- Upper Master Control, L + R upper 02 Groups = Upper_Ribbon_Ctrl_Grp (pivot Master Joint)

- Lower Master Control, L + R upper 02 Groups = Lower_Ribbon_Ctrl_Grp (pivot Master Joint)

- Upper,Lower and Central Groups = L/Corner_Ctrl_Grp (Pivot placed on corner joint).


  For the controls, Nurb circle are placed around the control joints and resized, the pivots being placed onto the master joints. Placing all the controls into a group (Mouth_Ctrl_Off_Grp), the Nurbs are renamed to reflect the joints they are going to control.

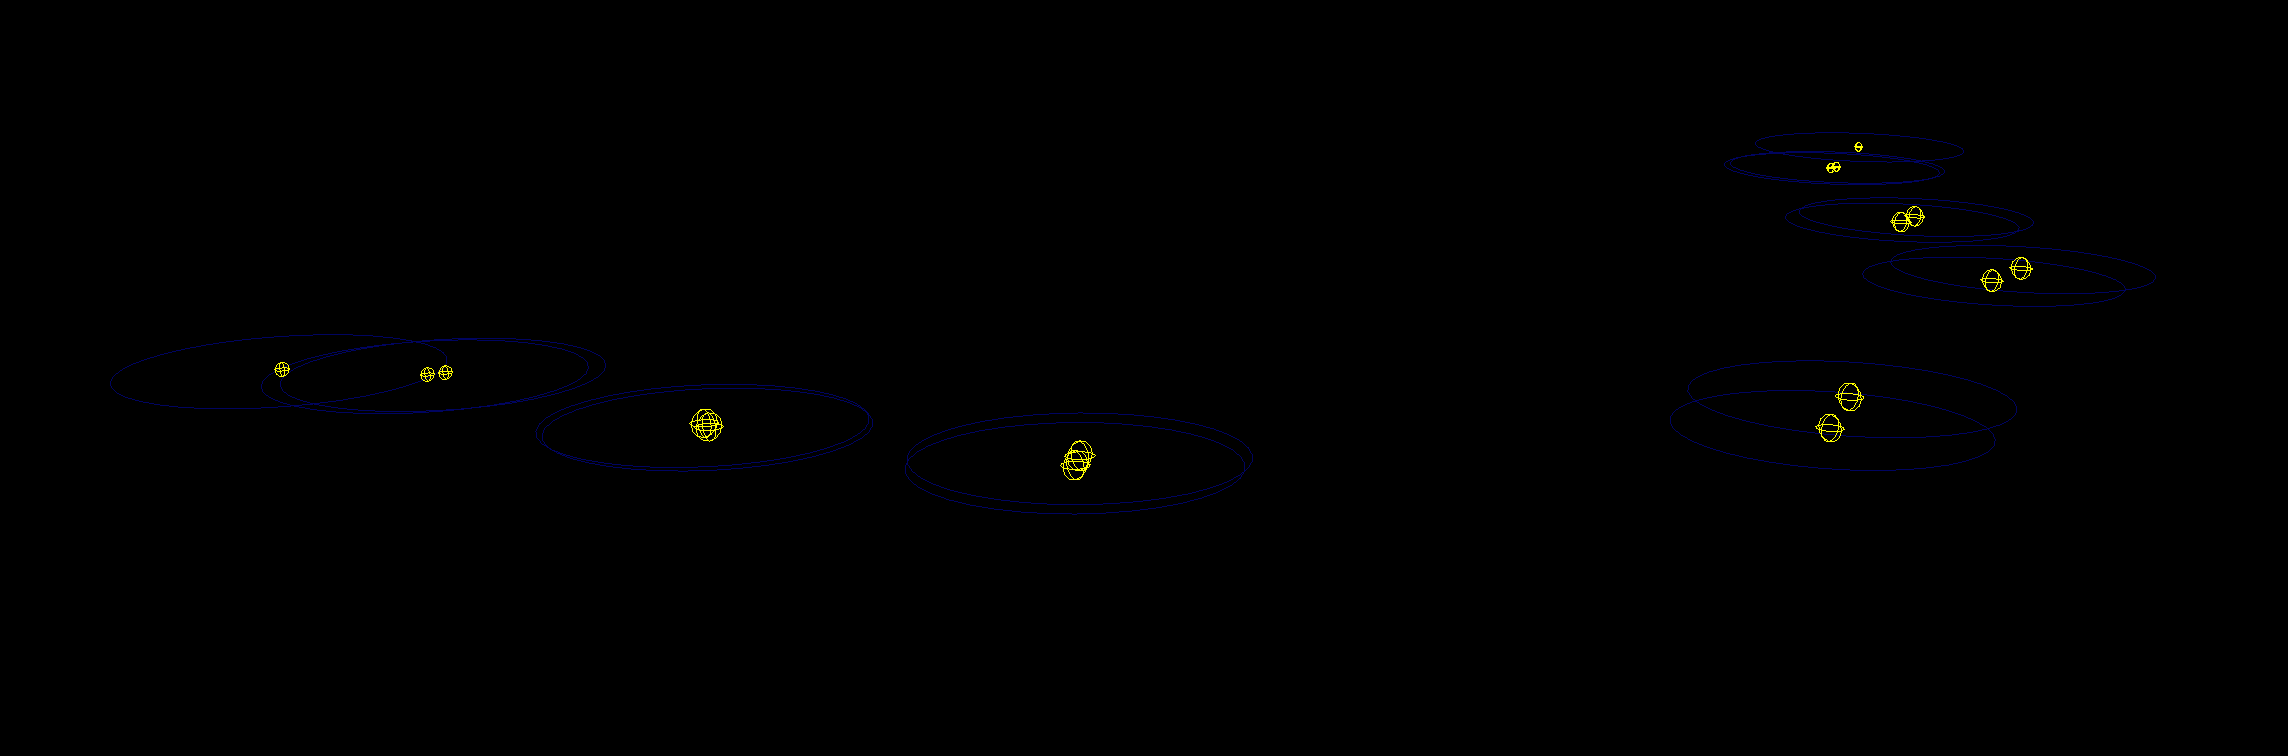
Joint Group Controls

  Adding another two controls further out in the viewport and calling them Upper/Lower_Master_CTRL's (the pivot placed back on the Master_joints), the same is done for the corners. The controls are then repositioned into the same place on the head geometry using the groups channel box (-8 in Translate Y).

Positioned via the Head Geometry

  With the connection editor, the controls are then bound to the correct joint groups. Its best to use the split screen so to see the connection is working after being activated. 

Completed Connections

  The master controls was then connected to the master groups and a hierarchy chain created between the singular joint controls and the master.

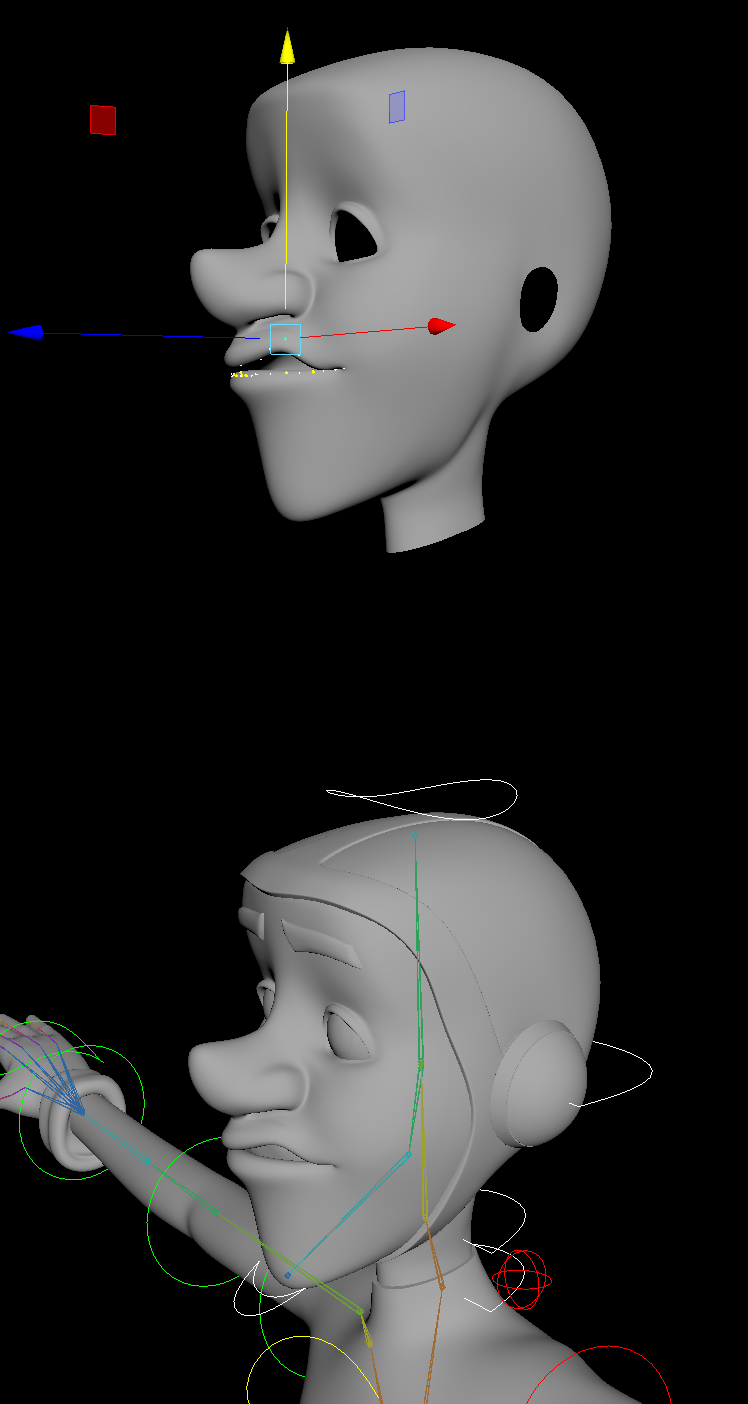
  To complete the controls, the CV's was used to bring all the controls outwards in the viewport (to allow better view), reshaped and then placed back into their final positions.

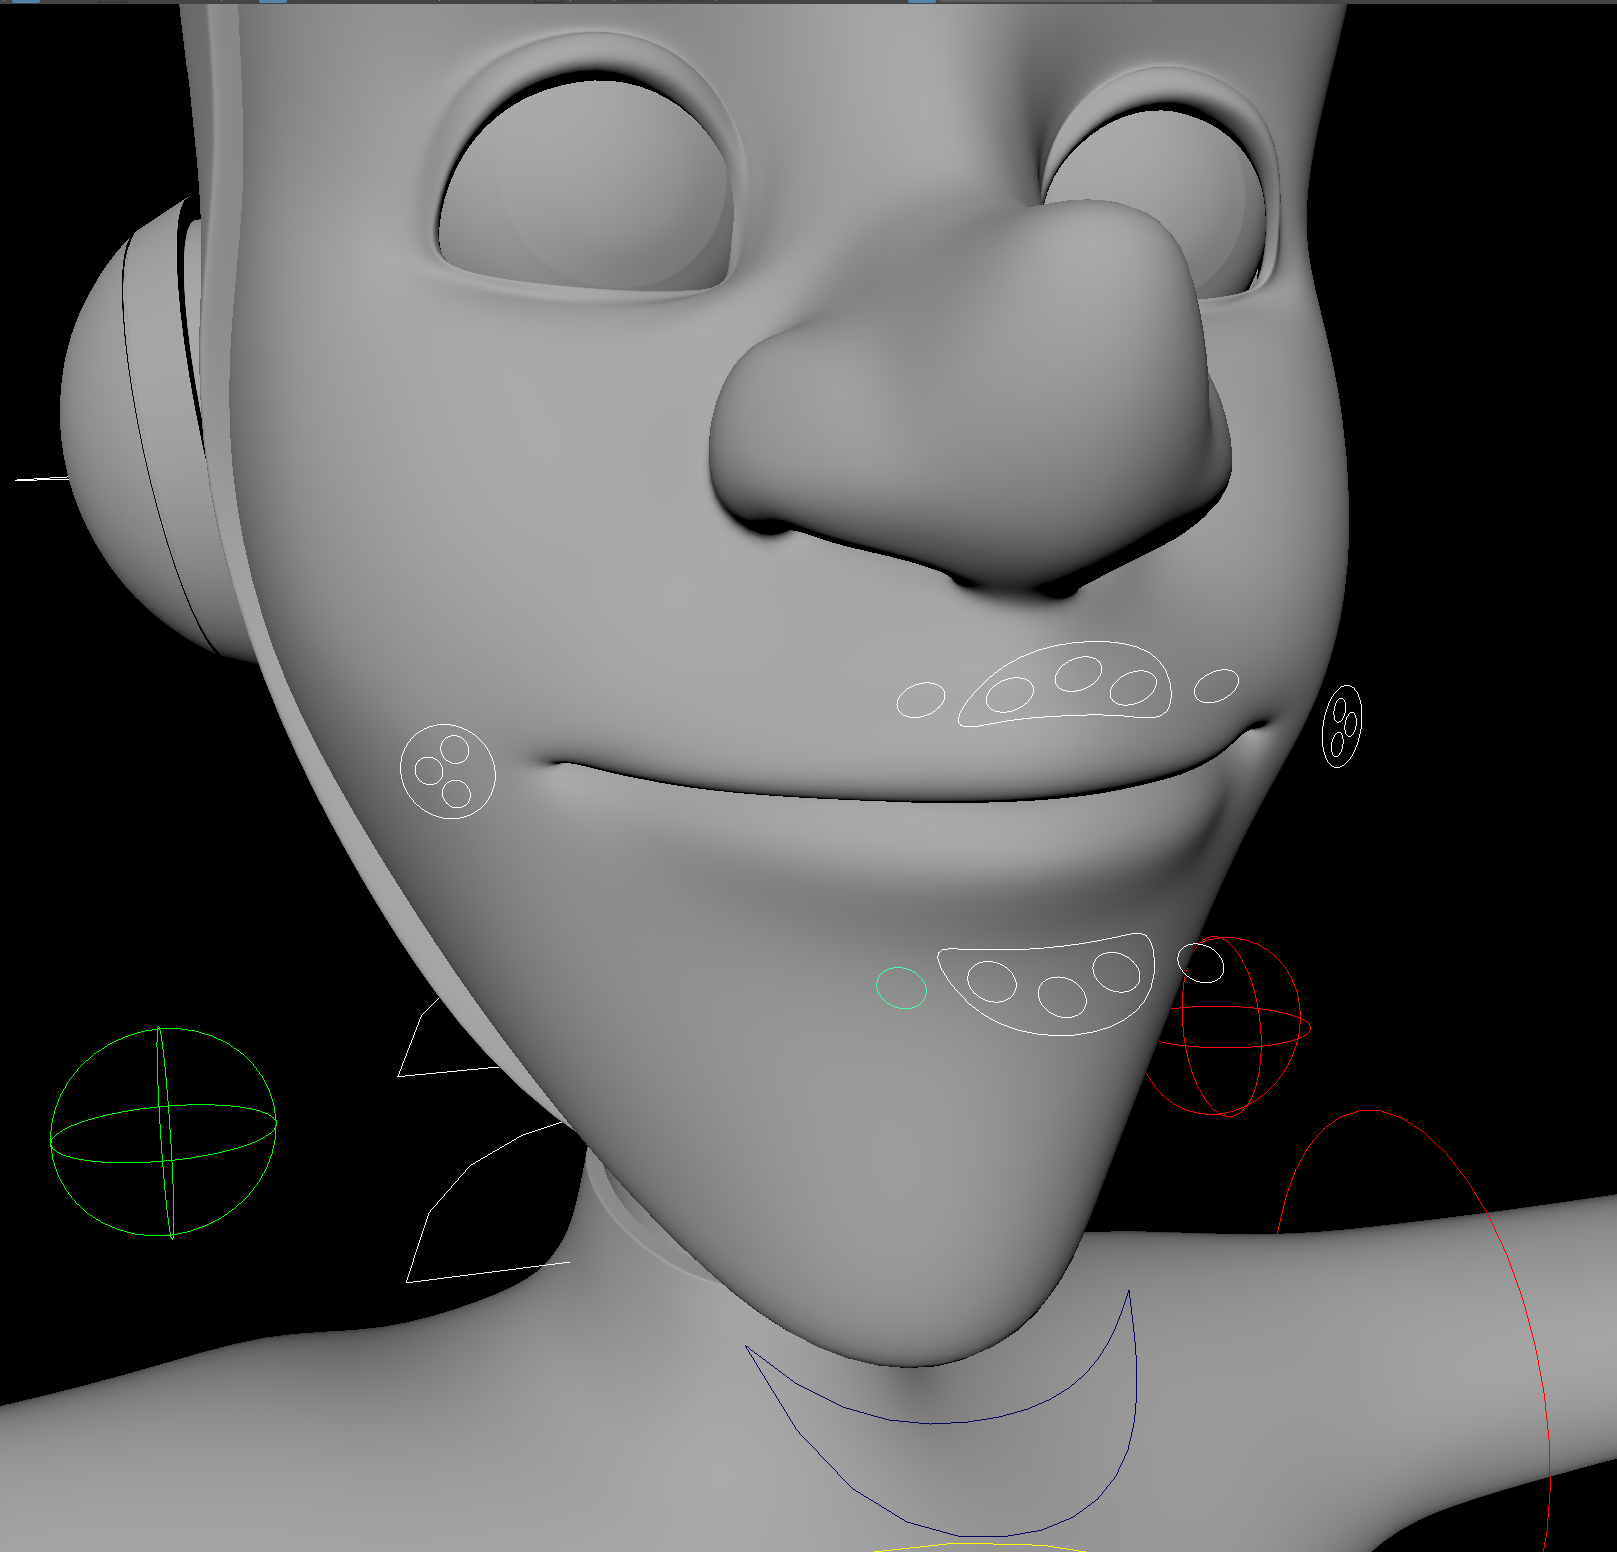
Final Mouth Rig Controls - Front

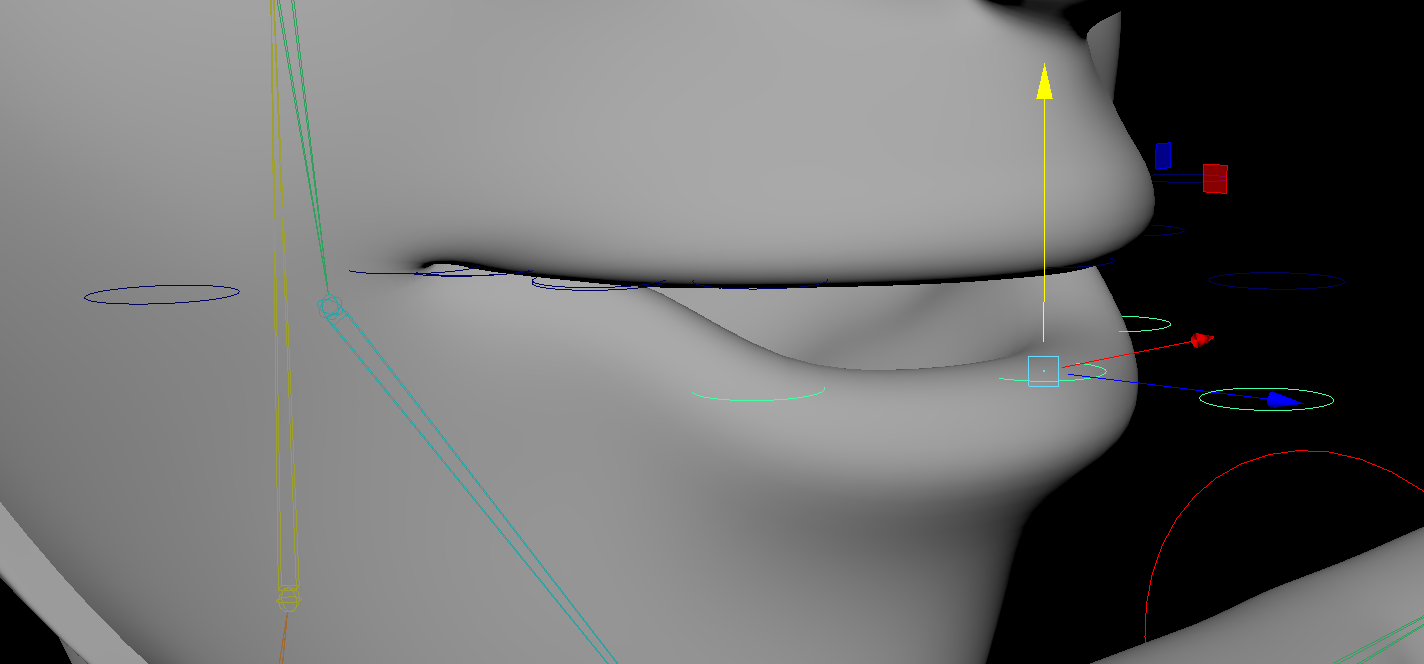
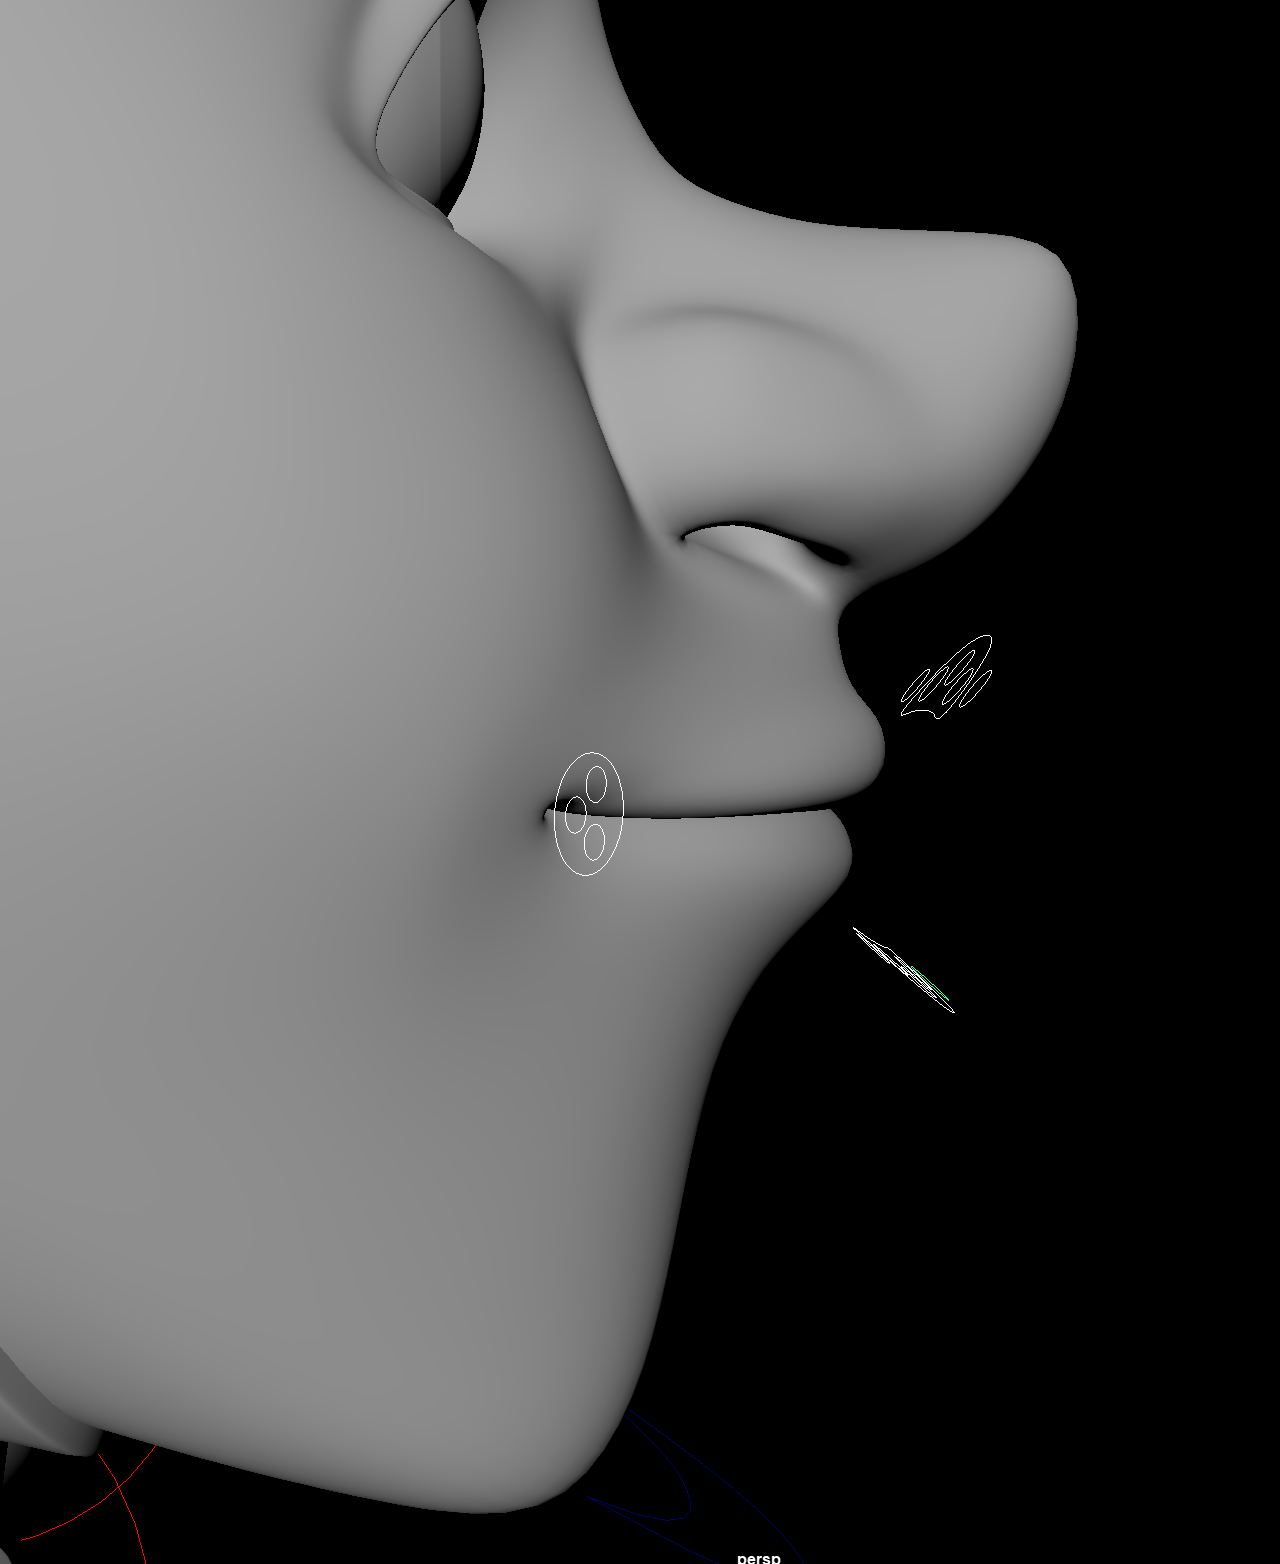
Final Mouth Rig Controls - Side

Thursday, March 18, 2021

Animation Workshop with James Holbart Pt 2: Blocking from Reference

   Continuing on with blocking from the last class, today was about expanding on the blocking process. We was to choose from either a personal reference, an extract from the  video: 50 ways to Sit (Kevin Perry) or James reference and block in the Key poses

  I decided to use James' reference and to follow along, leading to the following outcome. I need to complete one more key pose which will allow me to start thinking about second passes.

Blocking in Class

   I had also done one at home from the "50 Ways to Sit" video (thinking it was the homework), but I wasn't overly confident in the blocking. I seem to get the body too twisted and the head is a bit odd. Animating along with James gave me a much better insight in to the blocking process.


Home Blocking


  I'm enjoying these classes a lot and am learning so much,  helping me to improve my animation. I just need to make sure to use these teachings when creating my final animation in my third year. 


Premise: Narrative Ideas 2 and Sketches

  So far in my premise project, I've got to the point where my characters are finalised and their personalities/purpose defined. However, work is still needed for the environment. I feel the environment I've sketched is right but the colour palettes need more work, currently they are far too muted and need more contrast. Correlation is also needed between the creature and the room.

   Conversations with my tutor lead to what time of day the narrative will be taking place and the events. Figuring this will be at night time allows for the girl to be in the room asleep, adding more fun and peril to the story. In terms of lighting, there will hopefully be a mix between fairy lights and night lights, allowing the incorporation of shadows to hide the "tappers" and bring some surprise.

  The girl character wont be seen as she will be under the covers, meaning I wont need to make a whole new design and can use some tricks in Maya to give the sleeping impression.

  I have made quick narrative and some sketches to go along with it before committing to a full storyboard. These are a working progress and are open to change.

Where Do All the Socks Go -... by Kimberley Davis

Narrative Sketches Pt 1


Wednesday, March 17, 2021

Premise: Finalising the Tappers Designs and Room Deigining

   Looking back over the "Tappers" design, the colour palette was far to  alike the "Sock Stealer's". As the "Tapper" nests are in-between pipes in the wall cavities, they would have a more muted and darker colouring/ markings. So with this in mind, I decided to stick to browns and dark read, making a nice contrast to the brighter colours of the "sock Stealer".

  Also, as they are quite mischievous, I tried to portray this in some quick gestures. Discussion between my teacher and I focused around them making nosier via other parts of their bodies (such as the tail) whilst making their snout a little more pronounced. As I still have to model, rig and animate the creatures, I felt that keeping them simpler was best. This is mainly due to my Maya capabilities. Instead I decided to put metal thimbles on their feet so they make more noise when running around.

I have also given the a temporary name of "Mistappos", this is still open for change.

Finalising "Mistappos" Design

  Next was to re-start on the environment. Starting by doing some more research, the idea of making the room for a creative person who enjoyed needle work seemed fitting to the project. This means the environment outcome will be a mix of a girls/young woman's bedroom and a seamstress studio. Therefore, the creatures design will reflect what she loves.

Bedroom Research

  The bedroom is gonna be quite cluttered and messy, meaning the "Sock Stealer" can easily hide when needed. Also, the pallets I tried was to try and match in with the "stealers" design. These palettes may need changing so everything doesn't become to monotonous. 

  I sketched the room with what is going to happen in mind, so I will be doing some rough storyboards next.
Testing Palettes

New Room Design

Tuesday, March 16, 2021

Texturing Class Pt 7: Dumpster and Graffiti

   Concentrating on a model of a dumpster, the goal was to add some distressed textures and graffiti using projections. Moving between both Maya and Substance painter, the maps was baked out and then the textures placed to our personal liking, allowing a  personal touch with graffiti.

  To give our render the final edge it needed, AO materials was placed on each of the separate parts of the scene and then all placed together in photoshop. 

  I find that I'm enjoying using Substance painter a lot, regardless of some of the features not working due to the capabilities of my graphic card. The more and more I use it, the easier it is becoming to move between the two programs and placing the textures into Maya. 

The Beginning Model
Working in Substance Painter 

Final AO Render
Final Result

Thursday, March 11, 2021

Animation Workshop with James Holbart Pt 1: Stepped Animation and Speed Posing

   Today's animation class with James was centred around blocking key poses and understanding the importance of "stepped" keyframes. Using stepped keyframes enables capturing "key" poses before jumping into more complex movements.

  We was tasked with speed posing the "bony" rig in Maya. Having only 10 minutes for each of the 5 poses, the aim was to try an get good curves in the body. I found this highly enjoyable and was a nice chance away from both the project and thesis. 

Premise - Finalising the "Sock Stealer" Design

  Following on from a design tutorial with Justin, a notion came up about the legs. The legs being so small will cause quite a problem with walking around and balance, meaning a little redesign was needed. In making them bigger (a bit like teddy bear legs), capturing a more grumpy motion in his movements will become easier. 

 In terms of the colour pallet, both the creatures are too similar. therefore a decision was made to keep the "Sock Stealer" brighter and the "tappers more muted (such as browns and greys due to their darker environment). More exploration will be needed in more exciting patchwork designs and colours.

  Some gestures poses was made to try and capture the "Stealers" grumpy attitude and walk. Next I will need to make few adjustment to the "tappers", leading up to their final outlook and allowing me to move on to the environment. I will need to think of the drama folding in the room and how items/furniture will be placed to assist with the outcome of events.

  Sadly, I've been a bit slow today in getting this small section done and feel I could have produced more. Recently, I've noticed I've been increasing tired which is causing a hindrance to my work flow and production. I'm hoping this is a small blip and that I can knock out a higher production of work soon as I'm aware that time is slipping away and really need to get some sort of storyboard/animatic done.

Slight Re-design and Colour Brightening

Tuesday, March 9, 2021

Premise: Tappers Revamped

  As with eh previous post for premise, I used the same tactics to created a revamped version of the " tapper". The designed ideas around this creature has changed again, mainly via the "tapping" noise coming from the creature itself. In this case, metal-like horns with create the "tapping/clattering" noise when they are moving.

  I wanted to keep the colour pallets more muted as they will be living in a darker/dirtier environment, but still being placed into the patchwork and knitted style. These elements will come though more with evolving concept art.

  They will be quite fast and mischievous, like squirrels and smaller monkeys. This will make contrast to the more "slower and grumpy" persona of the sock stealer.


Texturing Lesson Pt 6: Rusted Oil Can via Substance Painter

   Starting with a model in Maya, the UV was transferred into Substance Painter so to create the desired look and the maps all hooked back in to Maya to give the final outcome. 

Starting Model, Combined, Smoothed and with Blinn Material

Final Render in Substance Painter

Substance Painter

Maps Placed and Rendered in Maya

Major - Submission Post: Final Animation, Reflective Statement and Links

Final Reflective Statement When starting the Major Project, there was still quite a lot of work left over from Minor for the planned final...