Wednesday, December 30, 2020

Collaboration: Pre-texture Set Up

  Moving on to the final animation stage, I am setting up the scenes ready for the fully textured playblasts. Following my Beat Sheet set is making planning a lot easier, but doing the animation is still slow process. This may be down to my perfectionism rather then doing the animation itself. I'm hoping to have as much done as possible by the end of the week, keeping in mind the other projects I still have to complete. 

  This test is far from finished, timings and shadows need to sorted out before making any final renders.


Test 1

Tuesday, December 29, 2020

Pipeline 1: Jetpack Jones - UV Mapping

   Following the completion of the modelling process, we move onto laying out our UV's ready for texturing. The head and body have been split up in to sections to allow for accurate texturing.

 As our model have been mirrored, the right side of the UV's are hidden under then left. Selecting the Right side, we flip the UV's so they show in the editor and do some manual work where needed. 

  Creating a lambert, a texture map provided by UCA was plugged into allow us to check for any stretching. If there is stretching present, resetting the size via the layout option may reduce it. The UV maps need to exported as a Tiff, these can be placed in photoshop and then the textures can be painted on.

Following this, we will move onto rigging and skinning. 

Eye UV's


Face UV's


Leg UV's


Torso UV's

Texture Mapping Lambert


Collaboration: 3D Pre-Viz WIP and Intro

   Moving forward with the 3D Pre-Viz, I have put together what we have so far in Premiere and made a opening sequence. For the opening sequences, I tried to keep to the 1980's style but a new one may be made for the finalized animation. In discussion with our tutor, a rubber stamp effect with the word "Fired" will show what happened to Moom JNR following his disasters. There will be more to come to complete the pre-viz.


Laundrette Skit: Saskya Olsen
Bell Hop Skit: Kimberley Davis
Opening Sequence and Composition: Kimberley Davis
Opening Theme: Dreaming Out Loud - Adobe Stock


Opening Sequence

Monday, December 28, 2020

Pipeline 1: Jet Pack Jones - The Hands Continued and Finishing Up

  Using the duplicate finger, we remove the bottom geometry up to the first knuckle. With a new lattice, we place it into the correct position using all three orthographs. Scaling up, we  rotate outwards so the nail is pointing away from the hand. 

  Although we have space for the thumb, we need it to transition well. Creating a new loop just before the thumb and one just after the first edge of the hand, we delete the faces facing the thumb. Selecting both objects, the combine option allows us to see both when selected. Extruding from the edges of the new opening, snapping the vertices together shows we have a small twist in the geometry. although not a problem, its may cause some problems with the UV layout.

  To start clean up, selecting the vertices and using the average tool allows a good starting position.  We will still need to sculpt them so doesn't look too blocky. 

   Continuing to add geometry and sculpt, the thumb need to come forward a bit as its too far back at this point. Using the vertices, we close the gap and need to change the geometry in the knuckles/palm. Using the multi-cut tool and cutting though the palm,  new geometry is made to allow better modelling and support.  

  We need another loop though the hand, but need to change the points in the tip of the thumb. We use the multi-cut tool to change some the edges by cutting though them, removing some edges and re-aligning in the thumb.  To finish up this, we take some time to sculp and remove any bumps present.

Palm

New Geometry in the Knuckles

  To do the fabric after the hand, we firstly bring back the end edge to the correct place. Placing some more edges so to allow better scaling, we select all the faces and extrude outwards. with the vertices towards the hand, we bring them inwards and reposition them so there is hang in the fabric below. 

  To add the folds to the glove, we make another loop and push inwards. The fabric allows a personal artist preference, adding more geometry whilst pushing edges inwards and outs to create the desired effect (keeping gravity in mind).

  Now we need to add the hand to the arm. Combining both and placing in wireframe shaded mode, we noticed the hand has 11 edges where as the hand has 12.  This means we will have a triangle but it can be hidden.

  Snapping the vertices together, the odd vertices is at the bottom of the glove. Merging the vertices and straightening the edge, pushing it inwards will allow us to hind the triangle. Following a clean up, we add two more edge, delete what isn't need and then merge the vertices. The triangle is very small, so it shouldn't cause any problems. 

  Once completed. we mirror the model so to gain a hand on each arm.

Finished Glove


Bringing the Model Together

 
   Starting with cleaning up the scene (removing layers not in use, history, pivots, etc), we need to make sure everything is name correctly and then we optimise.  

  Importing the head into the scene, to start with it much to big. Selecting the head group, we bring it up in the view port and scale until it fits the orthographs and the body.  The bottom of the neck is outside of the top. Removing the bottom edges of the neck, we reposition the bottom edge and scale so the neck fits snuggly. 

  After optimising and removing the orthographs, we placed everything on layers so to help with UVing.

Jetpack Jone's mesh is now finished and ready for the UVing step. 


Finished Mesh


Pipeline 1: Jet Pack Jones - The Hands

   The hands will be broken up into parts for modelling, starting with a cube for the first finger. Bringing it up in the view port, we align it with the front orthographic. Changing the vertices points to get a rough shape and then scaling it to the correct size. 

  Dividing it up into 2 horizontally, we scale out the edges to give us a rounder appearance and the same was done vertically. Sculpting the fingers to get the correct volume, the ends are brought back to start creating the end.  Working from the middle of the finger, more loops are made with the multi-cut tool to create thirds and then scaled to straighten them. To stop any future loop being wonky, we place one just before the finger top so to give us perfect loops for sculpting. 

  As with the elbows, two loop was placed around the joins and more though the bigger sections. With all the starting geometry in place, we use our vertices to sculpt a more finger-like appearance.  We need the fingers to taper so to have a bit more realism to the design. 

  Using a lattice and selecting the points, we finalise the shaping. This base will be used for all of  the fingers on the hand. 

Base Finger

  Moving onto the palm, we create a cube and place it into the correct place via the orthographs. As we need it to match the fingers (which is now a 8 sided geometry), we add some loops to break up the square. Rounding the object with the new vertices and cleaning up, we add some more loops to bring in a little bit of separation for the fingers. We need the end result to look a hexagon so to be able to attach the fingers, placing more geometry on the top and bottom. 


Hand Base

  For the thumb, we have to use the multi-cut tool as the edge loop won't work (these is due to the increased amount of geometry), drawing though the middle of the hand base. Placing another loop at the end of the palm, we sculpt the vertices to create a rounder appearance. 

  Once the clean up and sculpting is complete, we create a duplicate of the finger, place it to the side and bring in a lattice. Using the lattice allows us to move the finger around in the correct orientation an scale, the hand need to be modelled in a open position for the rigging process.

  Positioning the finger, more duplications are created and then lattices applied to bring it them up to the correct scale. Using the lattice rotation, there is some overlap in the base of the fingers. Scaling downwards and tapering enables the overlapping to be removed. Deleting the history gets rid of the lattices. 

  Using the wireframe-on-shaded mode, we snap all the vertices together and then merge them. It's important to snap the hand vertices to the finger so to create a more realistic join. When all connected, cleaning up with the average tool and sculpting enables better a better appeal. To stop stretching in the knuckles, another edge loop is placed and small bumps created in the  knuckle and pad areas.


Fingers Connected

Toolkit 2: Character Design - Continued Environments Development 2

  Moving on to the corridor/ bunker main door (as with the observation cell), I created a normalised version first and then drew the wood-cut Germen expressionist style overtop. In terms of colour, I decided to experiment with how different layer styles would look in helping to create atmosphere. 

   The painting itself has returned to a more outlined aesthetic. Using the more painterly style took up too much time and more energy then needed. The emphasis for these designs is on the lighting/shadows, not so much the painting style. 

  Once the medical area is done, I will work on warping the environments further. 

Normal design

Subtract Overlay

Linear Light

Colour Burn - Too Dark

Sunday, December 27, 2020

Toolkit 2: Character Design - Continued Environment Development 1

  Working on the environments, I started with the observation cell. As the protagonist would have been in there for some time, making it look "wrecked" may reflect how his emotions would escalate during periods of his isolation. Discussion with my tutor lead to some elements that may be present, such as ripped up cloth/bedding, neglected food and scratches on the door. 

   Starting with trying to capture the real, I went with a more concept/painterly effect and tried to bring in shadows. With this in place, I then wanted to place the "Wood-Cut" style of the 1930 German expressionism in the same lighting. The twisted environments will need to match the side-kick's appearance as she take over control. Currently I have kept them fairly similar in proportion, but wanted to gain a better understanding of the look before adding any warping. 

  Environment painting is a area of mine that needs alot of improvement. As I have not done much of it in the past, I find it very difficult to complete without any outlines. I want to really expand in this area and grow more in developing dynamic lighting/contrast. 

  Next I will explore the other areas of the bunker. 


Wednesday, December 23, 2020

Toolkit 2: Character Design - Main Character Design Development

  Looking over my designs, I realised I have done a lot on my sidekick (a illusion of the main character's wife due to the psychotics) and not much more on my protagonist. Firstly I wanted to give him a name, after some debate I felt that Chester suited his original personality. Although I won't really be using his normal form, I wanted to have a more sold bases of what he would have looked like before the deterioration. 

  For the transformation, I made his pupils more dilated to give the effect of the drugs being in his system, as well as making him thinner and more unkempt. His skin would become greyer and more sullen due to the lack of eating real food, his changed perception just wanting more of the substance altering him and relating it to a food source. In thinking about the effects the experiment would be having to his psyche, dark circles would appear due to insomnia and a heightened sense of anxiety would make him jumpy at noises. 

  Being honest, the more I do these design, the more anxiety I have about the pushing them. This is quite a dark story, esp with the sidekick (wife delusion) enhancing the protagonist's downfall and I'm wondering if to bring these back slightly so to instill hope rather than despair. 


Chester's (Protagonist) Head Turnaround

  In creating these designs and following my tutors advised, I tried to make sure both "states" look alike so as to not mistake either as a different character. Again, I am wondering if the "Zombie" state is too far pushed and if it need reeling back. 


Chester's Transformation ("Zombie" State) Head Turn-Around

Full Body Transformation

  Now I have done these, I will move onto characters interactions and the environment. For the environment, as the "wife" takes over his psyche more in leading him to the "food", it will warp to fit her appearance her her to become more overpowering. 

Saturday, December 19, 2020

Submission - Collaboration: Film Reviews


Film Review 1: 

 https://kimberleydavis32.blogspot.com/2020/10/toolkit-2-film-lecture-1-myths-and.html


Film Review 2:

 https://kimberleydavis32.blogspot.com/2020/11/film-lectures-lesson-2-archetypes.html


Film Review 3: 

https://kimberleydavis32.blogspot.com/2020/11/collaboration-film-lecture-3-structural.html


Film Review 4: 

https://kimberleydavis32.blogspot.com/2020/11/collaboration-film-lecture-4-5-time-and.html


Film Review 5:

 https://kimberleydavis32.blogspot.com/2020/11/collaboration-film-lecture-5.html


Film Review 6:

 https://kimberleydavis32.blogspot.com/2020/12/collaboration-film-lectures-6-quality.html


Film Review 7: 

https://kimberleydavis32.blogspot.com/2020/12/collaboration-film-lecture-part-7.html


Reflective Statement:

   When first being tasked with writing film reviews, I felt it to be tedious and unnecessary. However, after learning aspects of film theory/history in class and seeing those lessons in practise, I am able understand components on a deeper level. The science behind story structuring and telling is quite complex, having evolved over time to become more dynamic. Without proper knowledge of its construction, many features have fallen flat where they could have succeed. Moving into premise, the lessons taught in classes has given me the keys needed to be able to create my own successful narrative. Although I still have low confidence with story writing and its not the main area of focus in my final project, it's something I am going to have to overcome in order to make it success. Moving forward with the reviews, reading and researching other critics will help to expand my understanding even further.

Toolkit 2: Character Design - Twisting the Sidekick

   Working from one of the first transformation designs, My tutor and I discussed further ways to twist her form as the protagonists mental state changes.  Below are some experimant designs and a head turn around. The first idea was placed so I can keep a visual of her design. As she chnages though out the story, the enviroment will chnage with her and in this style. 

  As the design is based on Enrick Heckel and Karl Schmindt-Rottluff's wood cuts, I wanted to keep her form fairly flat, almost as if she has been carved from wood. I'm not sure if this is apparent, this may need a little more tweaking to get right. 

Further Twisting

Three-Quater Turn Around

Wednesday, December 16, 2020

Pipeline 1: Jet Pack Jones - Legs and Boots

  Working back in with cylinders to start shaping out the legs, we ned the subdivisions to be 12 and remove the caps. Using the side view, we place the cylinder and scale length ways from top of the leg down to the just below the boots. We need to be mindful of the material around the legs when sculpting, meaning we may need more geometry. 

  The orthographic show the legs pressed together. Working from the knee, we place a edge loop but have to be aware that the position may change due to what is needed. 

  Placing in our 3 edges for the skinning, we can bring out the center edge to start the impression of the knee. As we did the the arm, we work by placing center loops and bringing out vertices to the correct place. We know these may need more work later to get the correct shape of the trousers, but currently we just need the correct amount of geometry.  

  With all the loops placed, we need to remember the trouser are placed over legs, so wee need to think about the muscles and bones underneath. 

  Selecting the 4 foremost vertices of the knee, we bring them back so to make the bone of the knee more predominate. Using smooth preview, we take the vertices down the side of the leg and make the flight trouser a little sharper, bringing in the cloth around the leg. When moving down to the fabric at the bottom of the leg, we want to imply gravity is pulling it down slightly. Also, we want it wide enough to fit in the boot.

  When moving the vertices around, checking the orthographics will tell us if we have moved away too much from the design and may need to bring them back. Moving too far away from our designs can cause a lose in volume, making flat sculpting.

Front Leg Model

The Back of the Leg


   To bring in the pelvis, we use the exude tool straight up passed the bottom of the torso with the world control. We firstly place in a loop where the crotch is in the front orthography, deleting the 4 planes facing the right hand side. 

  Before bring the extrude across the crotch area, we bring the 4 edges down to allow more of a angle. We then extrude and snap to the center, bringing down so vertices to work with the orthographics. After cleaning up, we want to place a "underwear" line. Drawing upwards from the angle in the crotch with the multi cut tool, we create a new loop around the leg. With the new triangle, we draw around it to open up the a looping system around under the inside of the leg, deleting those edges and creating so new ones that work better. This allows us to space out our edges better.

  We still need to make sure our edges are not twisting, cleaning up as we go. If the geometry is twisted, it will cause strange deformations when skinned.

  Adding more loops across the top of the pelvis, we position the vertices and work on bringing the vertices across the back of the trousers, checking with the drawings. The top of the pelvis can be tapered in to give the indication of a waist.

  When looking downwards on the legs, any vertices that are on the center line, we select that section downwards and move it away. Once certain all the points are away, we can mirror to get a first look at our trousers. We now need to close the gap around the tops of the legs, adding volume and cleaning up the edges with the relax tool.

  The front and side of the pelvis should be flatter, using the average vertices can help to level it out. Around the rear, we need to bring out the volume and add a bit more of a crease so to bring in the anatomy.

Currently, we have two start patterns in the front of the pelvis causing some problems. Going back to having only the left side, we draw up from the point around the underside of the crotch and create another loop around the body. Doing this have moved the star pattern into the crotch area and is more useful.

Working Process


Cleaned Up Geometry

  For the belt, we have to remove the second to top edge and place another one in that is straighter. Cutting straight across the model, we bring it inwards until its straight. Re-mirroring the legs, we make sure the vertices around the top edge is straight. Bringing them up, we used the multi-cut tool again and cut straight across, deleting the excess. We then select the faces we want and extrude outwards to give  us the starting of the belt.

  Removing the newly formed inner lip around the top of the legs, we placed some loops on the edges of the belt to stop collapse when smoothed. The back of the jumper needs to come down a little to give a tucked in impression.

  For the belt loops, we use polygon cubes and resize them, taper, remove the back plane and place them in the correct place. As the orthographics are slightly different to each other, placing the belt loop requires a little bit of artist decision. Belt loops are not straight, so using the vertices to taper the middle and shrinking the top/bottom will give a better look. 

  Selecting the outer edges and corners, beveling and changing the attributes enables a good support when smoothed. Once happy, we duplicated them and place them around the belt. Once one side is done, the grouping and scaling abilities gives us perfect placement on the other side of the belt.  

  With these in place and a final clean up, the trousers are now complete ready for the boots.

Finished Trousers


The Boots

   To finish the legs, we need to do the boots.  As with the legs, we created a cylinder, removed the caps and changed the sections to 12. Bringing it up in the view port, we placed it in the right place and positioned the vertices. The boots are squished together in the front orthographic, meaning we will need to model over the center line and then move the boot into the correct place afterwards. 

  The bottom vertices need to be smaller to give us an impression of an ankle, now we placed a loop about halfway in the cylinder. We want to have a little contouring in the boots, drawing this loop in slightly.  As with the legs and arms, we placed more loops and continued with our contouring.

  For the foot, we selected the boot edge and extruded downwards, place our geometry in to the right places. The front planes was extruded again and the top most vertices was brought down to give us the basic foot shape. We need the foot to be straight so to make skinning easier.


   As we extruded, we have gained more geometry on the bottom of the foot. Removing this enables us to place our own sole.  Re-drawing with the round the ankle with the multi-cut tool,  merging together any vertices that are creating triangles, we can make a better support for the curve into the boot. 

   Continuing to add edge loops though the foot width, we sculpt in a incline though the top and make a inwards curve in the side (giving us the inner step we need). The toes need to come down a bit more and the heel would curl round slightly, scaling inwards to show a bone structure. 


   In the front join, we have this small bump that needs to be removed. Using the average vertices helped to smoothed this out more. Now that we have finished cleaning up and moving edges/vertices around, the next step is to extrude downwards to create the sole. Selecting the bottom edges, we extrude straight downwards so to snap to the grid correctly.

   We can have this sole quite thick but not massively. With all the bottom faces, the thickness brings it out so we have a sole lip, placing edge-loops to add the needed support.  Beveling the outer most edge gave us the perfect curve. 

  Moving on to the bottom of the foot, selecting the edge and extruding inwards, the fill hole tool closes up the large gap. Splitting the new plane down the center, we work along the edges and connect up the opposing vertices using the multi-cut tool.hopefully, we still have 12 pairs of vertices.


 Looking at the main boot into the leg, the relax tool smooths out around the ankle (on a low setting). For the top of the boot, a rim was created used the extrude thickness and brought down. This will help close the gap between the leg and the boot, placing edge loops to make a curve and support to the edges. 

  Although the gap is better, we still need to close it completely. With the bottom edge of the leg, expanding outwards helped to seal up the gap completely, but more clean up is required after doing this.

  The biggest challenge now will be mirroring the boot. As we had to use the center line to model, the leg and boot are now crossing over it. Changing our model and boot in to component mode and selecting the vertices up to the top of the leg, a lattice deformer enabled us the bring over the model without causing too much deformation. 

   Deleting half the trousers again and tidying up, the mirror tool brought in our other leg whilst duplicating boot enabled us to place it correctly. Removing the history will delete the lattice. 

Finished Boots

Tuesday, December 15, 2020

Pipeline 1: Jet Pack Jones - Torso Blocking and the Arms.

 Torso Blocking

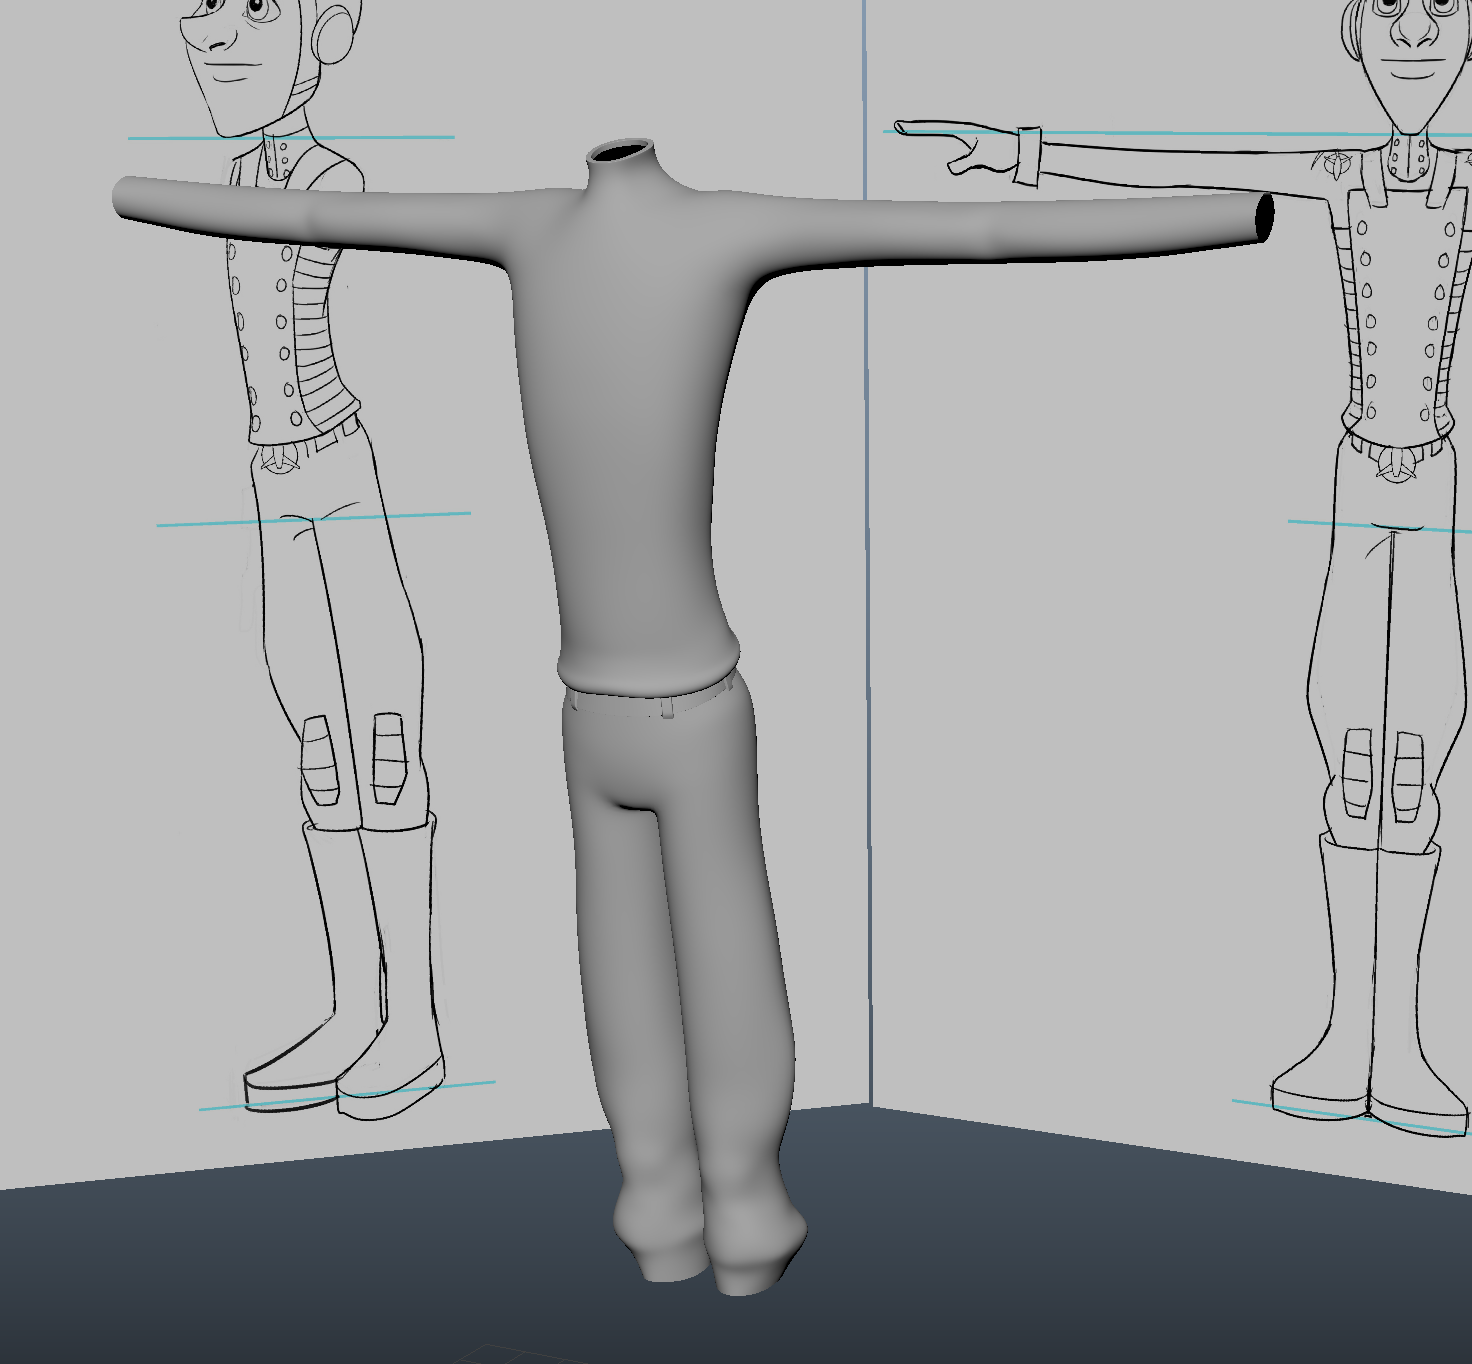
 Positioning our new orthograpths in Maya, we have 4 views to model the body from. As the front orthographic does not have very clear details of the in the fingers, we will use the top view for this. 


Working from a polygon cylinder, we reduce the sections to 8 and half the model. Removing both the caps, we begin by moving our current vertices to follow the top and the bottom of the designs, giving us a good starting point for modeling. 

  With these vertices in place,  we can start adding edge loop. Placing one in the center, we follow the arch of the design, adding more loops every other line in the shirt details of the side orthographic. Using all the orthographic views will help us get our vertices placements right. With the horizontal loop in position, we add more edges loops though the vertical sections and continue the same process. The key element here is to see of the shape holds when smoothed.

  Moving onto the bottom of the shirt, we bring out the bottom edge and add another loop. Using the scale tool, we work to make the curve smoother about the back of the model, making sure to reduce any collapse in the rest of the torso.


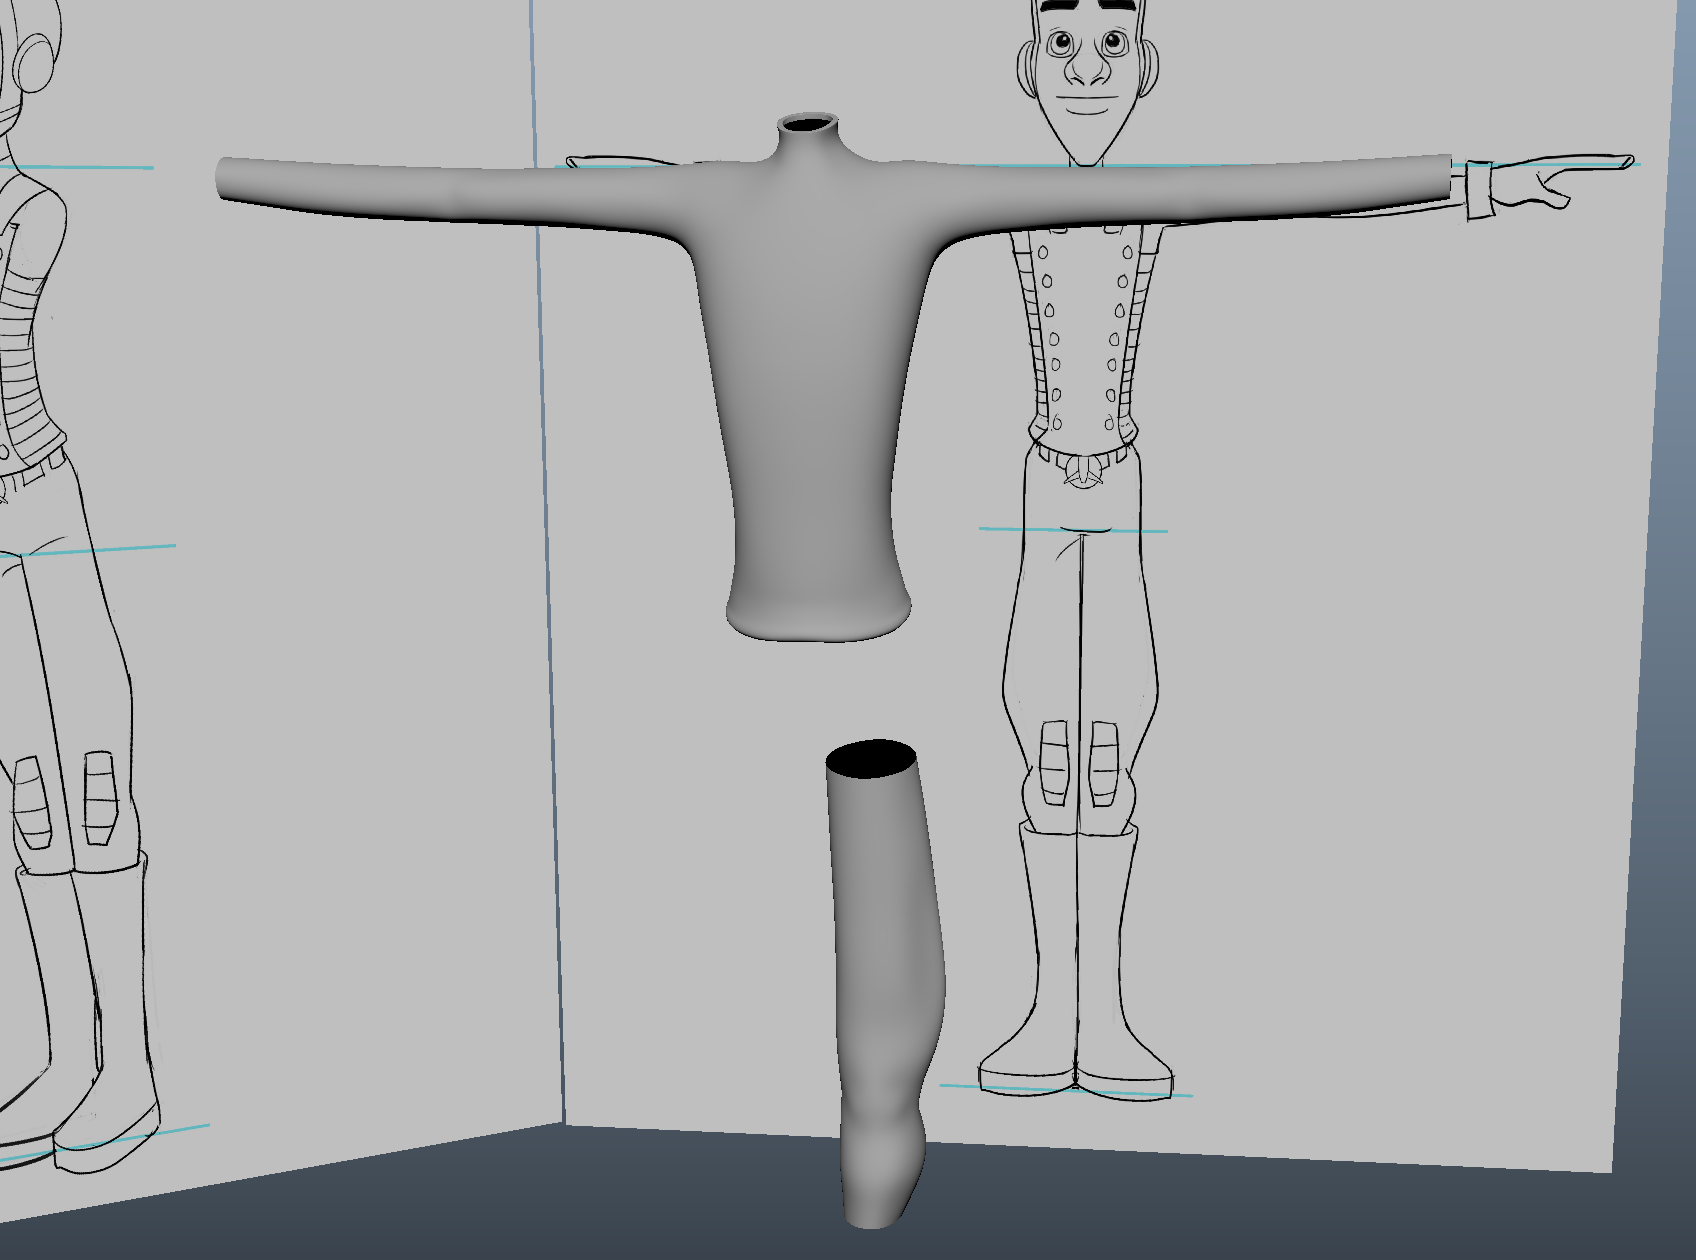
  To create our upper body for the lower part, we extrude upwards to just under the arms via the front view. Switching to the side view, we can now reposition our new vertices to keep our body shape going. Selecting two edges from the back and the front of our torso, we extrude upwards again towards the neck. 

  We need leave a gap for the neck. Removing half the model and selecting two front and back edges,   the append tool will bridge the gap. Placing a edge loop half way allows us to start creating the shoulder.

  Using the multi-cut tool, we create a loop in our front and back for the neck placement. We can delete to extra edges and start moving the vertices around the bottom of the neck on the orthographic.  As with the head, we have to keep our model clean to reduce work later. 

  Selecting the Multi-cut tool again, we draw a loop around the opening of the arm, merging together vertices so to remove any triangles. Scaling to flatten the cylinder, we continues to add edges and sculpt our model. As we have added extra loops, we can move the ones around the body downwards and add more support to the torso.


  With the arm opening created, we now use the top and side views to bring the arm backwards into place and clean up the vertices. We have to be aware that the orthographics may not line up, so we to make personal judgement on where we want to place it. 

  There are large gaps currently in our geometry, especially around the front of the arm. Creating another loop, we cut though the diamonds and merge vertices to remove any triangles, Looking at our smooth preview, we need to bring up the shoulder slightly to give us a little bump. 

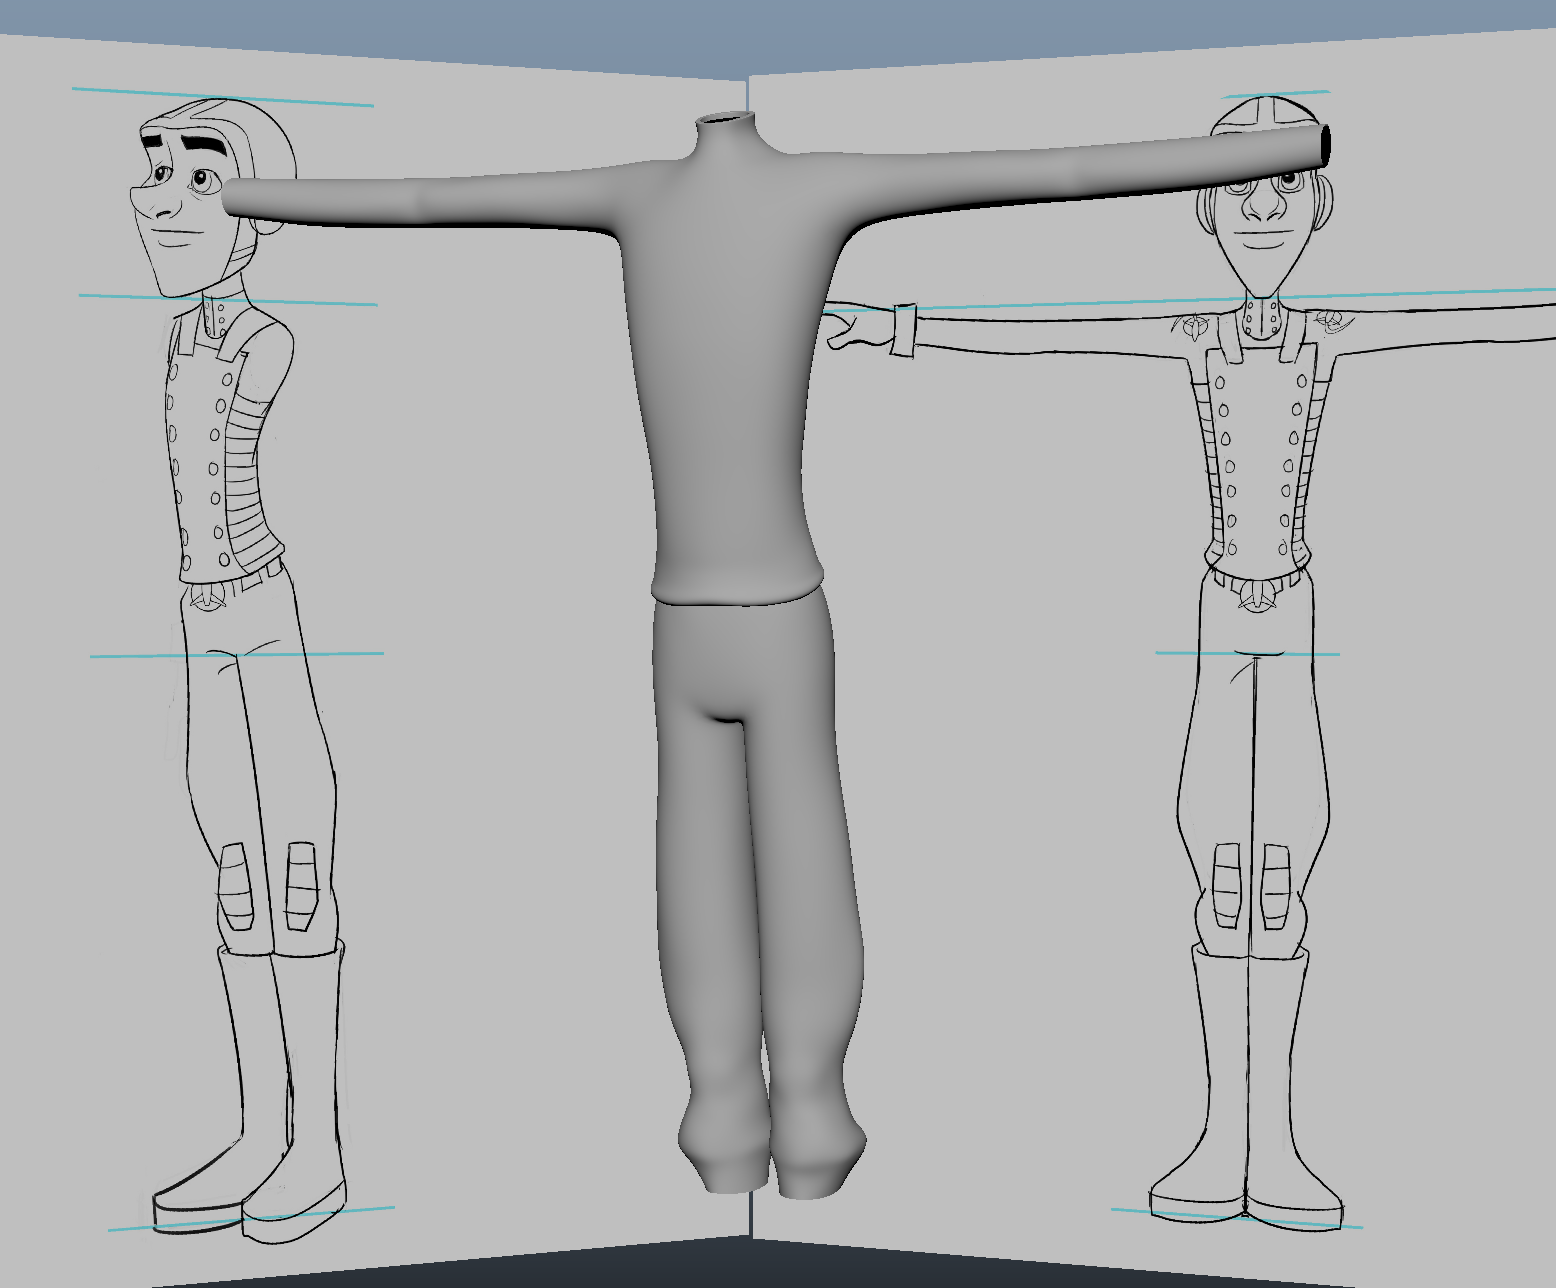
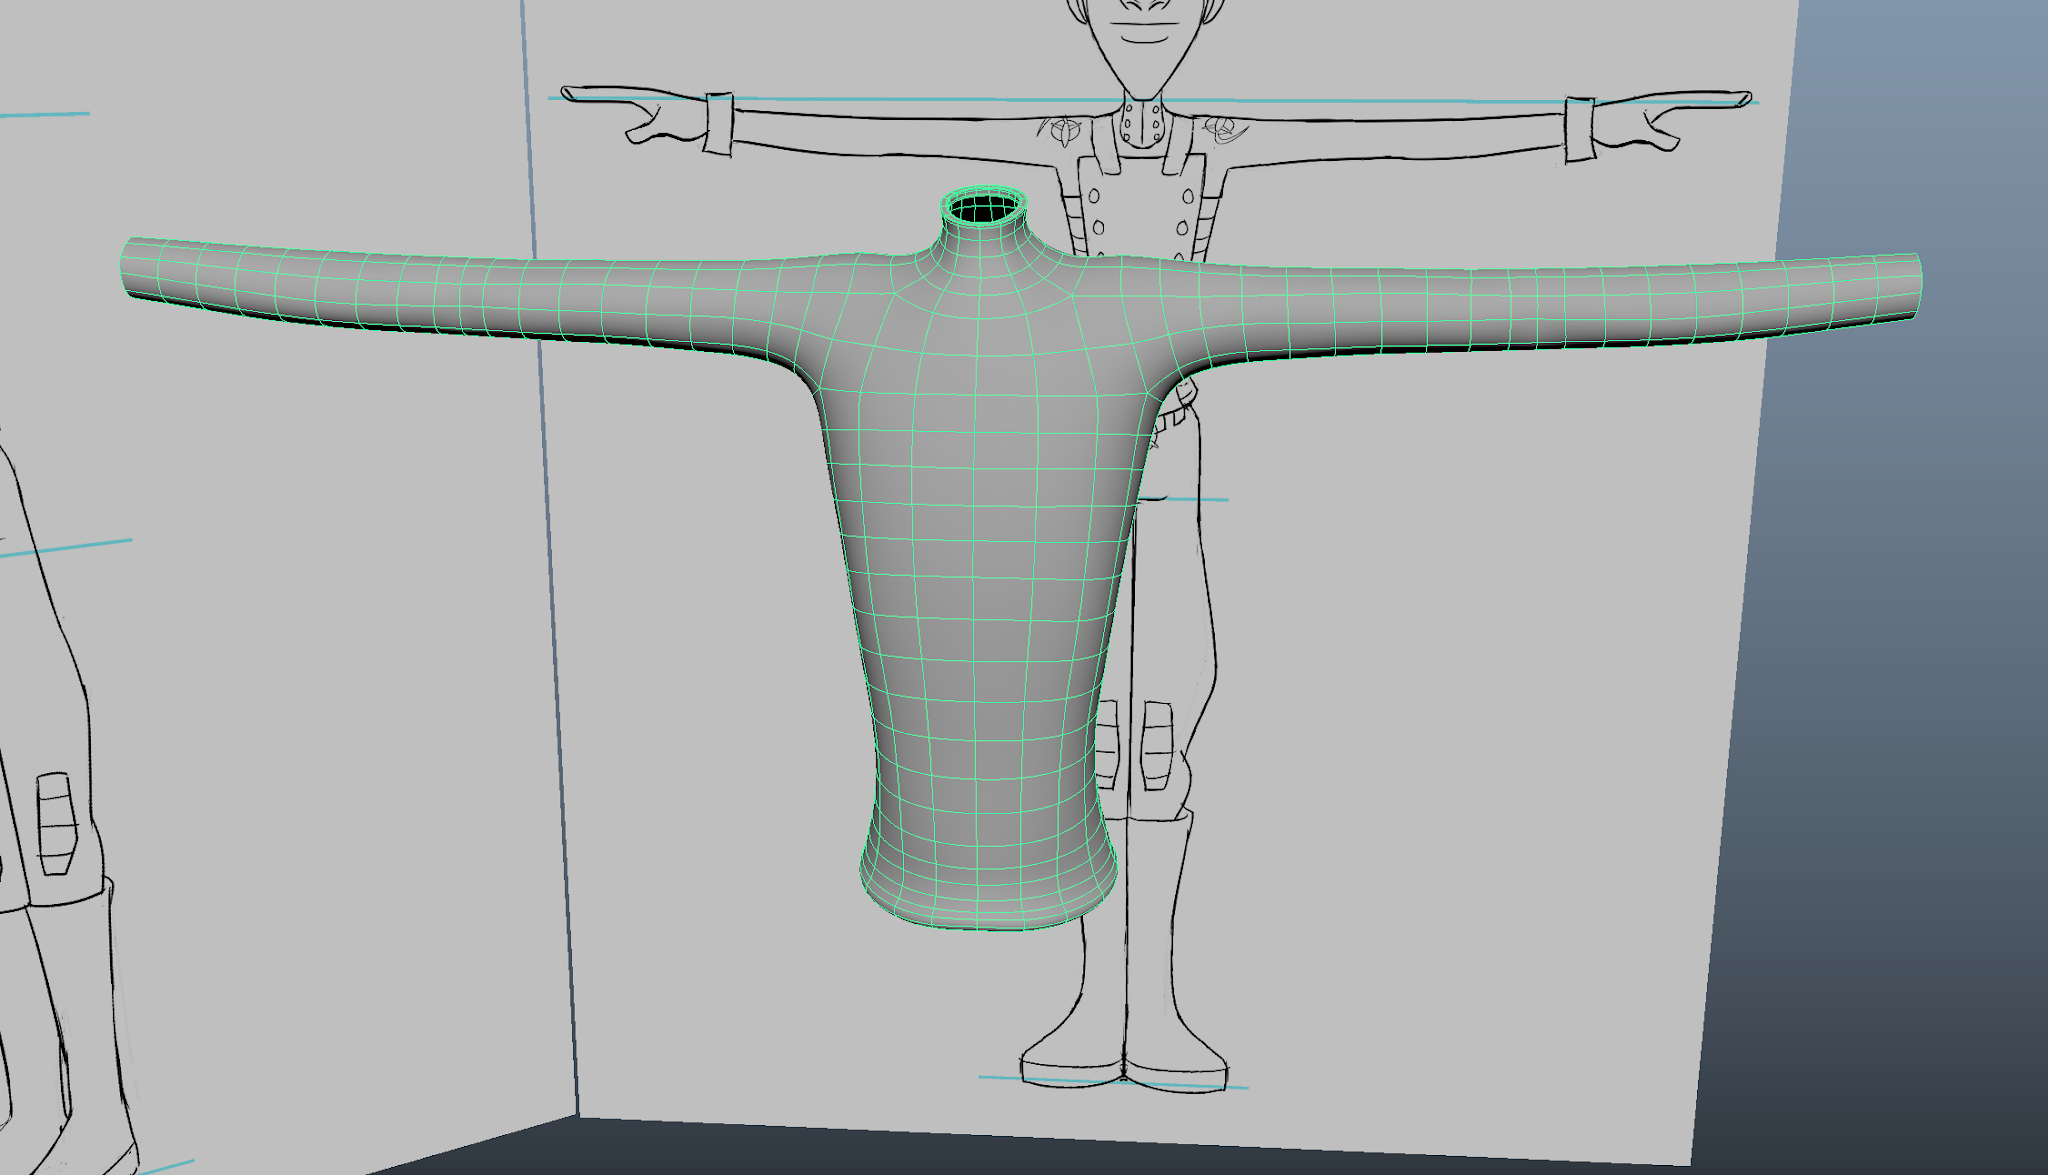
  Moving into the neck, we create a mirror of the torso and extrude upwards the top of the shirt, using the scale to give us a rounder geometry. We need more curve in the base of the neck and front of the chest, so we continue to add in edge loops and model. We creating the neck, we need to move the geometry around to gain the correct support around the back and shoulder.


Mirrored Torso


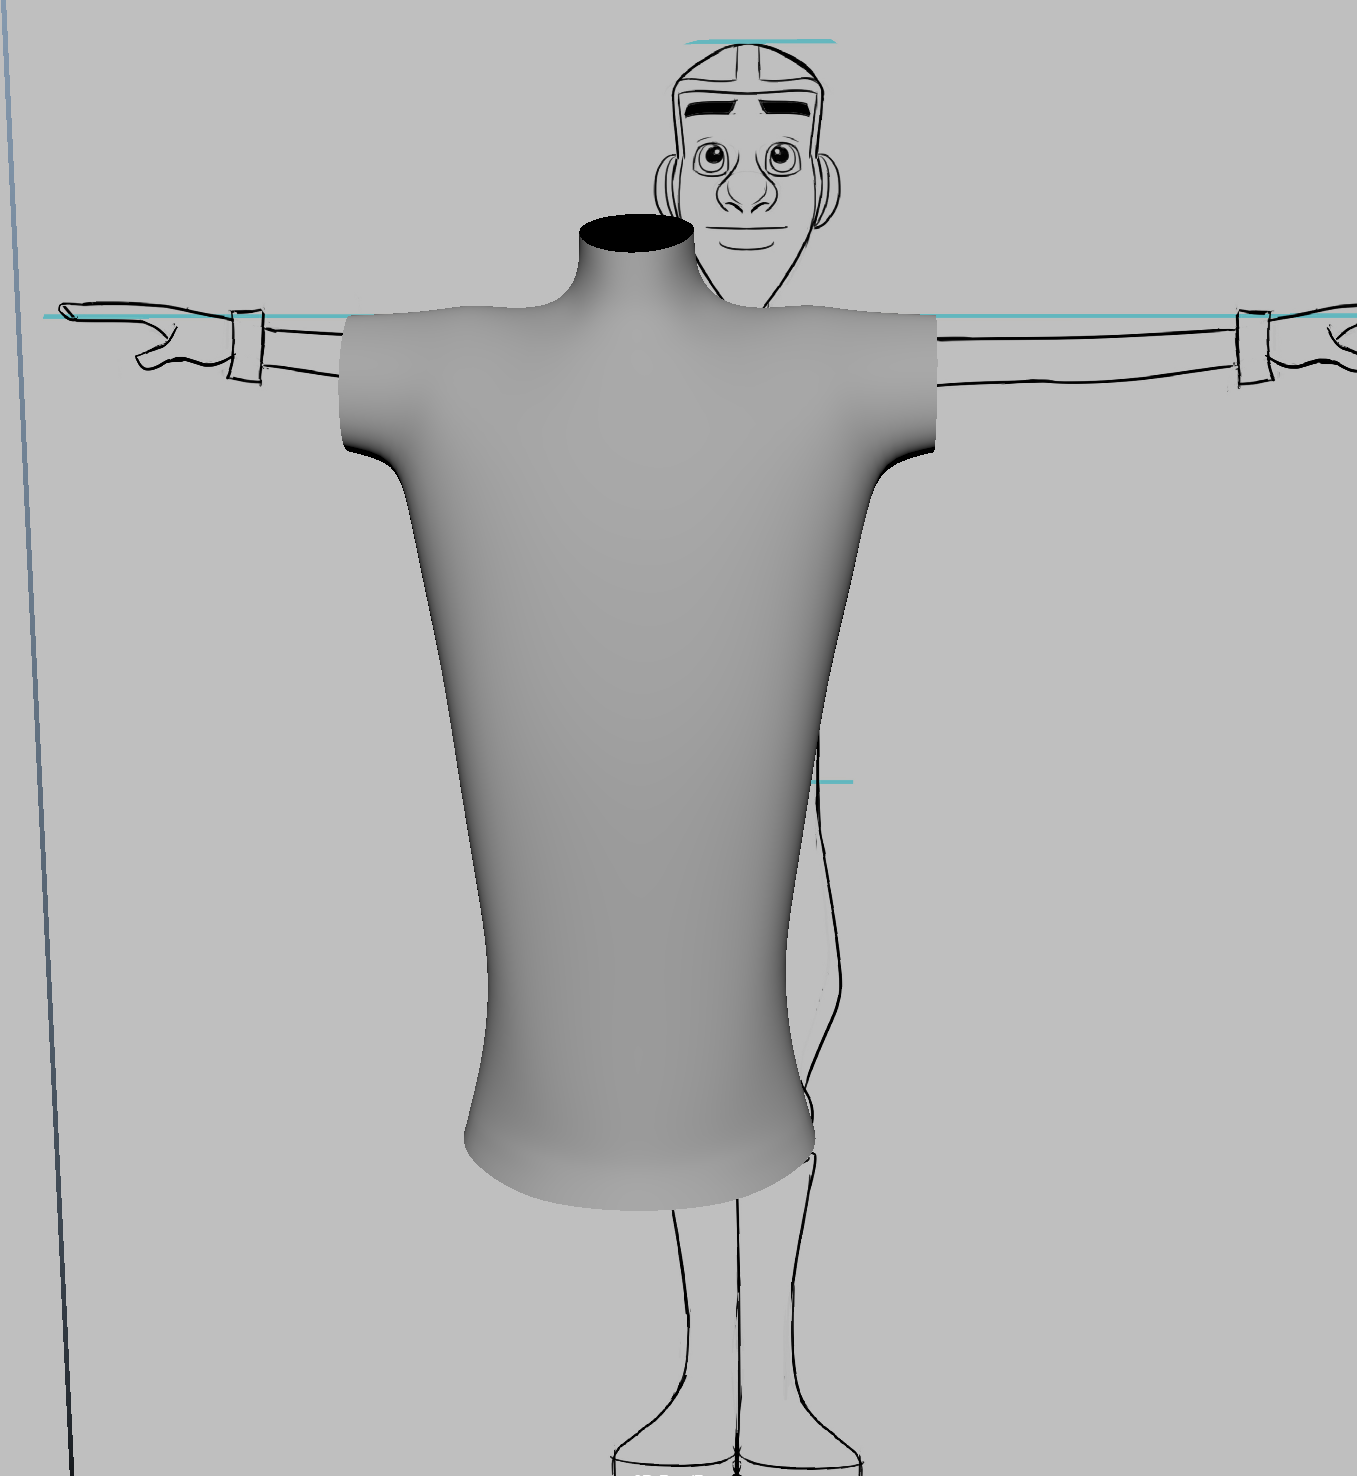
Torso Clean up and the Arms

  With the torso clean, we can now use the Edge Loop tool to add in the side details on the side view. Using the Shift key, Maya will calculate half way between the current edges and create a transition. We need to make sure the geometry is of equal spacing, maximizing support. Using the Relax Tool will help get the best results, moving down the back and the front of the model.

  Around the neck, the loop is far too low. Using the Edge Loop Tool, we create another edge and slide it upwards so we can bring the first loop upwards. We need to clean up again after using the Relax Tool, with the symmetry on we work on removing any tracking or bumps. We need to keep the model close to our orthographics so we keep to the character. 

  Removing half the model and re-scaling the vertices to the center, we pull out the arm edge to the edge of the wrist. Using the front view. we create our first loop where the elbow would be. This will give us our bend in the arm and we can use the weigh to position it correctly. Using the rotation, we can move the loop to match the orientation of the arm. 

  To make sure the loops work with our future skinning and gives us a good bend in the arms, we need at least 3 loops on both sides of the shoulder and the elbow. Straightening up the newly formed loops will allow the future placements to be well positioned. We then start sculpting the elbow by bringing in and then outwards the two loops on each side. 

  Placing loops at the halfway point in the upper arm, we scale inwards and continue adding loops. We repeat this until we have 6 loops on each section. Once all done, we start to bringing out the volume in the bicep, then use the Relax Tool to even out the geometry.  We need to check all views to make sure the volume is correct, repeating this in the forearm but thinning inwards around the wrist. 

  When modelling the arm, we need to have a small knowledge of real anatomy so to not create something really obscure. The under hang in the front orthographic is not natural, so we have to be careful when we approach it and make it more subtle. We need to take some time to clean up and make it smooth, thinning areas where needed. If its seems hard to remove lumps/ bumps, we can use the Average Vertices to help smooth.

  Finishing with the elbow, we can select the two foremost points and push them back to give us a small crease. 

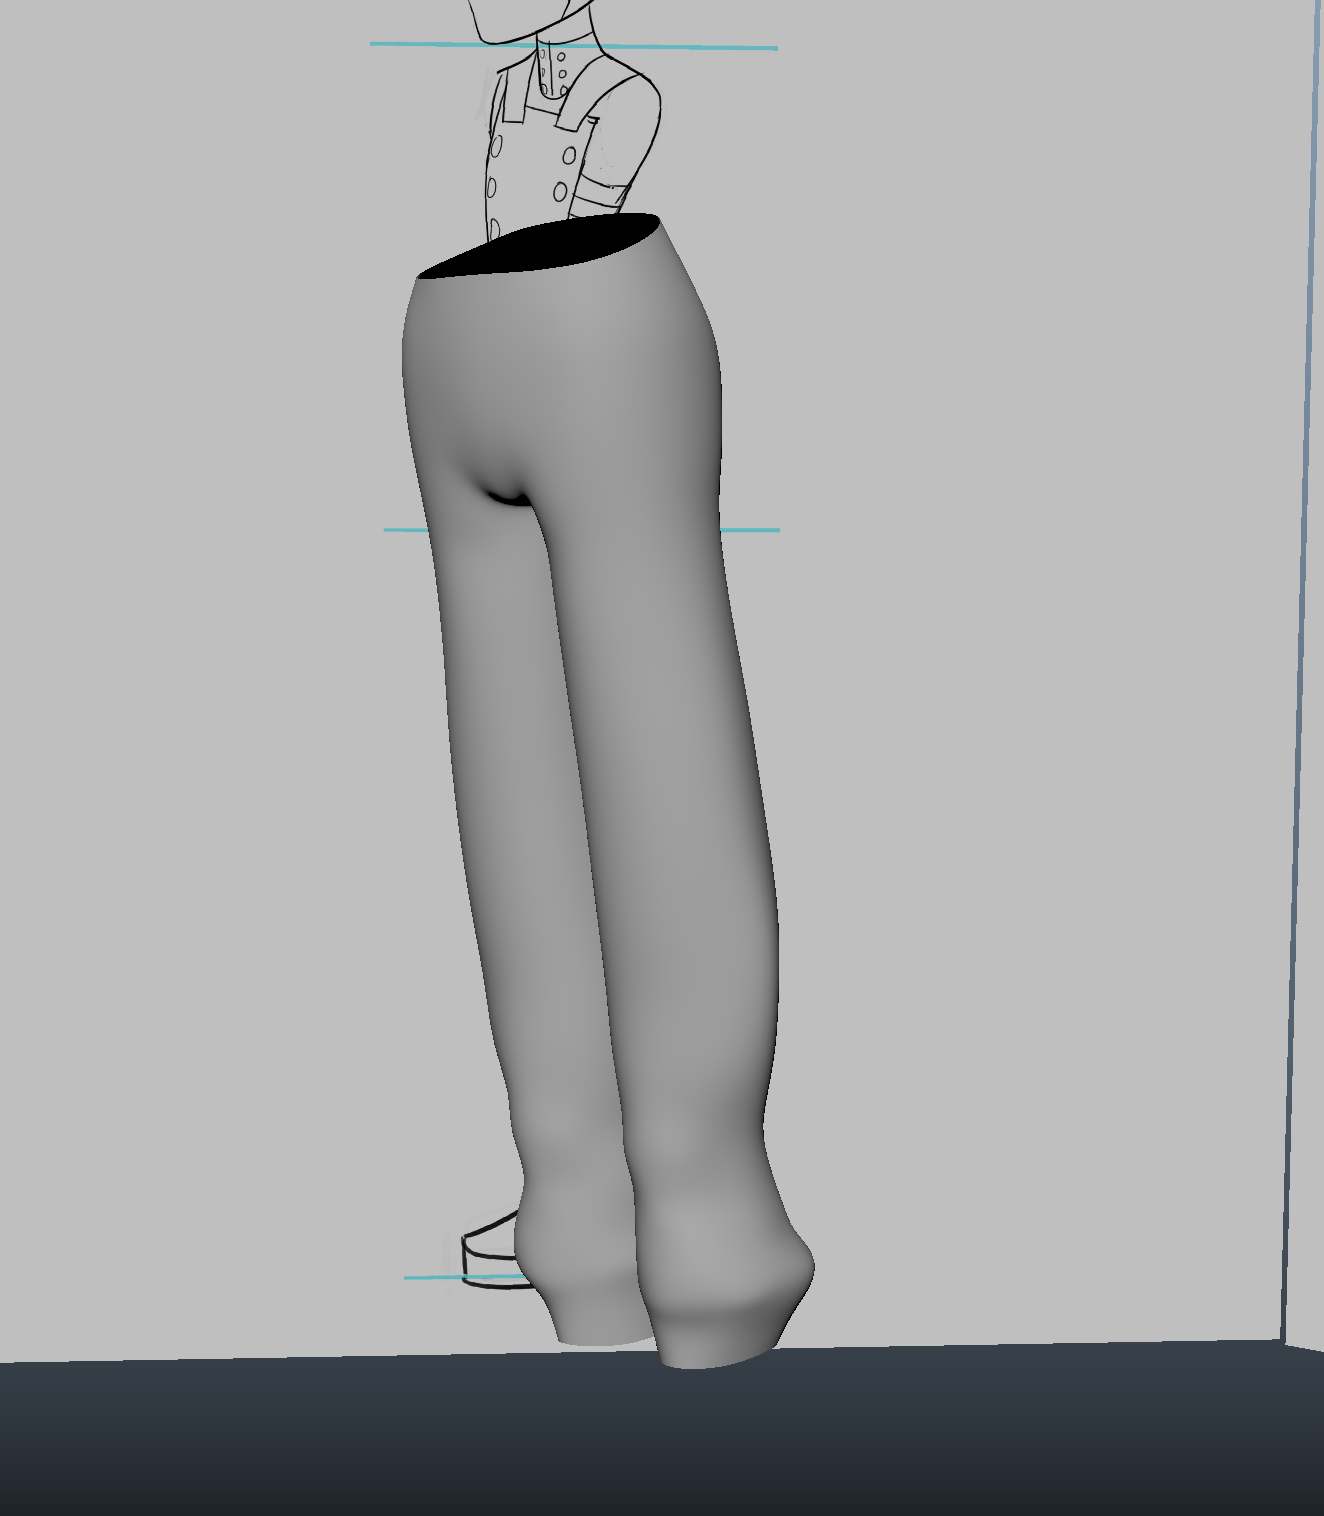
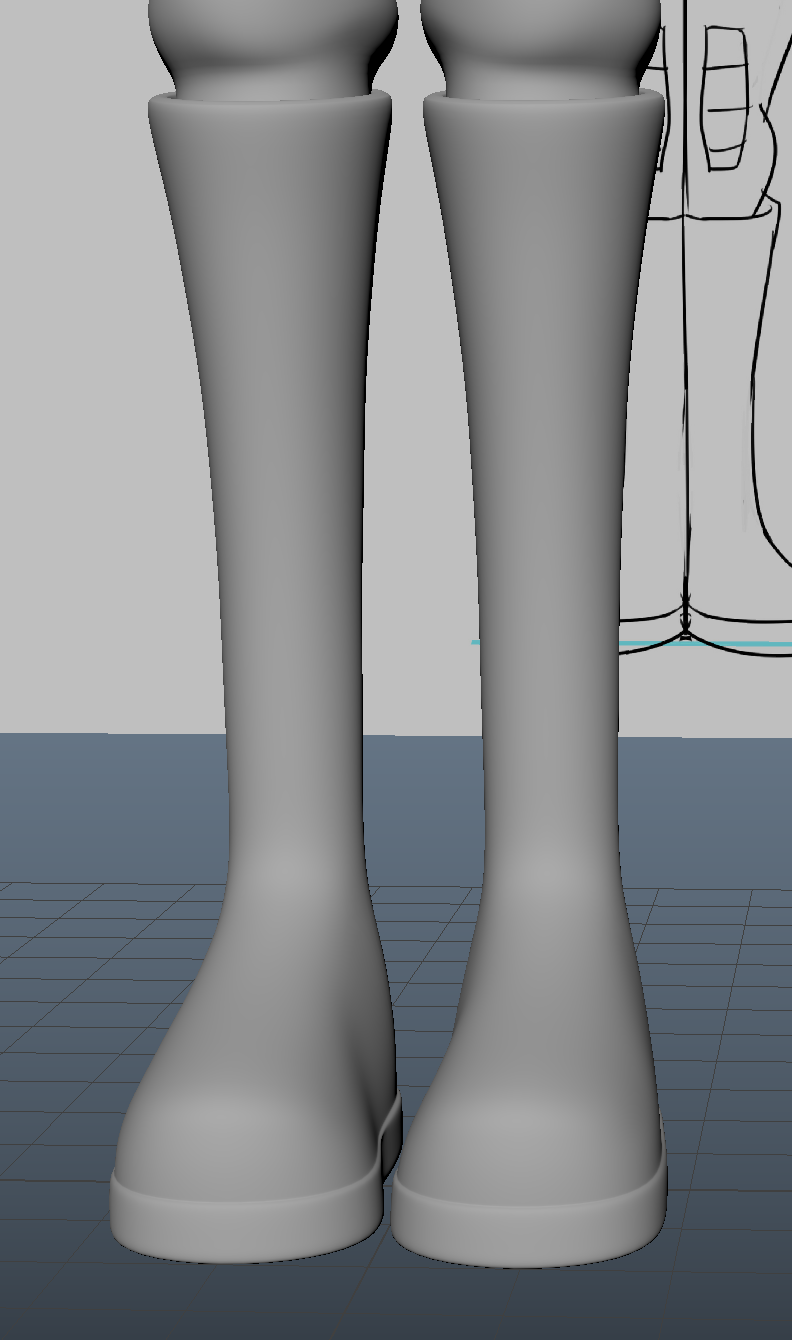
  Finalizing the bottom of the shirt, we first mirror the torso and select the bottom most edge. Exuding via thickness, we bring the edge inwards towards the trousers in the orthograpths. Using the symmetry, we smooth out the angle and work to make it even. Holding shift, we place a loop on each side of the edge so to give us the more rounded shape wanted. If needed, we go back in and add more volume. 

  Going back to the neck, we select the top edge and exude inwards via the thickness. We need to be able to fit this opening with the neck, then place in a slight drop. To finish this area, we add a few edge loop to stop the edges collapsing when smoothed. 

Finished Torso

Collaboration: Final Hotel Lobby Set

 Using the concept art and the Pre-Viz base, the hotel set is now all completed and ready for animation. I tried to keep the modelling simple but recognizable. Once done, they was imported into the final set and the textures created. Placing the assets in the scene first and then doing the textures meant that all the UV's are in the correct place, rather then trying to move them around. 

  As we are not using the Arnold Render for this project, I decided to only use Blinn and Lambert materials. These will be best for Maya View port play blasting. I also placed some bump maps to give the scene that bit more depth.

  There is a mixture of lighting being used. Currently there is a ambient, a few point lights and a large area light. But, these may need a touch more tweaking before driving into the animation. The light sources also have a small amount of yellow/orange so to give that warm marble glow, a more pink hue has been placed in the ceiling.  For the shadows the Depth Map shadows option is being used, increasing the size to 4096 and placing a filter of 5. This will reduce the sharpness. 

  The ferns was created by using the paint effects tool. Selecting the plant pots and making them printable, I was able to use the fern brush to make small bunches.

  In further discussions with my tutor about making the trolley spin continuously, he instructed me in how to create a rig to get the desired effects and then using the graph editor.

 There is a lot of textures in this scene which is making it quite resource intensive. The best bet here is to turn off everything (lights, textures Ambient occ, etc)  whilst working and then bring it all back for the playblasting. This will stop my computer from slowing down.

Hotel Set without Textures


Textured/ Lights Via Camera 01 


Textured and Lights - Perceptive View

Thursday, December 10, 2020

Toolkit 2: Animation/Maya - Moom practice

  Continuing on from the Maya lesson, I did a little practicing with a section from my storyboard and Moom. Working the way instructed made animating a lot easier. Although not perfect, I feel my skills are starting to improve.  


  I managed to keep my Graph Editor clean with all the right curves and arcs, but using the breakdown keys did provide some problems. Using these may just require practice and timing need a little more tweaking, but I feel I'm slowing getting there.

Wednesday, December 9, 2020

Collaboration: Film Lecture Part 8 - Script Writing Class

   To have a little fun before the Christmas break, we was given a script writing task. The ideal was to write a script revolving around a given picture, then present it as if to gain funding for a film development. This meant thinking about our character, where the image belongs into the 3 act structure, the events leading up to it and if the story can become non-linear. We was given a time limit of 2 hours, an the option to complete extra tasks.

   Although we was unable to complete the presentation on time, we was able to finalize it afterwards. In Team A was Saskya Olsen, Jessica Crossby, Jasmine Masters, and myself.

  I found this task quite hard. I like to have a little time to really think about ideas rather then rushing to get as much down as possible. This is something for myself to work on.

  The document was finished by Jasmine, a more solid form of story by Jessica and the development of ideas by Saskya.

Script Writing Class by Kimberley Davis on Scribd

Collaboration/ Toolkit 2 - Hotel Skit Beat Sheet

 For the last Maya lesson of the term (before Christmas Break), we looked at Beats Sheet, and how they can be an excellent guide for animating. We was asked to choose a small part of our storyboards and use the example to break down our animation, creating the extreme and inbetween poses with Moom in Maya.

  Our tutor instructed us on ways to speed up the animation production, enabling a quicker turn around. We can start by placing our extreme key frames on 8's and our Inbetween's at 4, then work to arrange the timing as needed. Inbetween keys can be selected as breakdowns (making the green) via the timeline so when moving extremes, they will always be in the central position. Its always best to keep things on evens, working with odd will bring in fractions and can disrupt the graph editor.

  The Graph Editor should be placed in stepped when plotting our extremes, then working in spline to see the results. Moom can be group selected by using the animation sets, to key individual assets, we will need to turn it off to be able to individually key controls. 

   Its important to clean up the Graph Editor as we go, making sure we have the correct curves and arcs. If Moom's feet dip below the surface, we can zero the negative translates to bring back the weight. Moom does have some funny ticks, he can get gimble lock in his wrist. This means just going back, zeroing out the attribute that is causing the problem and then rekey in the same axis.

  We was asked to practise these techniques on Moom in Maya so to get an idea in animating. Sadly I didn't get time do this but I managed to complete the Beat Sheet for the Hotel Skit.


Collaboration - Hotel Skit ... by Kimberley Davis

Monday, December 7, 2020

Collaboration: Bell Hop - Orthograpthics

  Before making a more finalized set, I created some Orthographics of the main assets to help with the modeling process. For the rest of the Hotel Lobby (such as the pillars and ceiling), this may be a process of trial and errors to get right. I tried to keep to the 80's style and colour pallet, which marble seems to have a pinkish hue to in some lights. There may be more Orthograpths to come depending on the set development. 

Reception Front
Reception Side

Lobby Chairs

Bell-Hop Trolley


Floor Texture 1

Floor Texture 2


Travel Case 1


Travel Case 2

Travel Case 3

Major - Submission Post: Final Animation, Reflective Statement and Links

Final Reflective Statement When starting the Major Project, there was still quite a lot of work left over from Minor for the planned final...