Starting the Blend Shapes
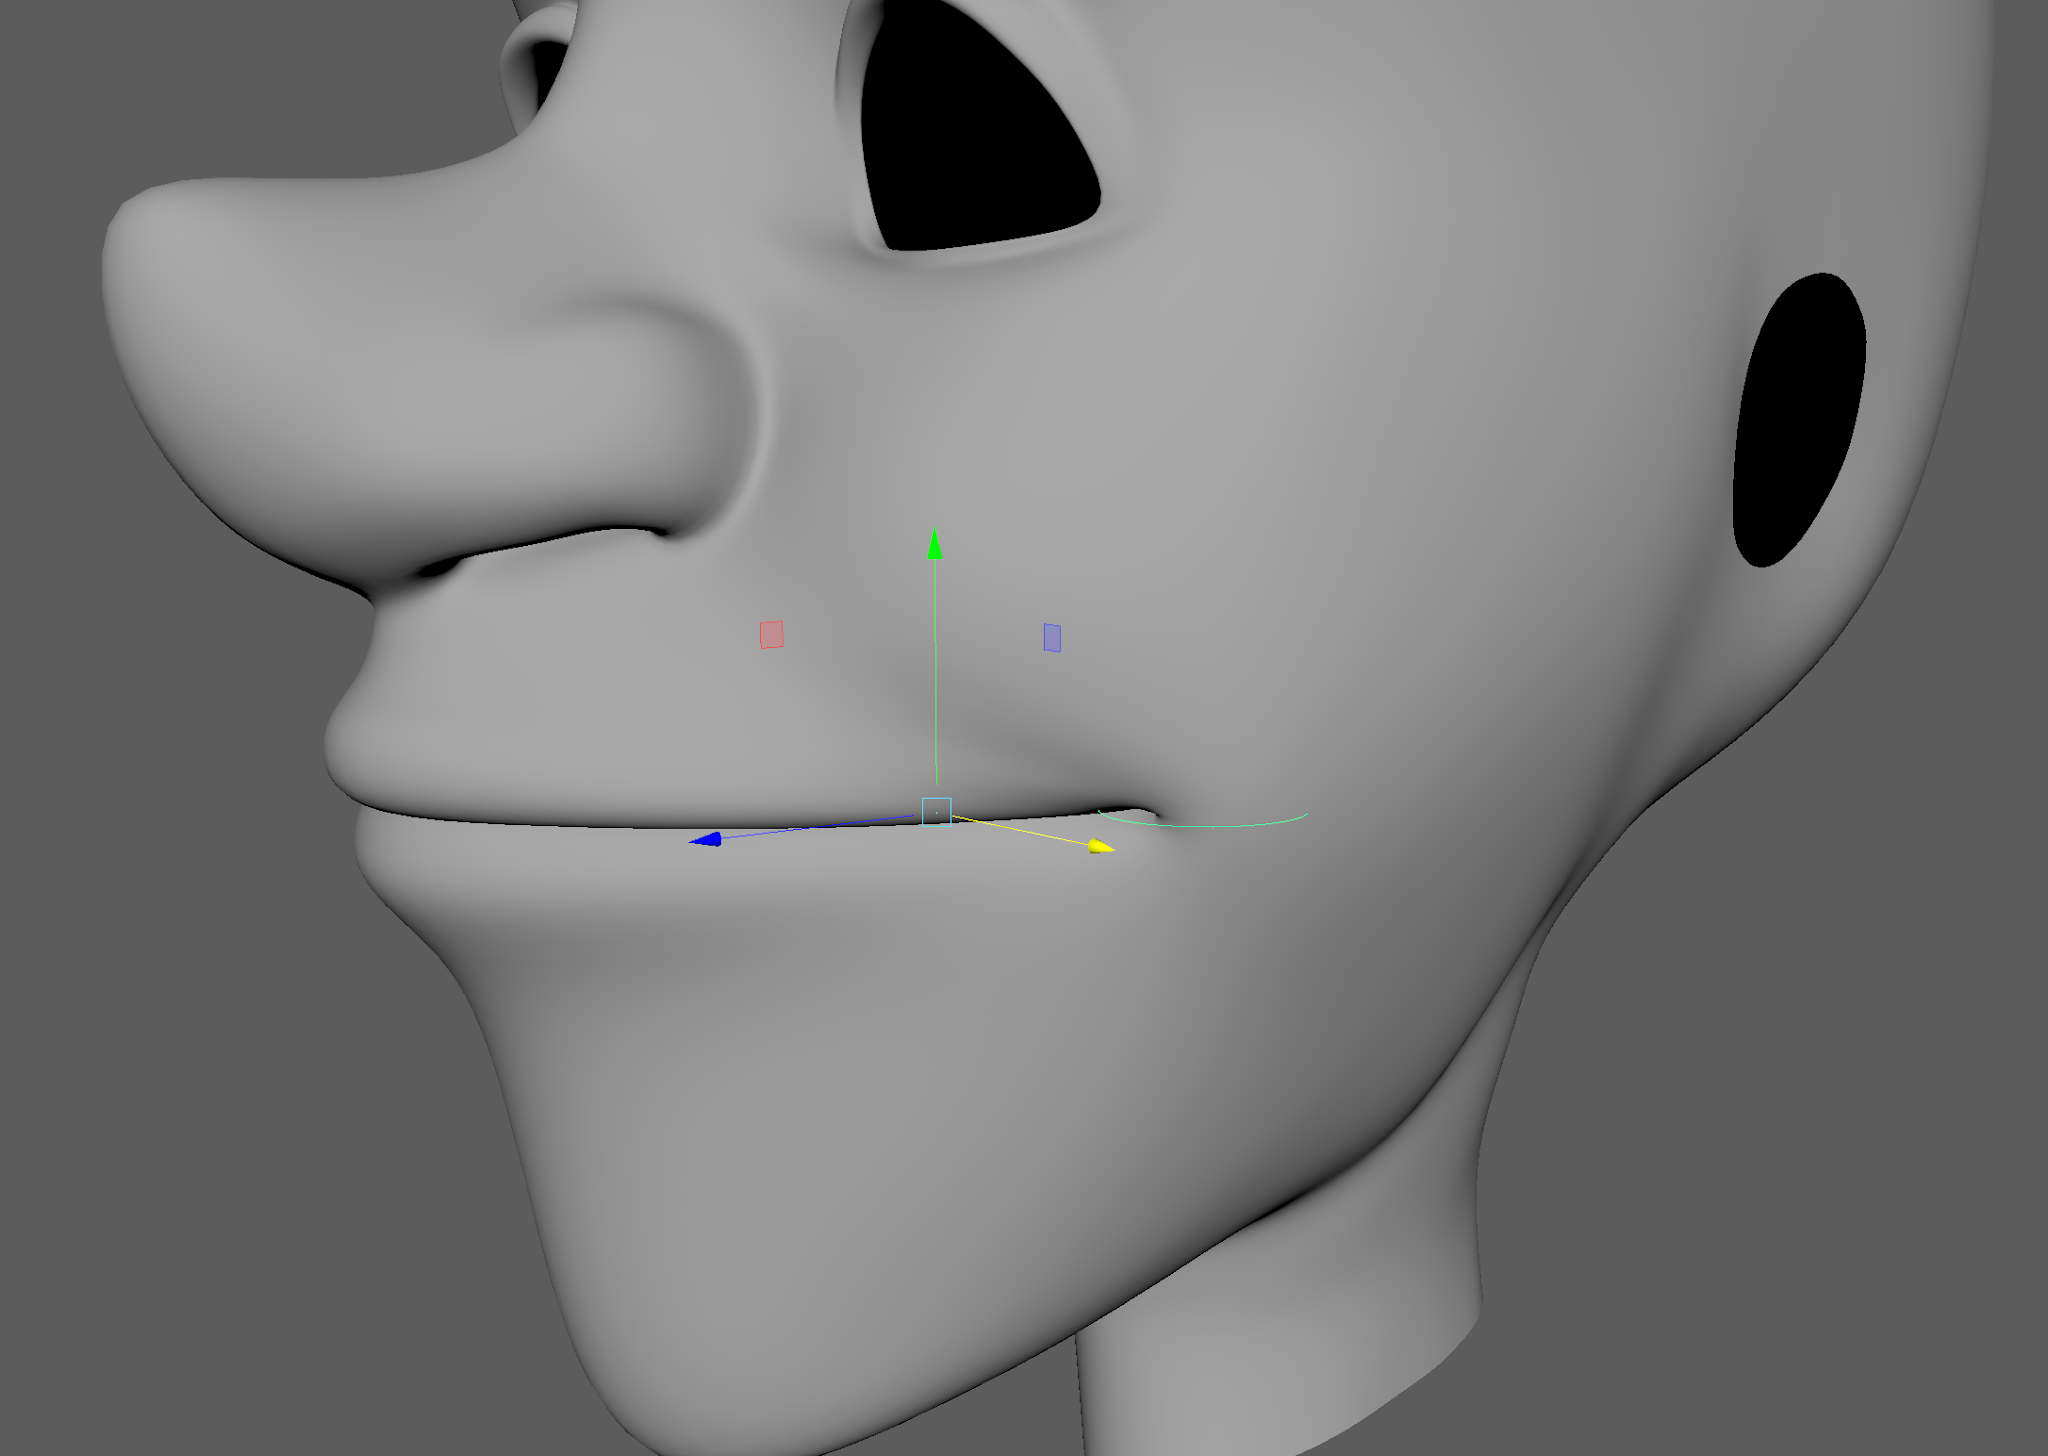
Making another head duplicate and bringing it up in Translate Y (15), the left mouth corner joint is duplicated and then brought up to the correct position in a group. Making the joint bigger, a new control was created and was placed into a off set group.
Bringing the joint to be under the control, the control needs to be rotated to work along the cheek to help with creating the blend shapes. This was done by changing the rotation of the off set group.
Adding a new joint and placing it on the forehead (base_joint), the skin is then bound to the new joints. Using the painting weights tool and some animation, the weights are repainted to the right areas to gain the correct mouth shapes (vertex/ edge selection, smoothing and flooding).
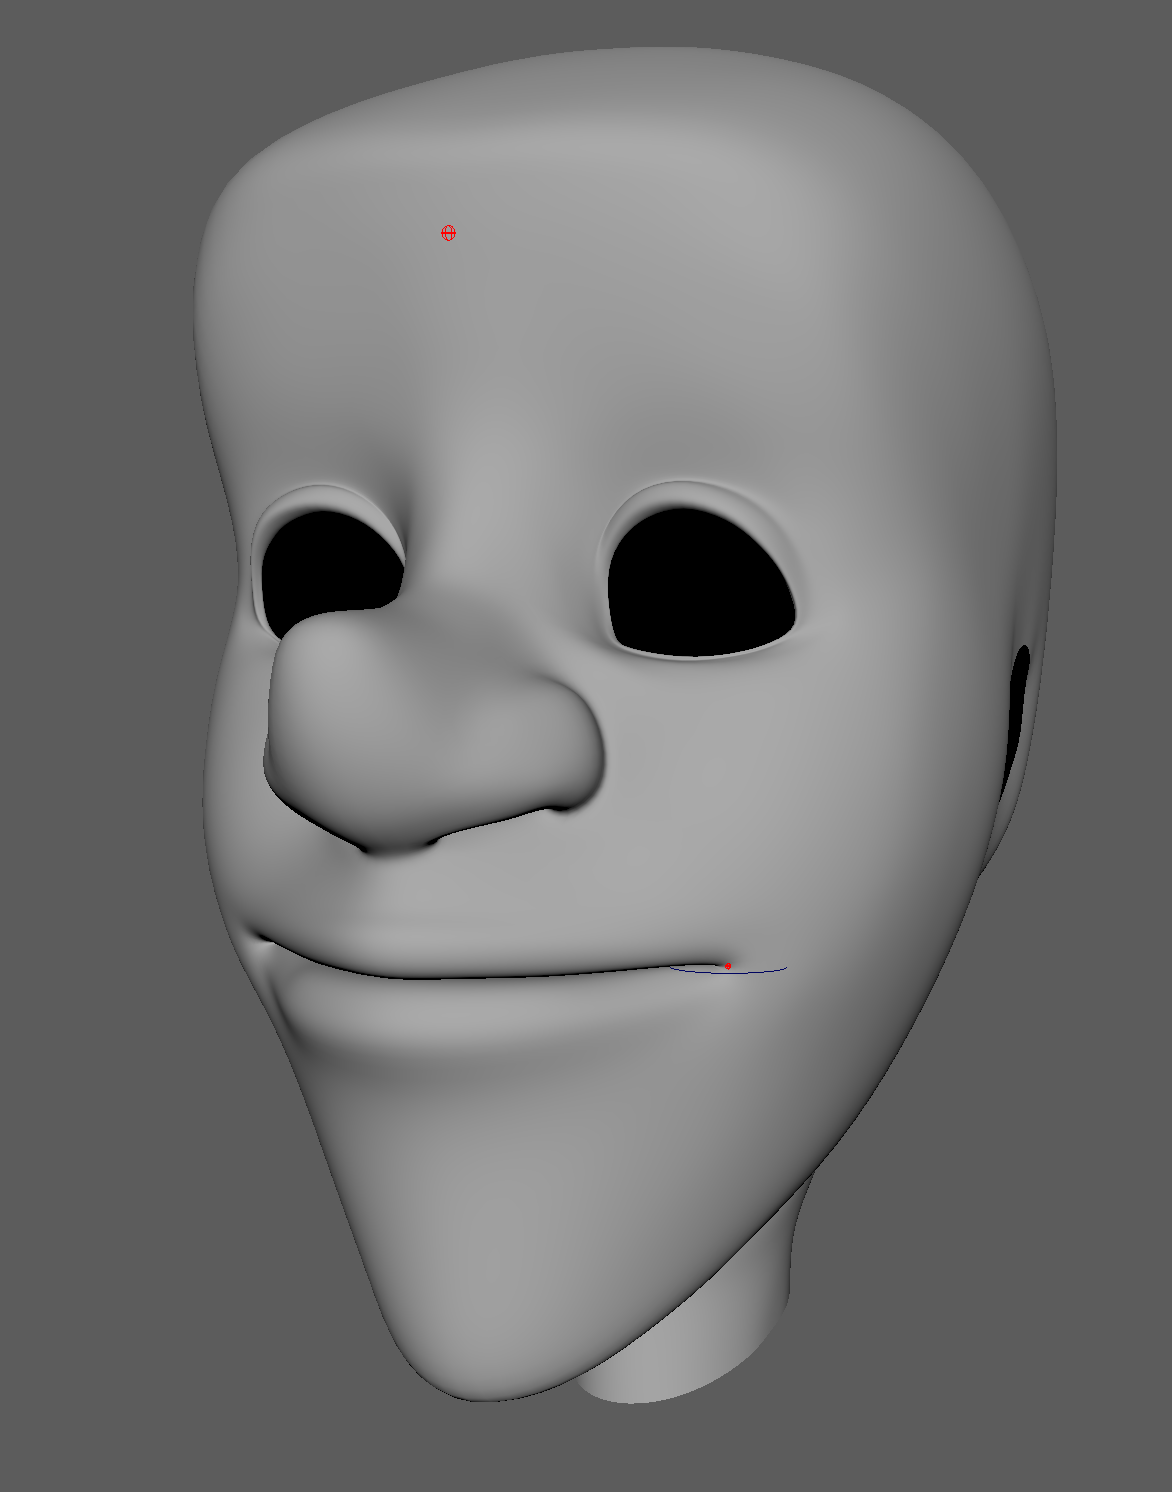 |
| Base and Cheek Modelling Joints |
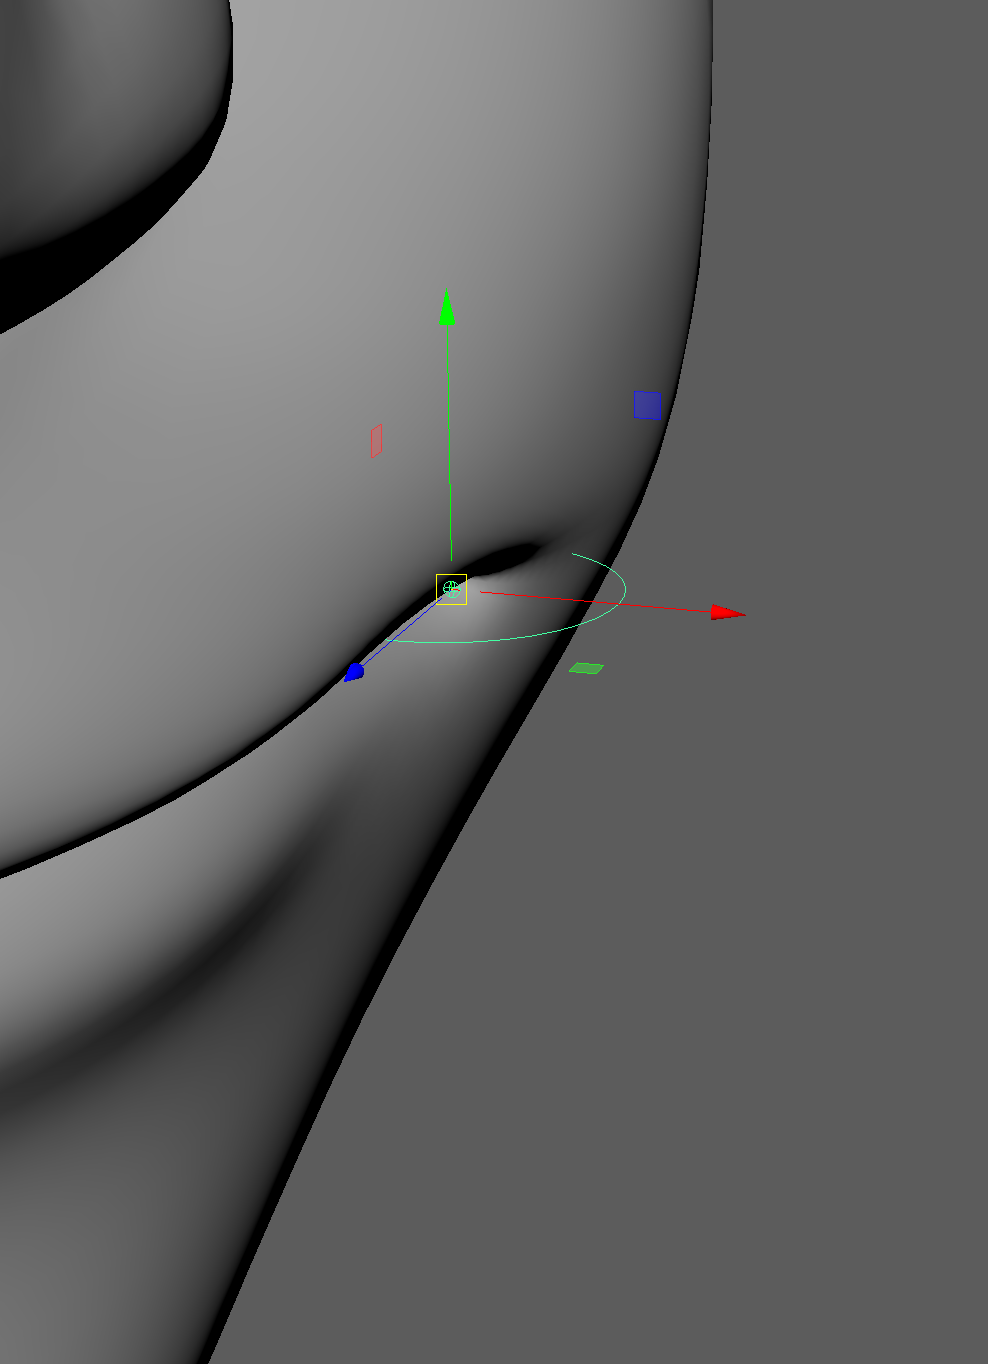 |
| New Rotation |
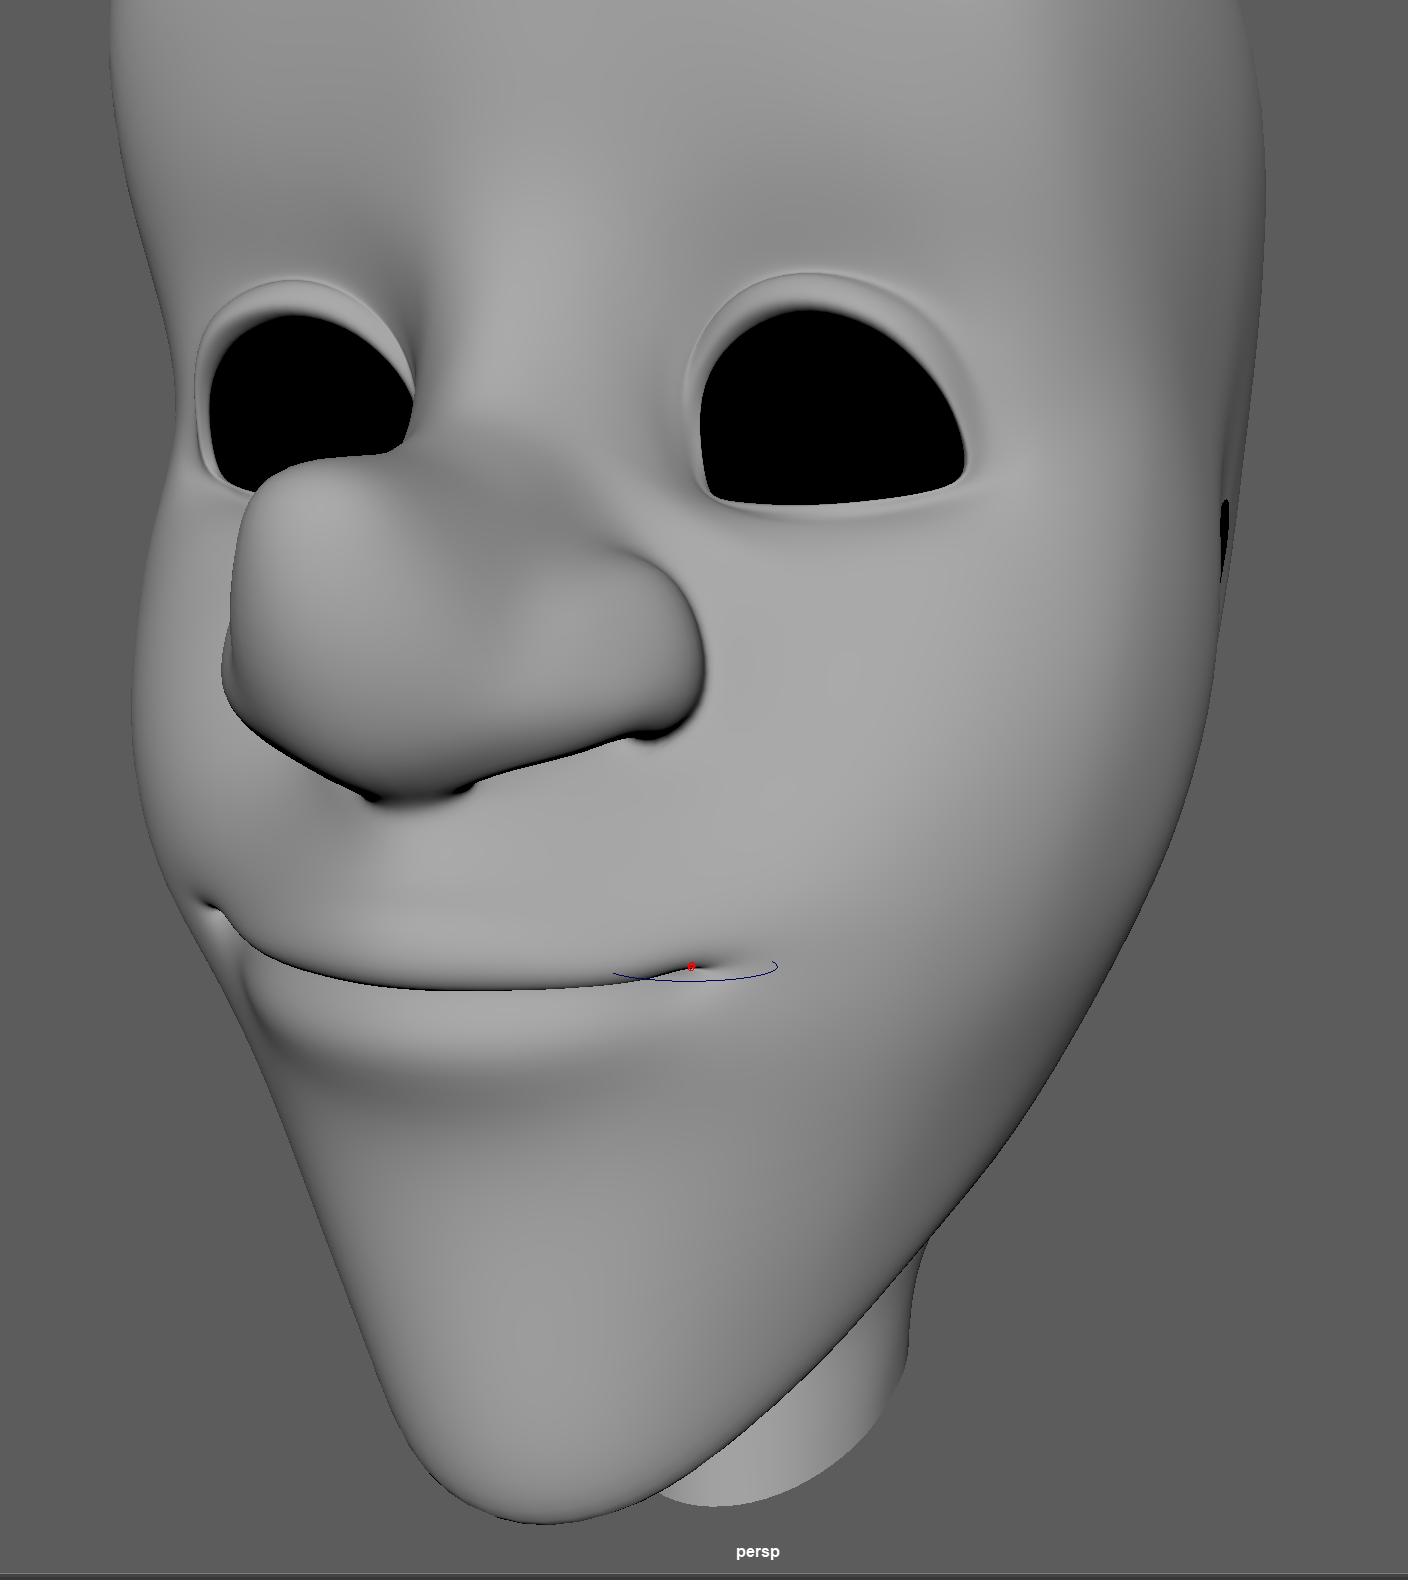 |
| In shape |
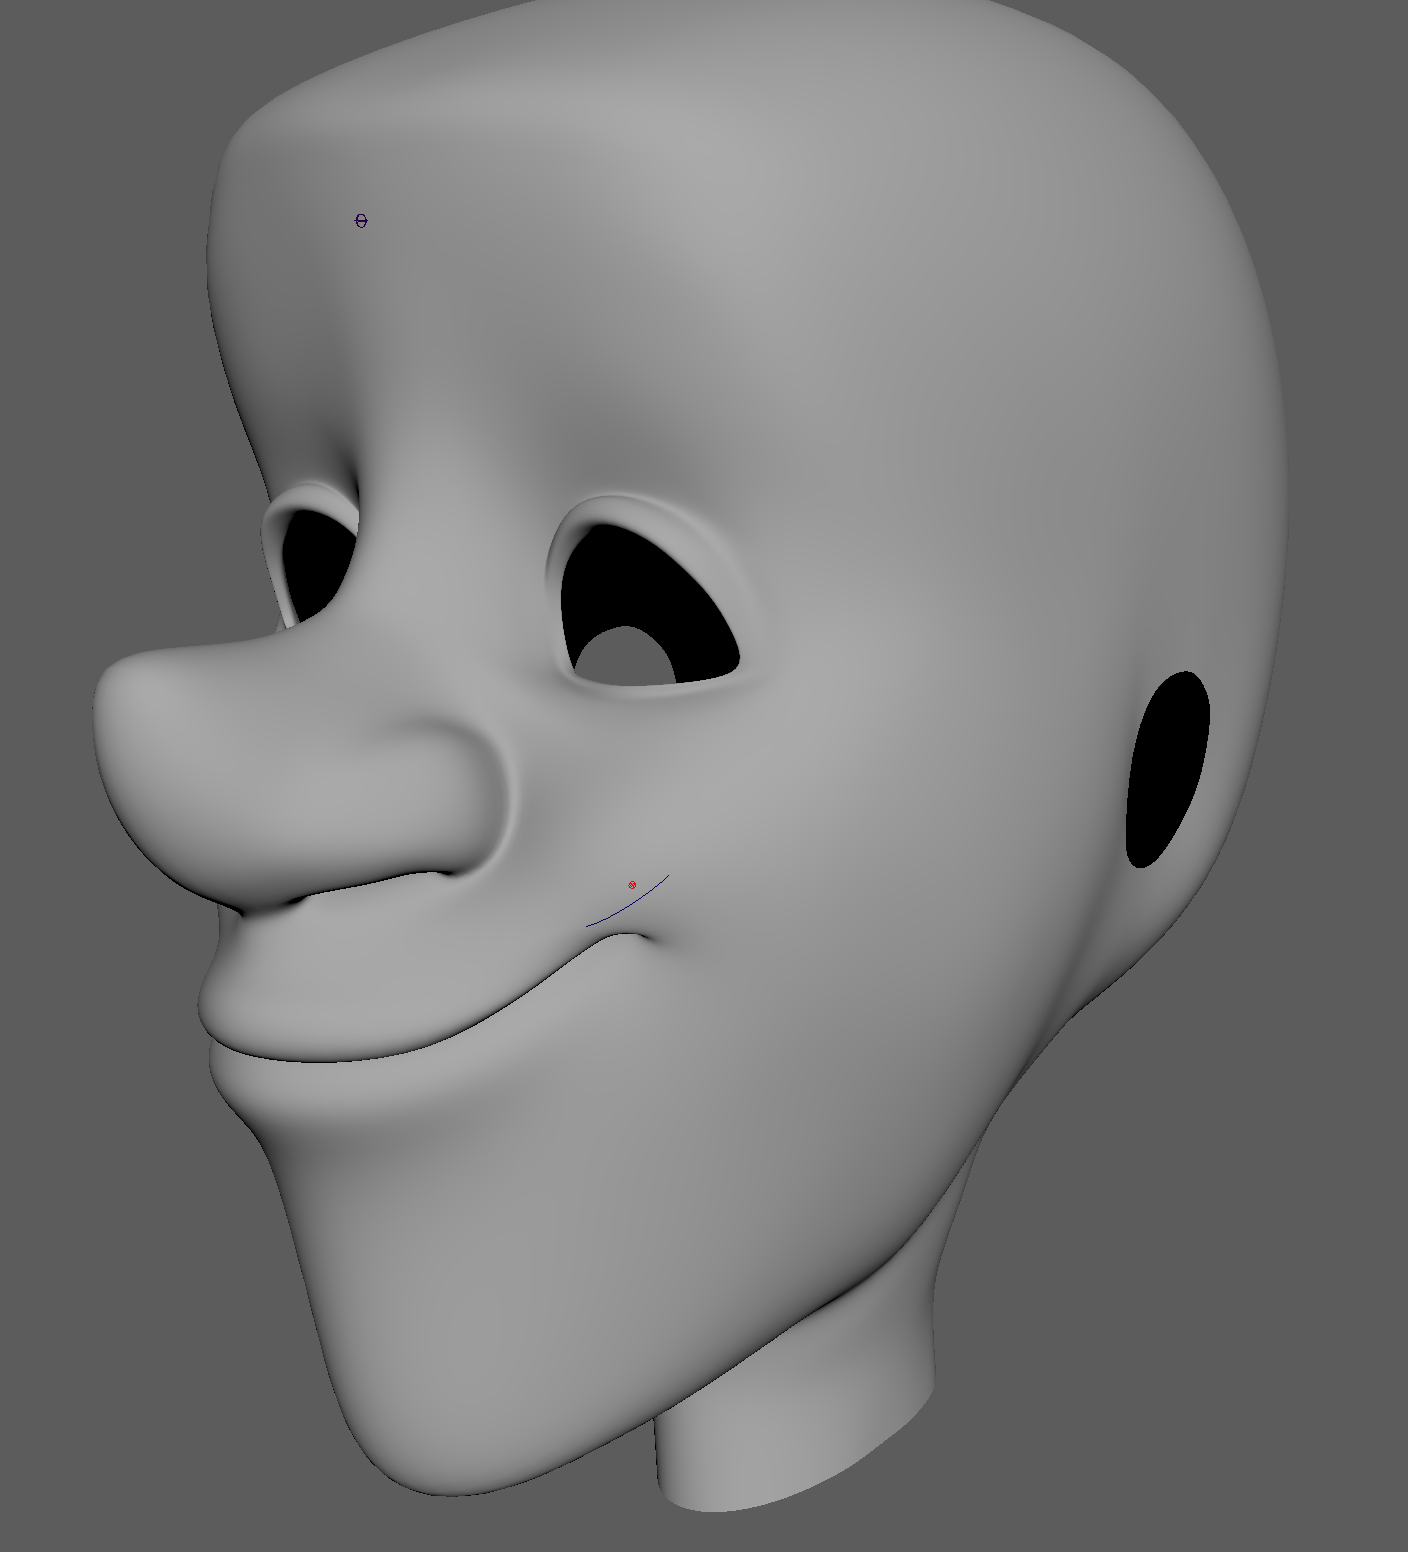 |
| Up Shape |
 |
| Modelling the Out Shape |
It may have taken longer then needed to get these right, there was a few attempts that I wasn't happy with so I ended up doing a few restarts. When the shapes are done, they are placed into the correct position and then duplicated. These will new duplicates will be the bases for the mouth blend shapes and are renamed as A,B,C and D in a clockwise.
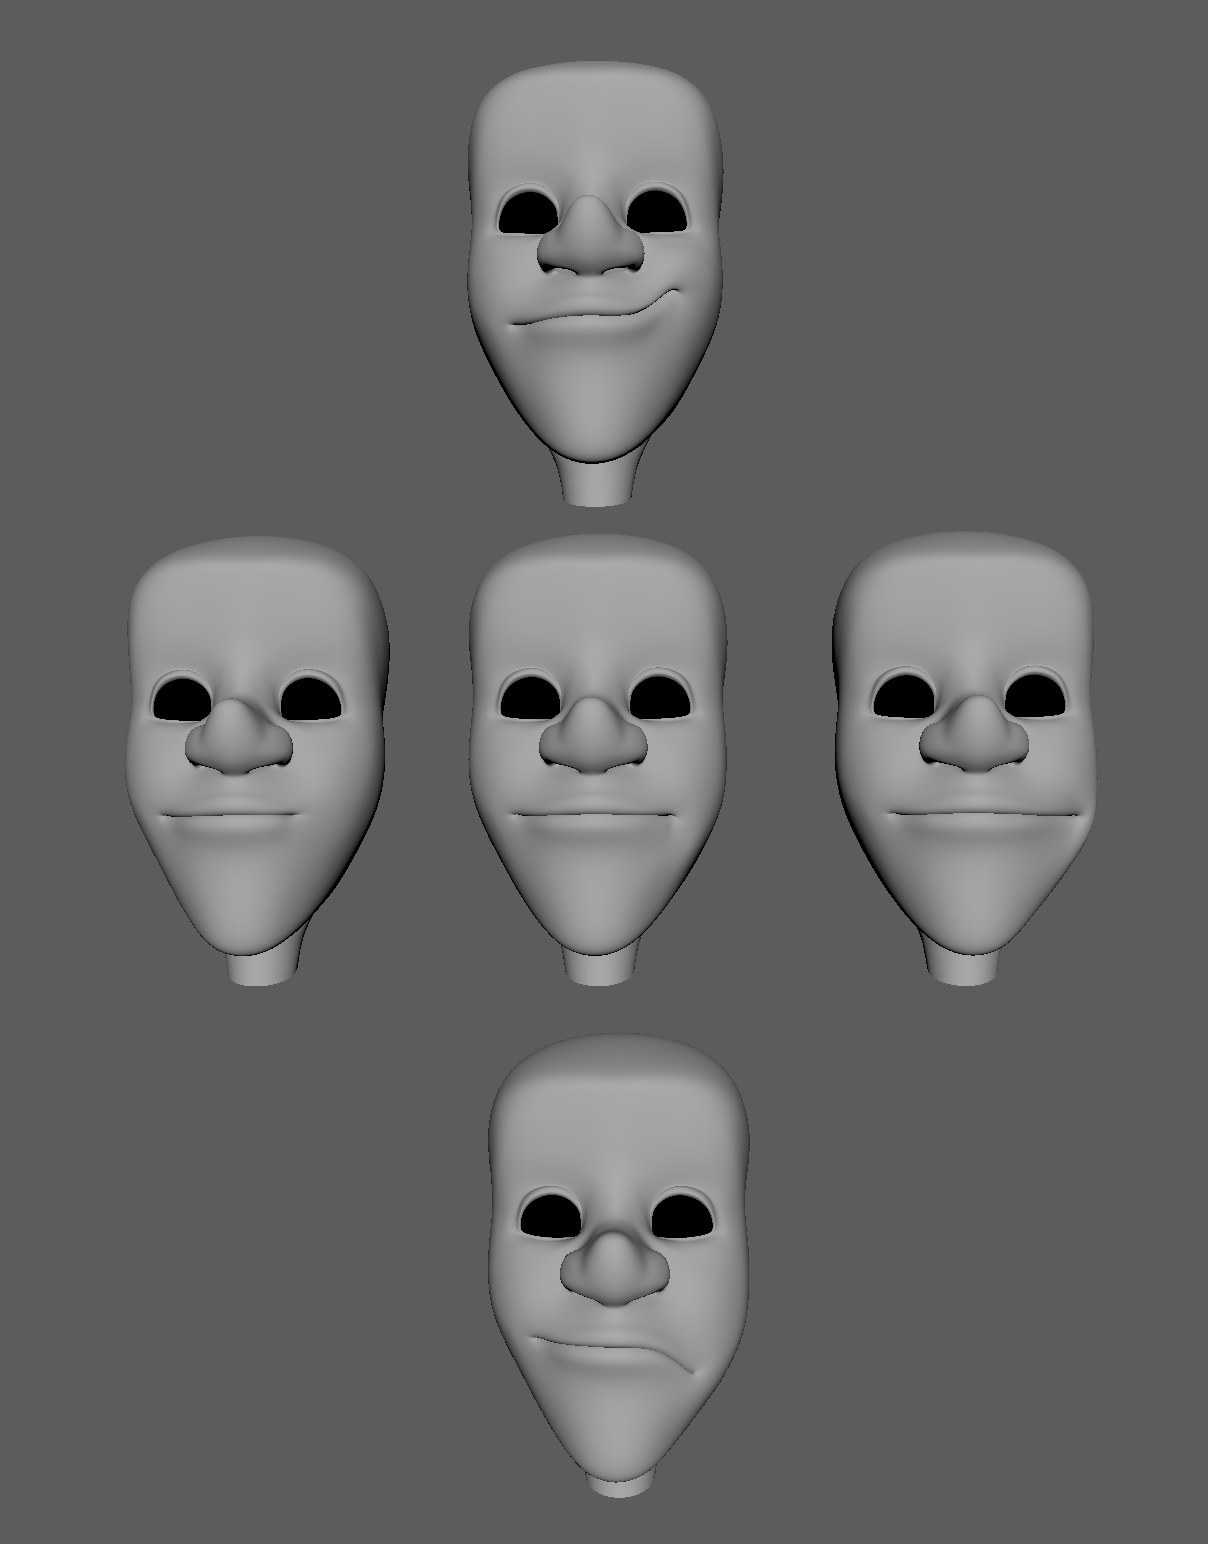 |
| Final Shapes |
Corrective Blend Shapes
Selecting two heads, we use the Deform: Blend Shape option to create some temporary in-betweens. Bringing the blend shape controls to 100 so to turn on both the shapes, a new mouth movement is made and then duplicated. To removed the blend shape deformation from the original, the history needs to be deleted and a new deformation can be made.
Some areas may need altering to make a better shape, I had to do a lot of alterations.
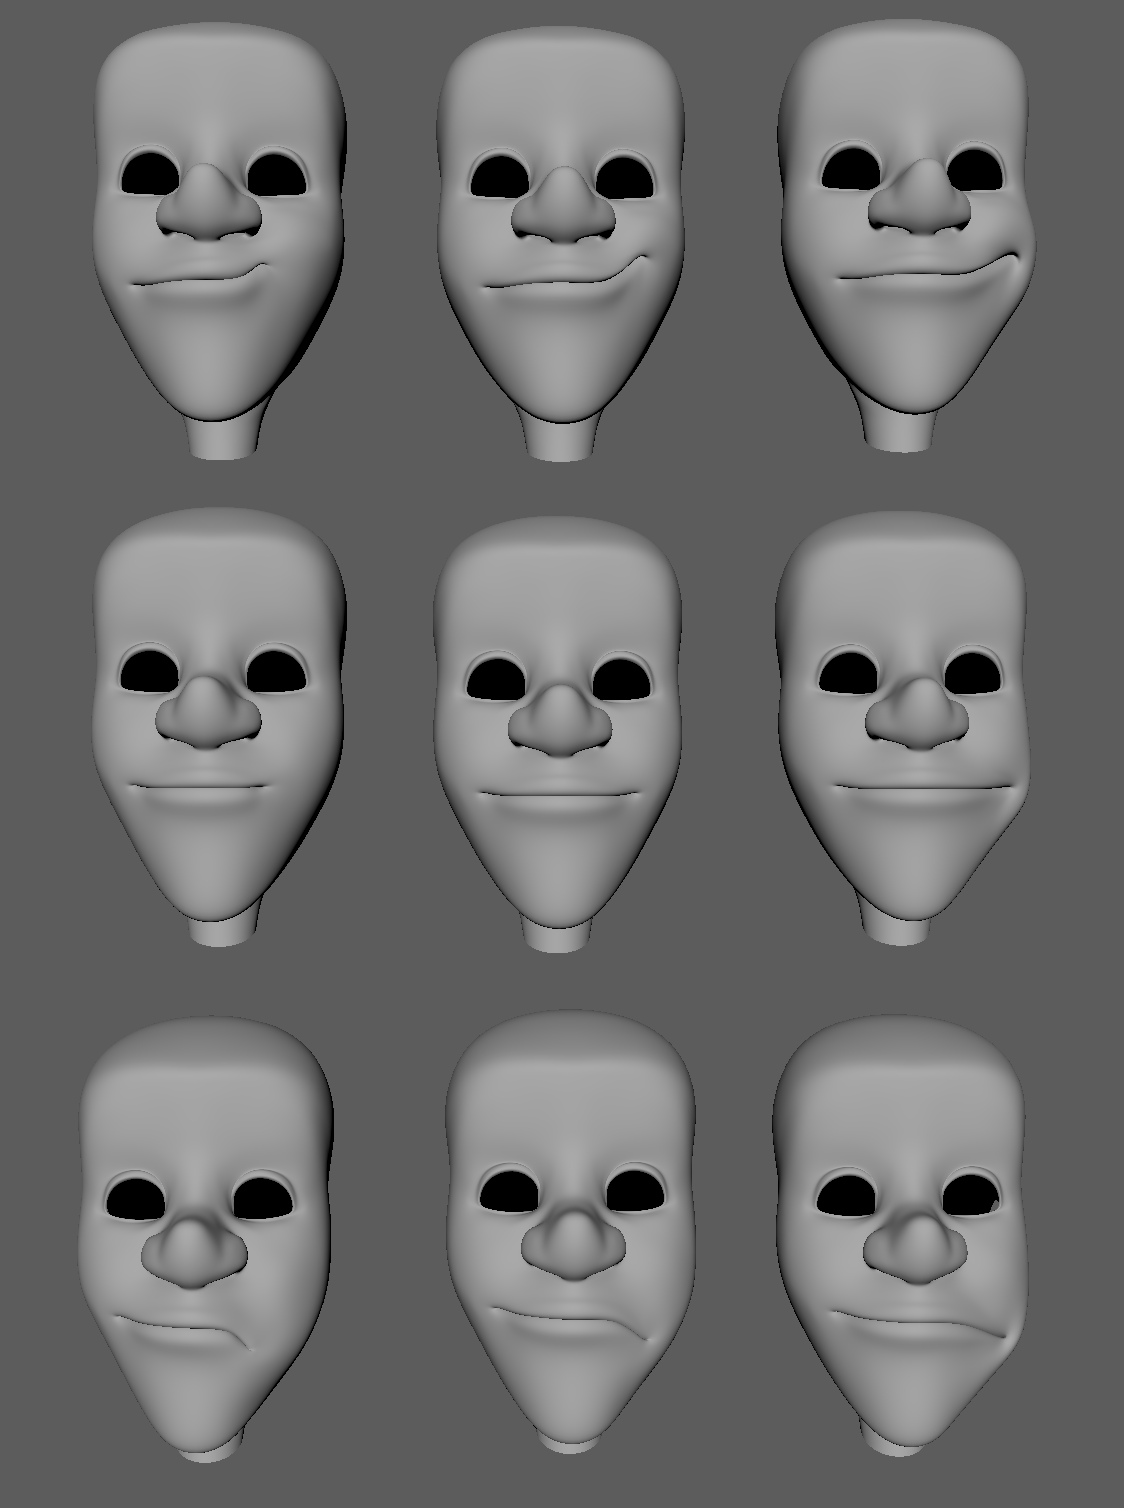 |
| New Temporary Blend Shapes |
For the next step, we need to subtract shapes to each other to make the final corrective shapes, this is know as parrell shapes.
Selecting the four left top shapes first, in the blend shape options we switch to Parell in advanced. Then placing the following attributes in to the controls, duplicates can be made of outcome. As with the previous blend shapes, the history is deleted to remove the deformation and the process is repeated till we have 4 new shapes. The heads need to renamed as AB, BC, CD and DA.
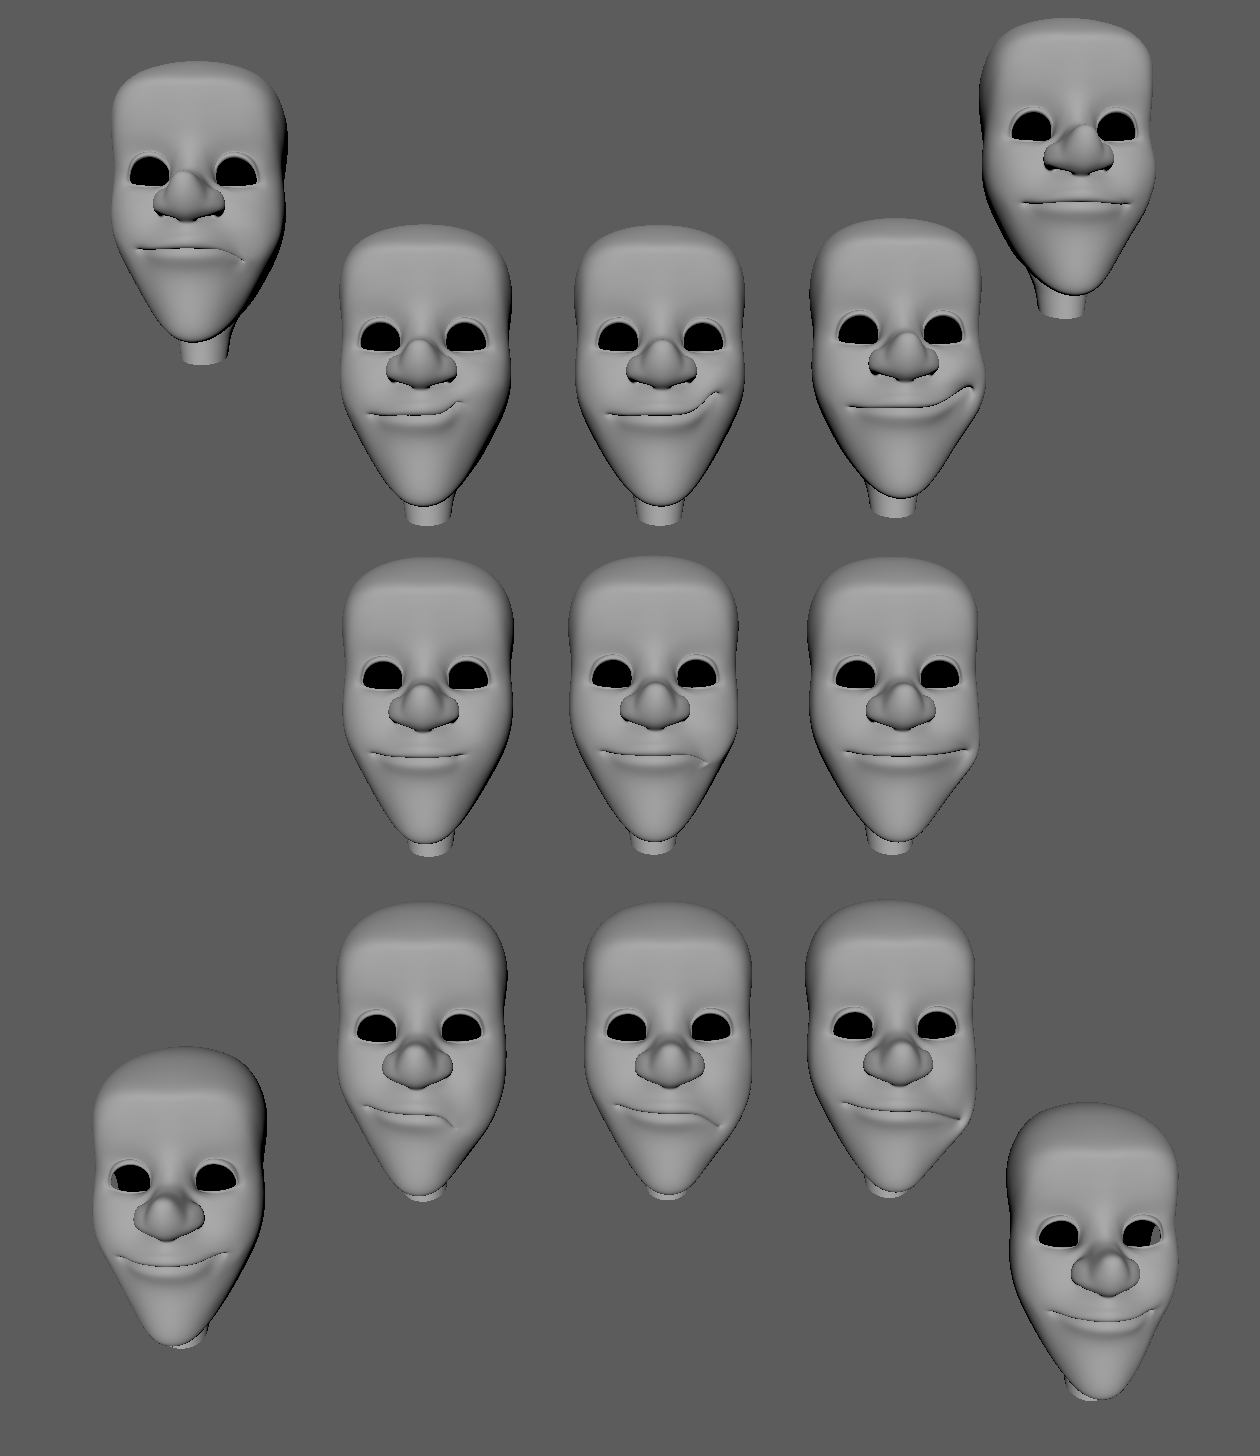 |
| Four New Blend Shapes |
Placing the original shapes onto a layer (for exporting) the new ones are then moved to replace them. These are renamed as L_ and then duplicated (and rename as R_) to be placed on the right hand side.
Adding a new head duplicate (from the original so to not have any deformations), this one is known as a bridge for the blend shape connection.
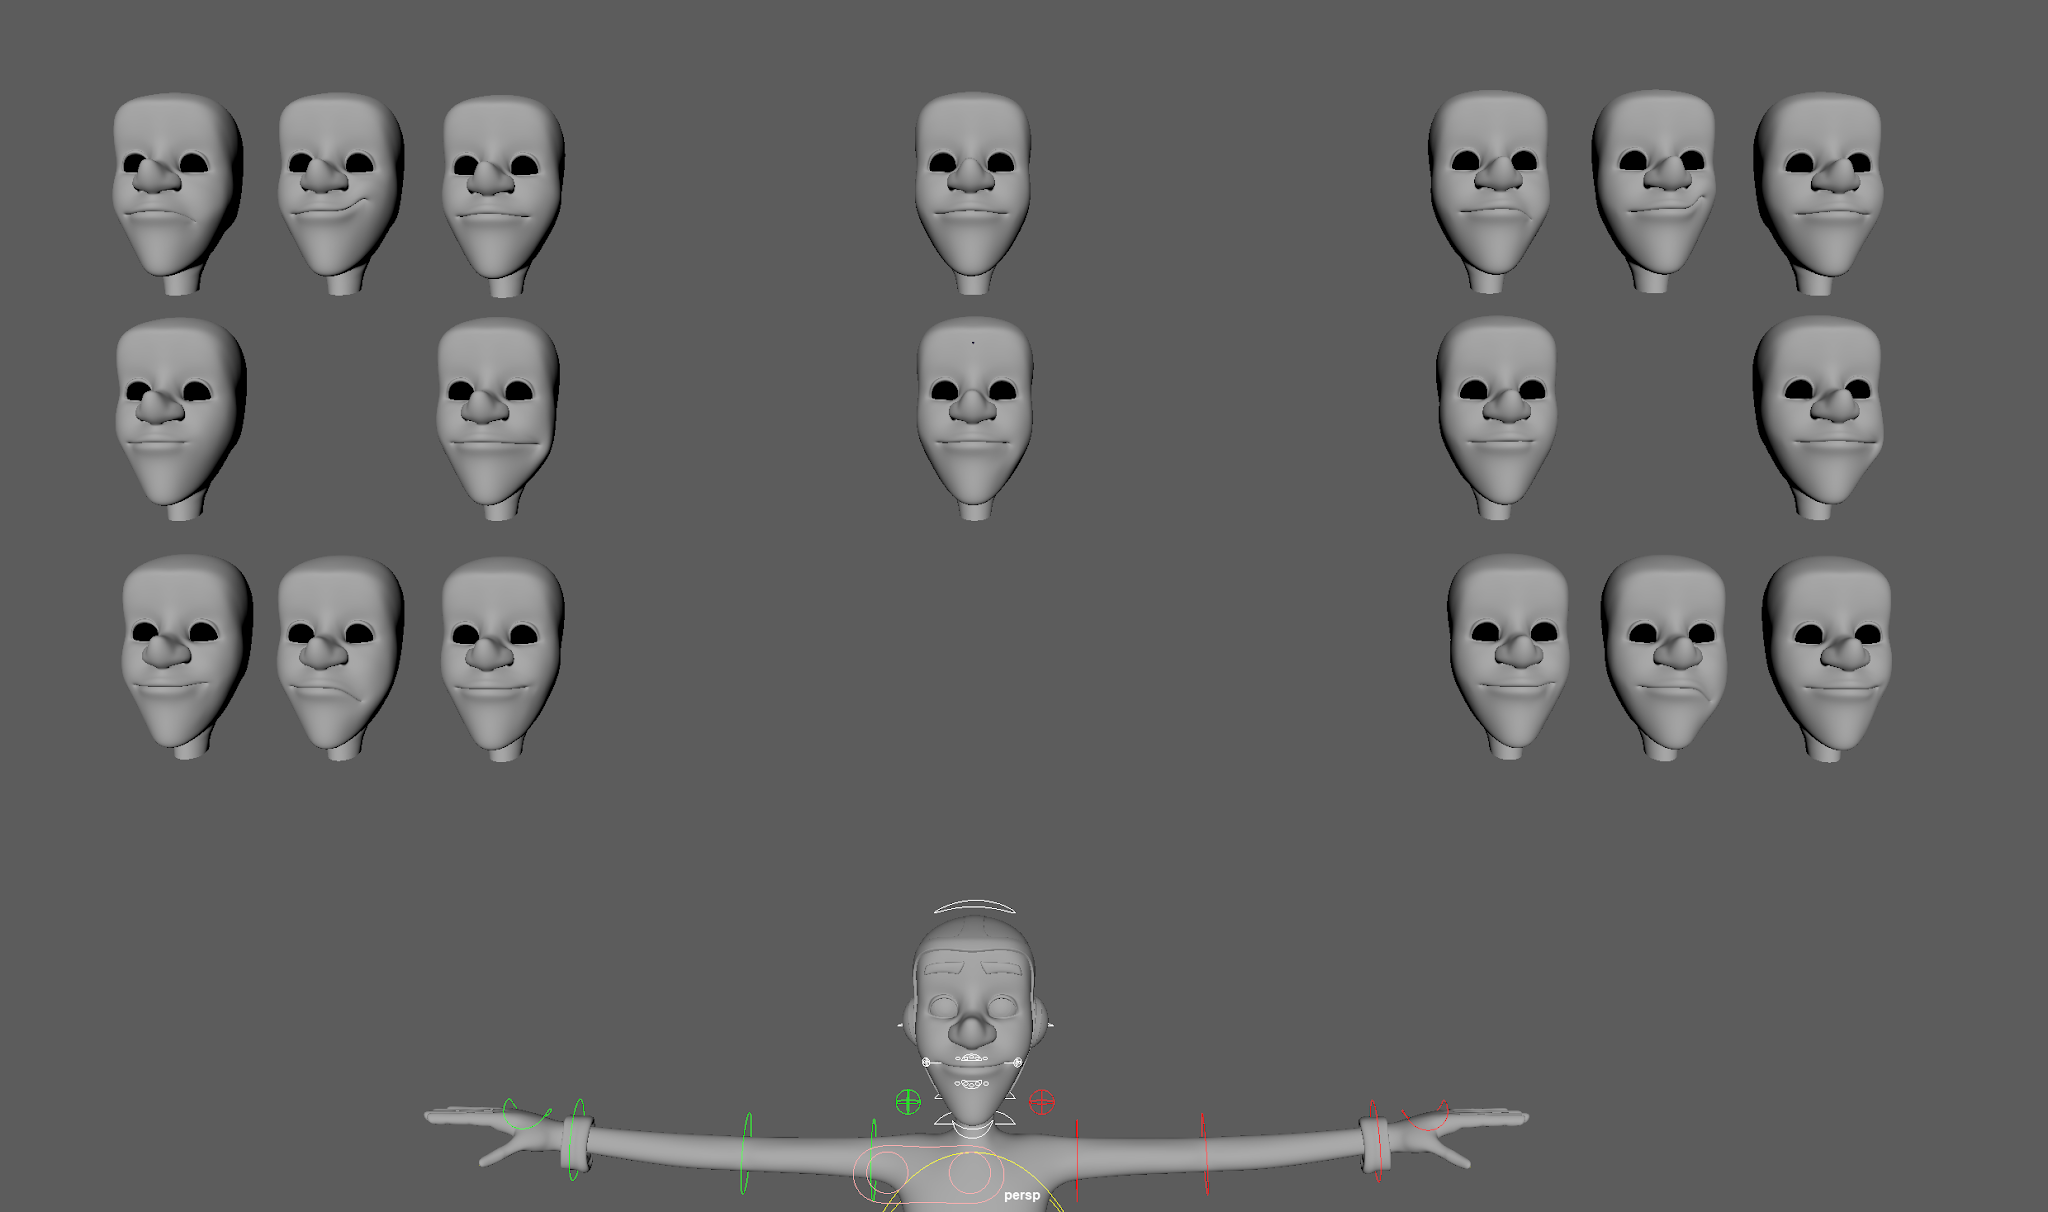 |
| Left and Right Blend Shapes |
All the heads, then the bridge is selected and a new automatic blend shape connection is made. To make a shape to work on the right side, the allocated right-side controls in the blend shape editor is selected and then the target flipped.
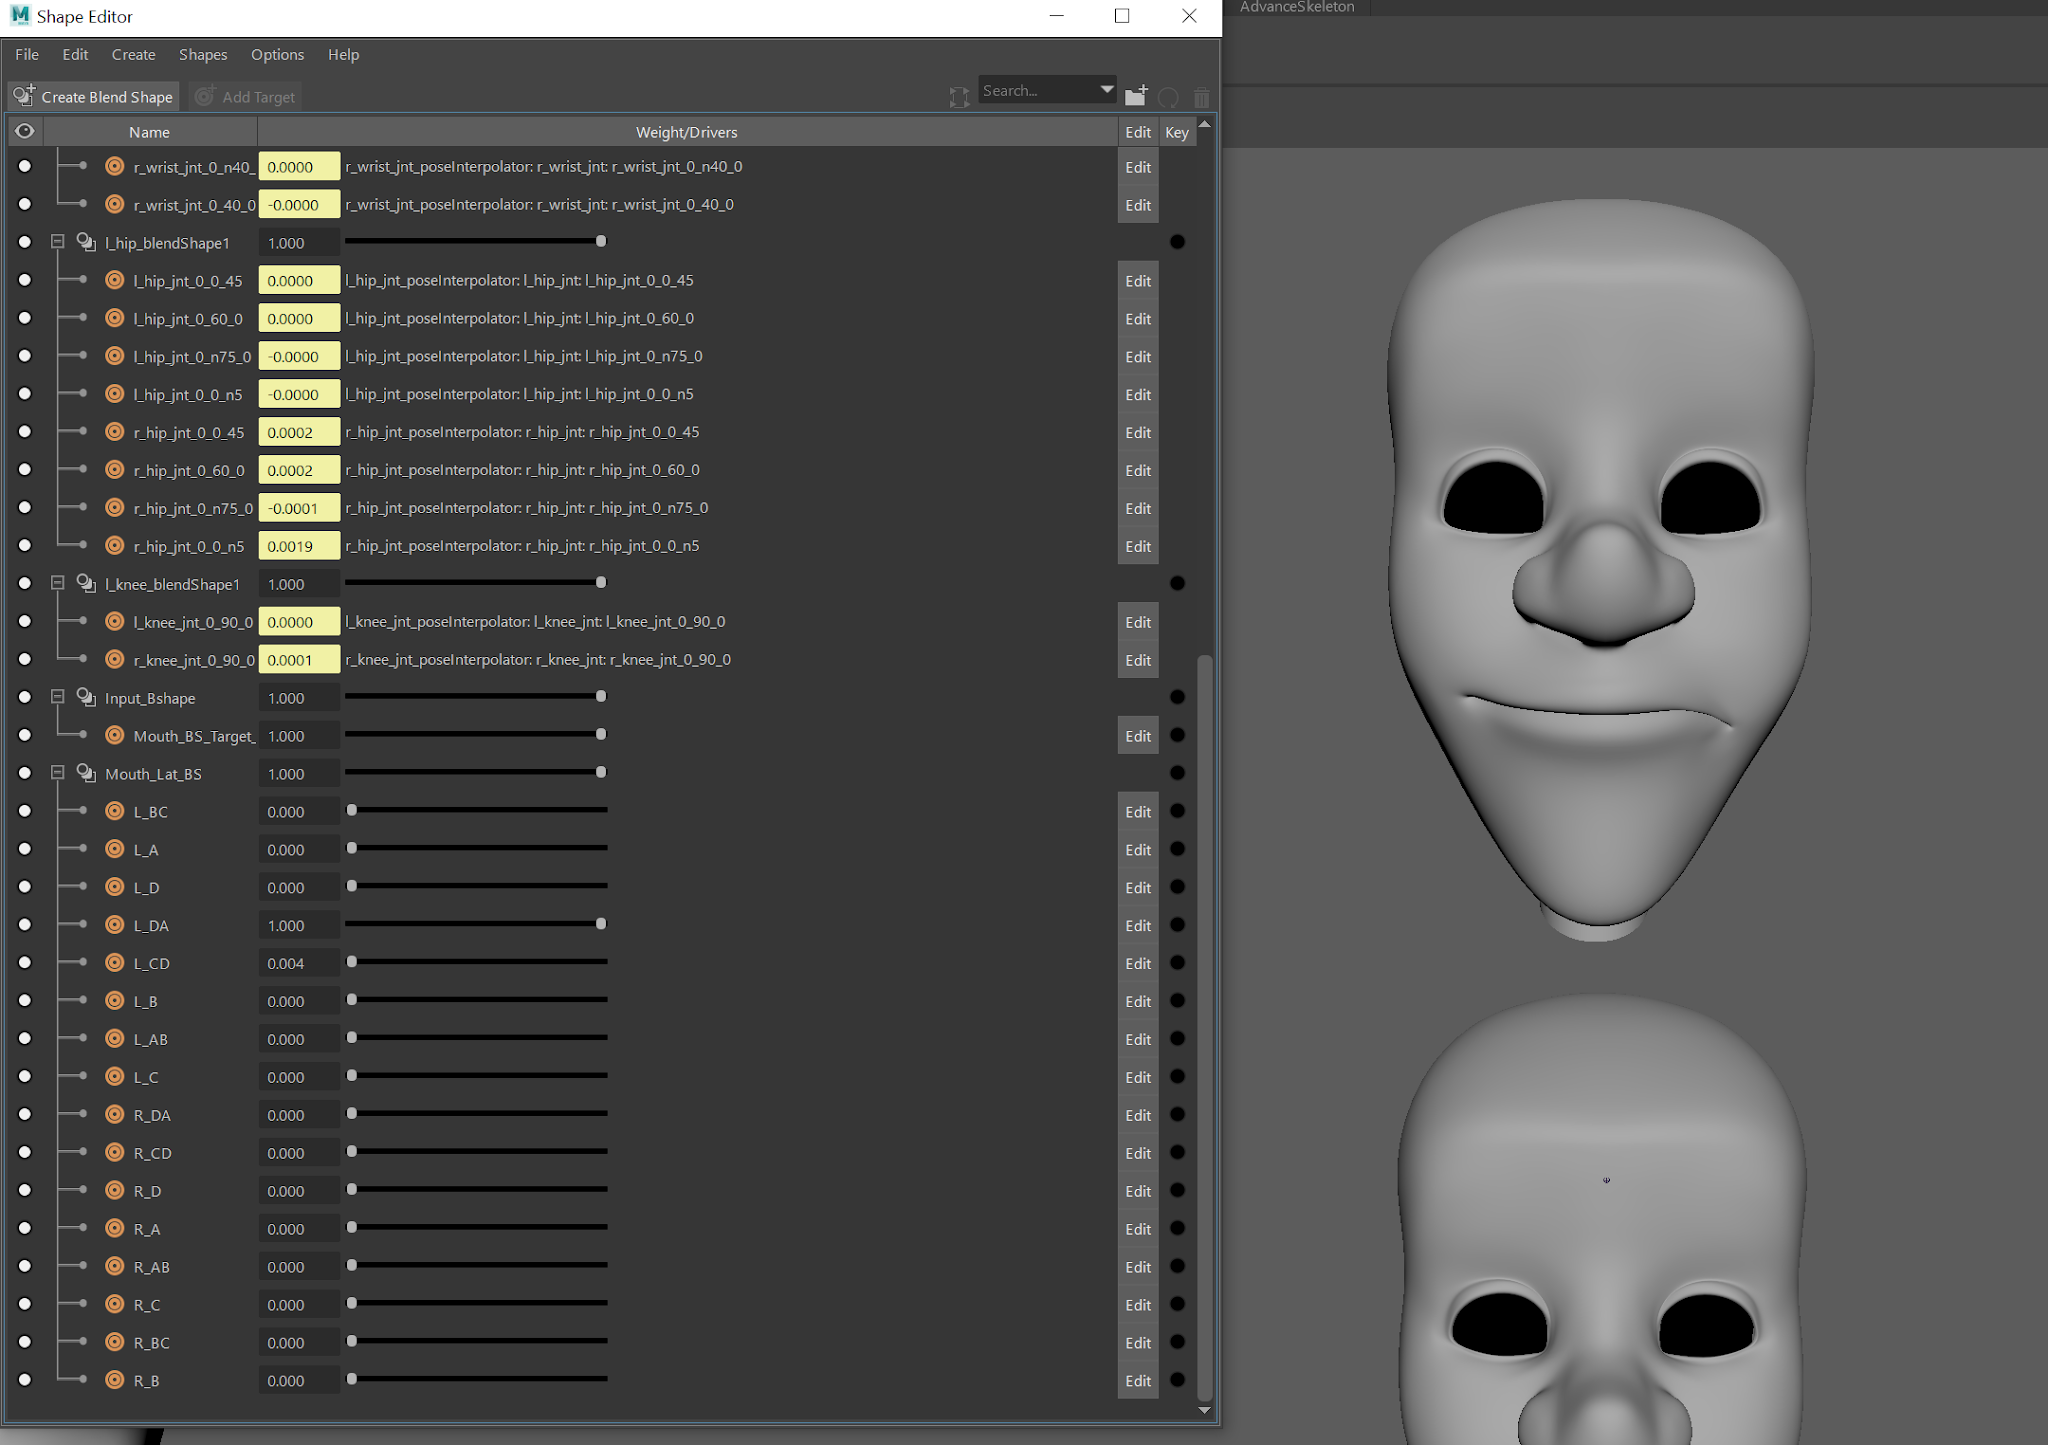 |
| The Shape Editor - Left |
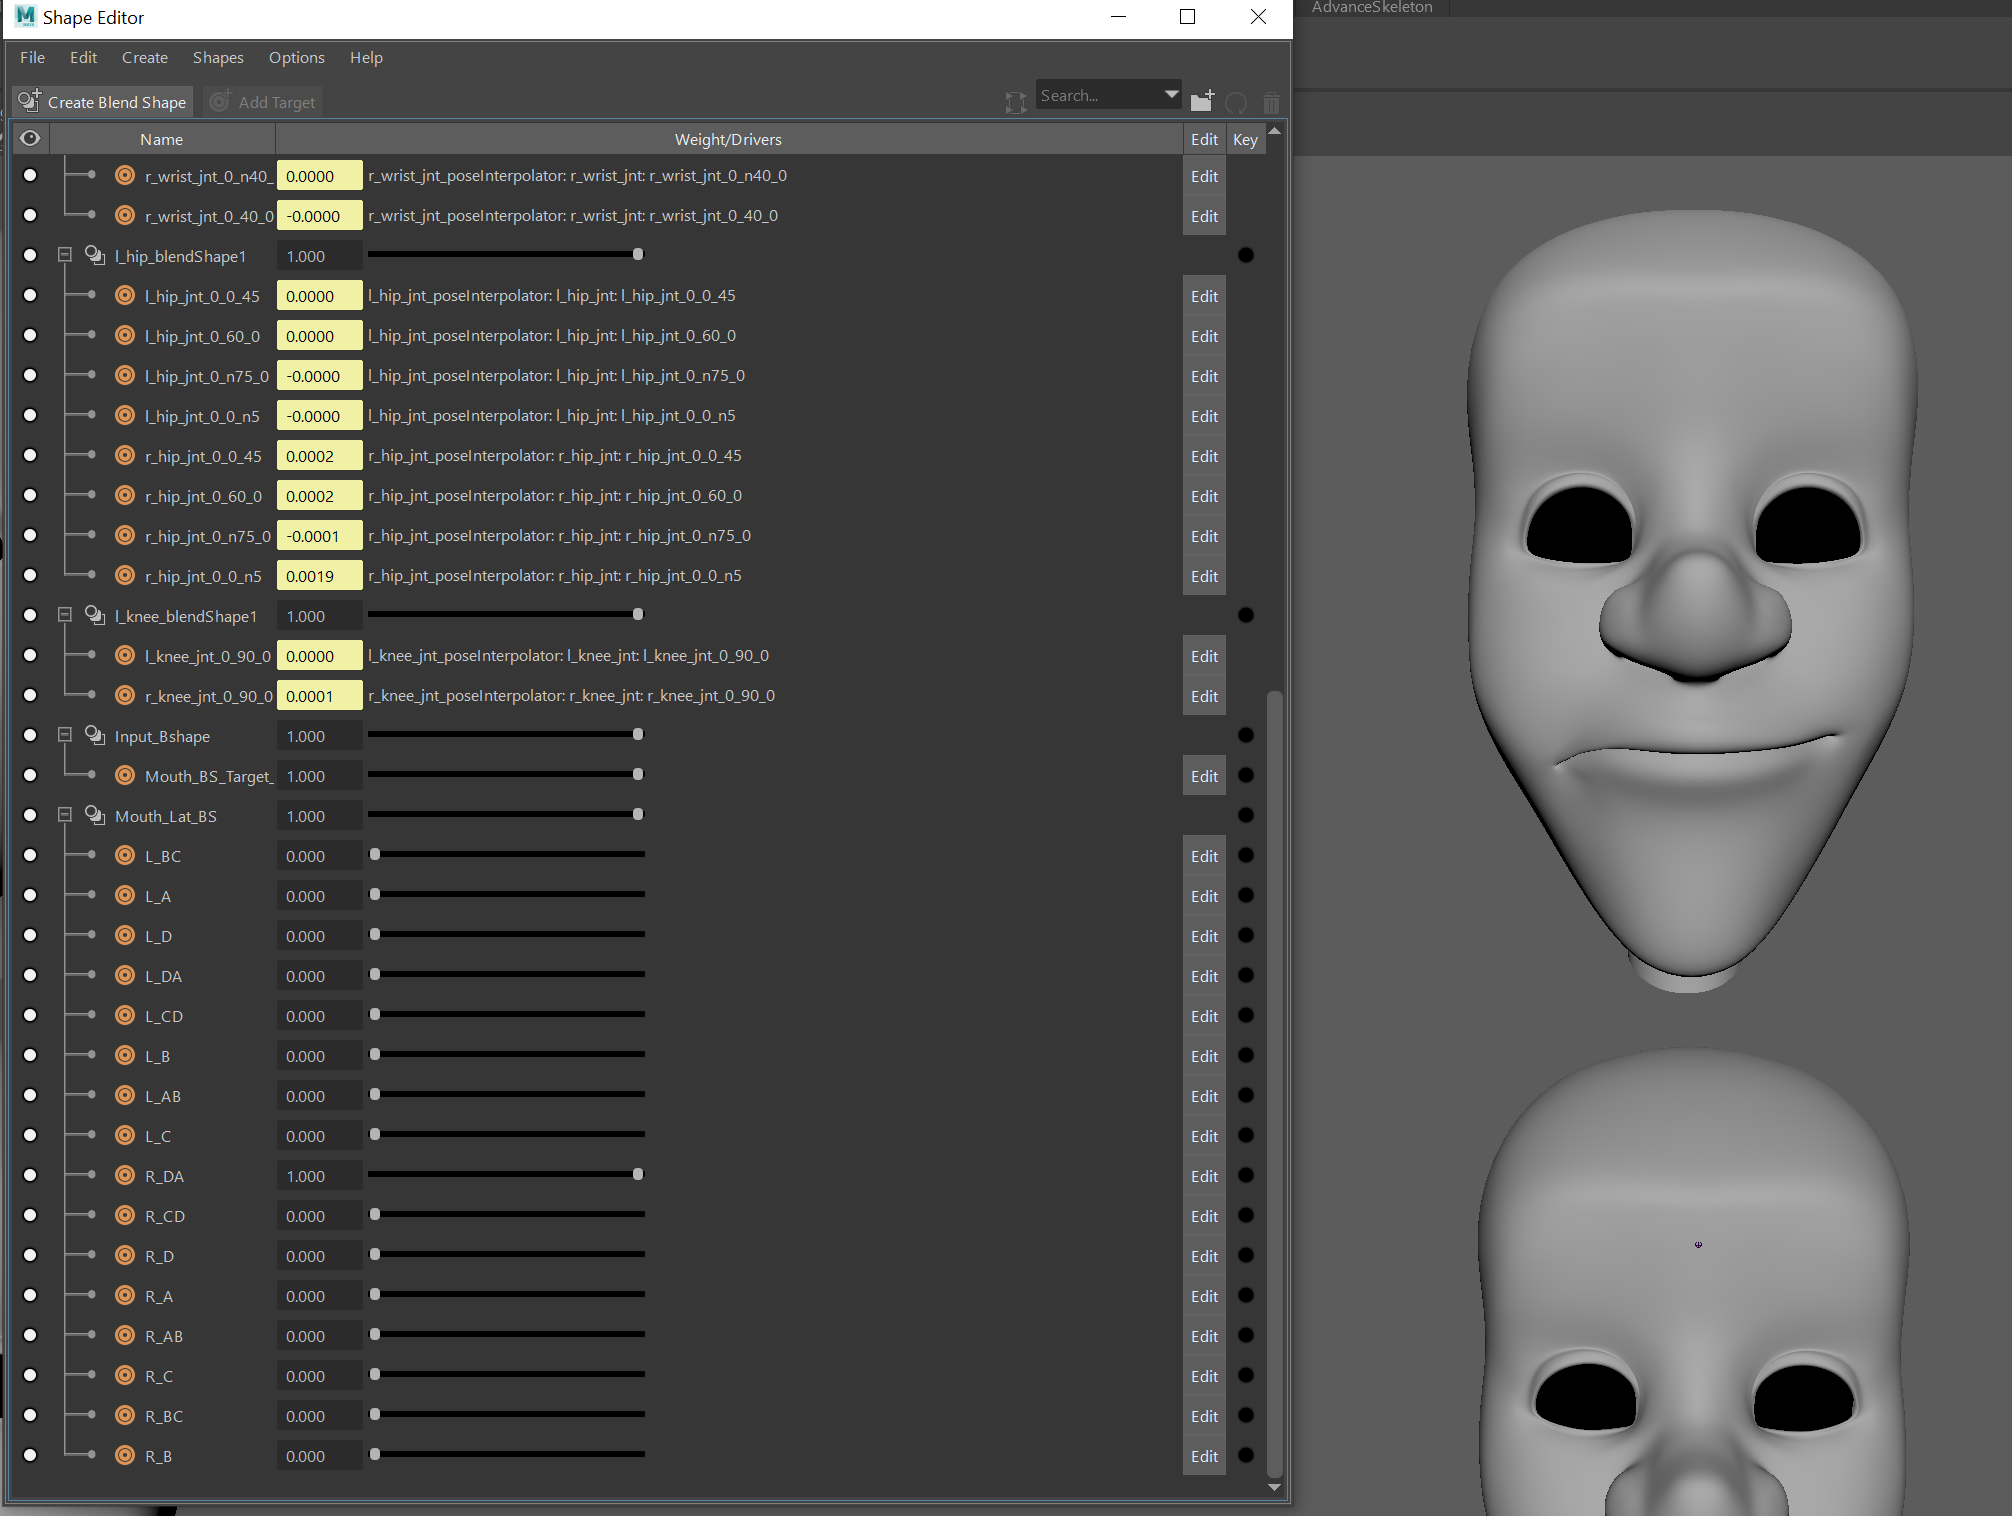 |
| The shape Editor - Right |
Duplicating, grouping and flipping the mouth controls to the right side, the joints are removed and the controls renamed as L/R mouth_lat_off_controls. The new controls are repositioned down to the original model. These are then placed into the mouth corner SDK groups, placing the corner master controls into 2 new groups and then moving them under the Lateral controls. (Creating the new groups stop any errors occurring from the values on the Lateral controls).
Set Driven keys are placed between the Lateral controls and the mouth blend shapes, using the maximum limits as the keys. To be able to see that the set driven keys are working on the main model, a blend shape target is placed using the Input_Bshape as the node. This now makes a Mouth_Target_Geo and a Lat_Bridge_Geo, allowing for the Blend Shapes to be turned on and off.
To finish up, scripts are needed to have the corrective shape work. In the shape editor and using the expression editor, the following script is created;
Mouth_Lat_BS.L_AB = Mouth _Lat_BS.L_A*Mouth_Lat_BS._B
This means that Blendshape AB will work when Blend Shapes A/B are multiplied by each other. This is then placed and altered as needed on each of the other channels in the Shape Editor. To show they are working, they turn pink and blue.
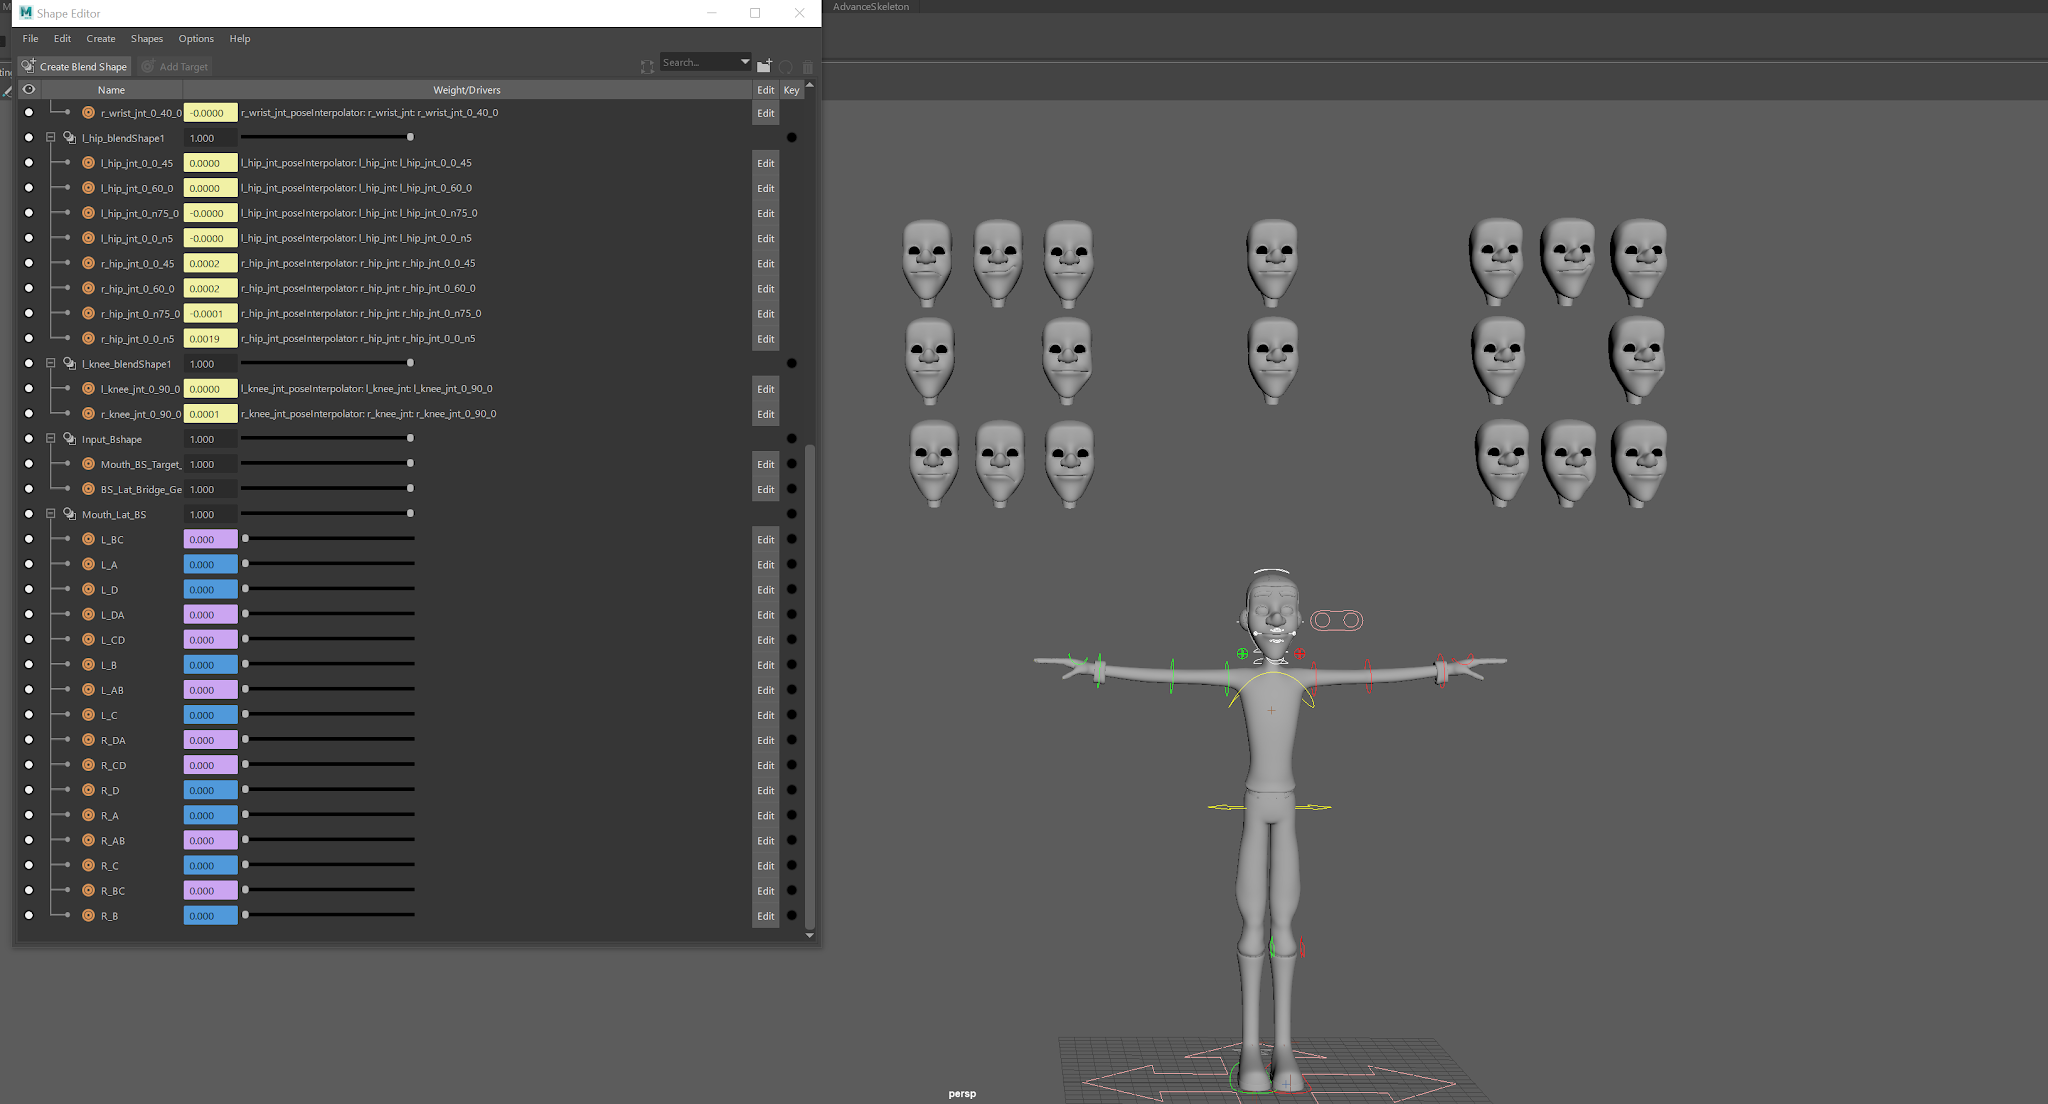 |
| Placing the Script |
As with some of the previous control, limits are placed in the translate attributes, this stops any tearing of the model. Also, all the set driven keys need to placed to linear in the graph editor.
The controls are then positioned around the corner master controls with the CVs and anything that needs to be exported, removed from the scene.
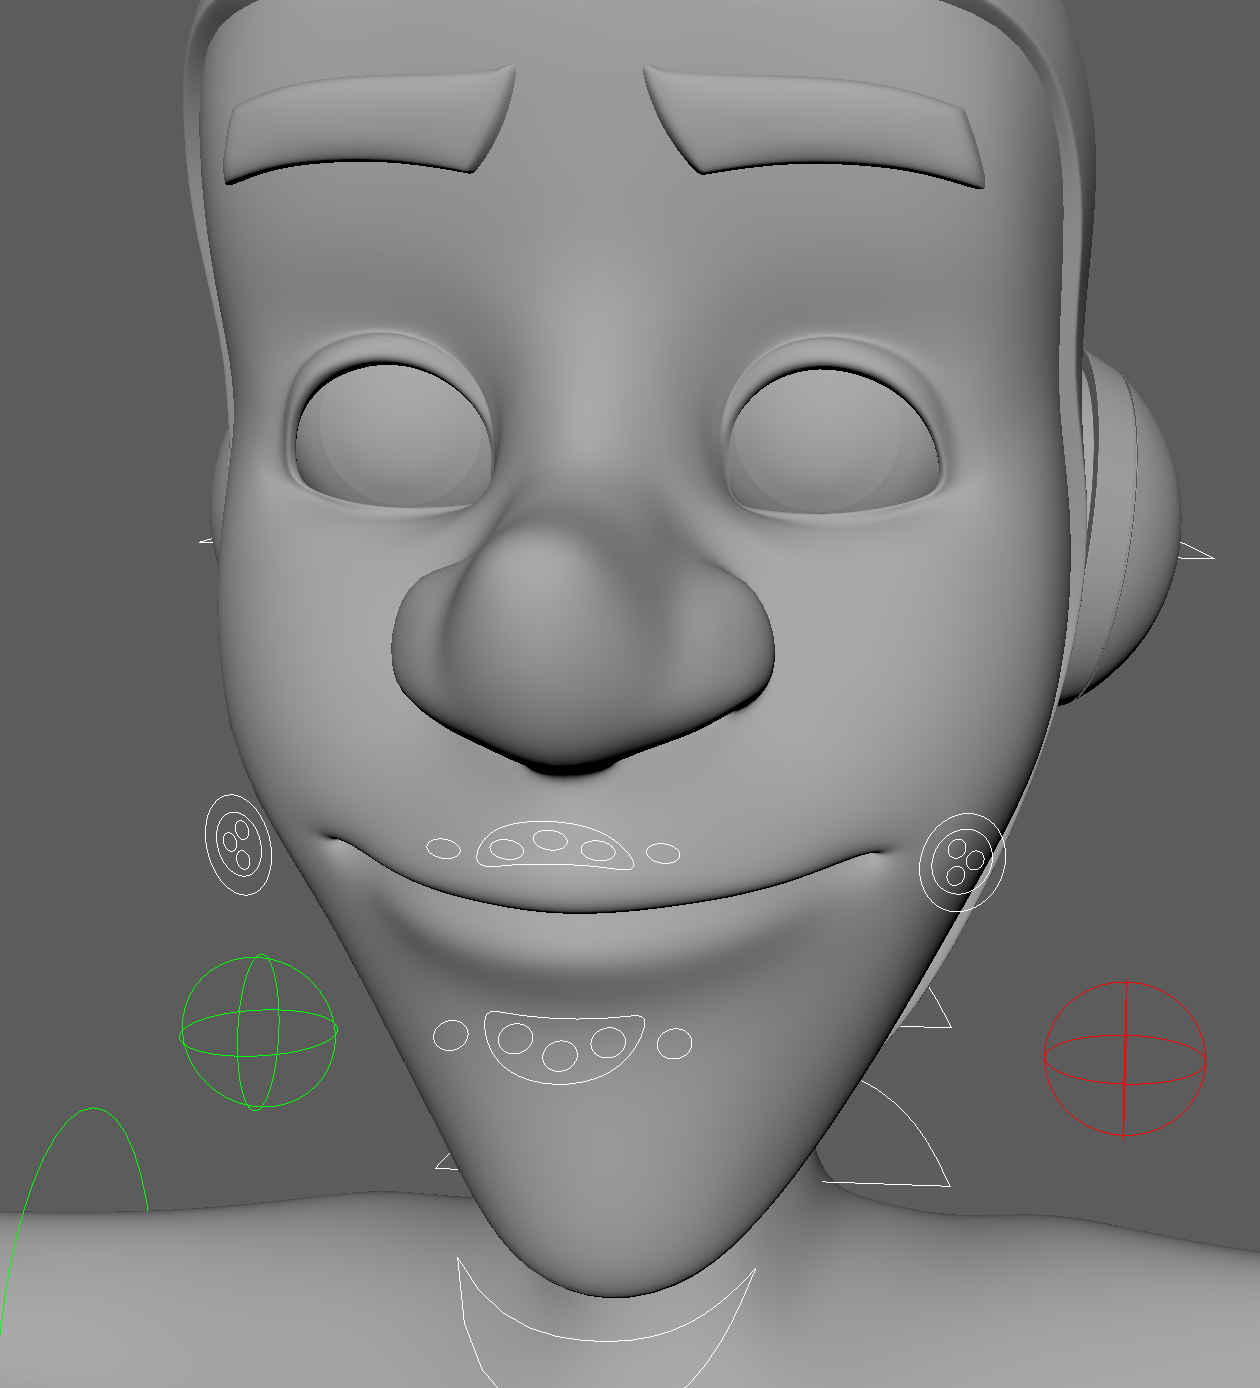 |
| Final Lateral Control Placement |
By far, I found this the most difficult part to complete. I had to do this a few times to get it right and there is still a few problems, but the blend shapes work so I happy with them.


No comments:
Post a Comment
Note: Only a member of this blog may post a comment.