Saturday, January 30, 2021

Pipeline 1: Jetpack Jones - Binding & Weight Grouping Mesh

  With the skeleton complete, we are now going to bind the Mesh. Working on the left boot first, we select the joint chain from the knee down and then use the bind skin tool (with "selected joints" in use). Currently there is some odd deformation when moving the joints, so selecting the boot geometry and going into paint weights tool, we flood the weights all to the knee (areas that are "painted" to a joint will be white, becoming grey the less influence a joint has). 

  Working from the knee downwards, we select vertices that we want to be controlled by the joint (this is about halfway to begin with) and then flood to that area. We continue this downwards to the tip of the foot, the last joint won't have any weights painting to them as its a "null" joint.


  To make bind quicker for the other boot, we can use the mirror skin weights tool. This is done by selecting the left boot, then the right and then mirroring. This makes identical weight binding.

  For the trousers, we start by selecting the joints from the pelvis down to the shin and the lower ribbon spine joint, then choosing to bind the skin. Like the boots, we flood the pelvis first and on the left hand side, we choose the vertices we what to be influenced by which joint (The trousers are quite close, so it's best to do it in the front view). As before, we mirror the paint weights across the trousers.

  We continue this process up the to torso and head. As the torso is the largest area, we choose both the upper and lower parts of the skeleton then bind the skin (changing the option to joint hierarchy).

  For the torso, we flood the chest joint to 100% and work though from the fingers on the left side, mirroring across when happy. 


The head is to be bound to the chest, neck and second neck joints. The belt loops are parented to the pelvis joint, whilst the head objects are parented to the top neck joint. These elements will be painted later to give a better effect. 

Toolkit 2: Character Design - Turnarounds Continued and First Animation Layout

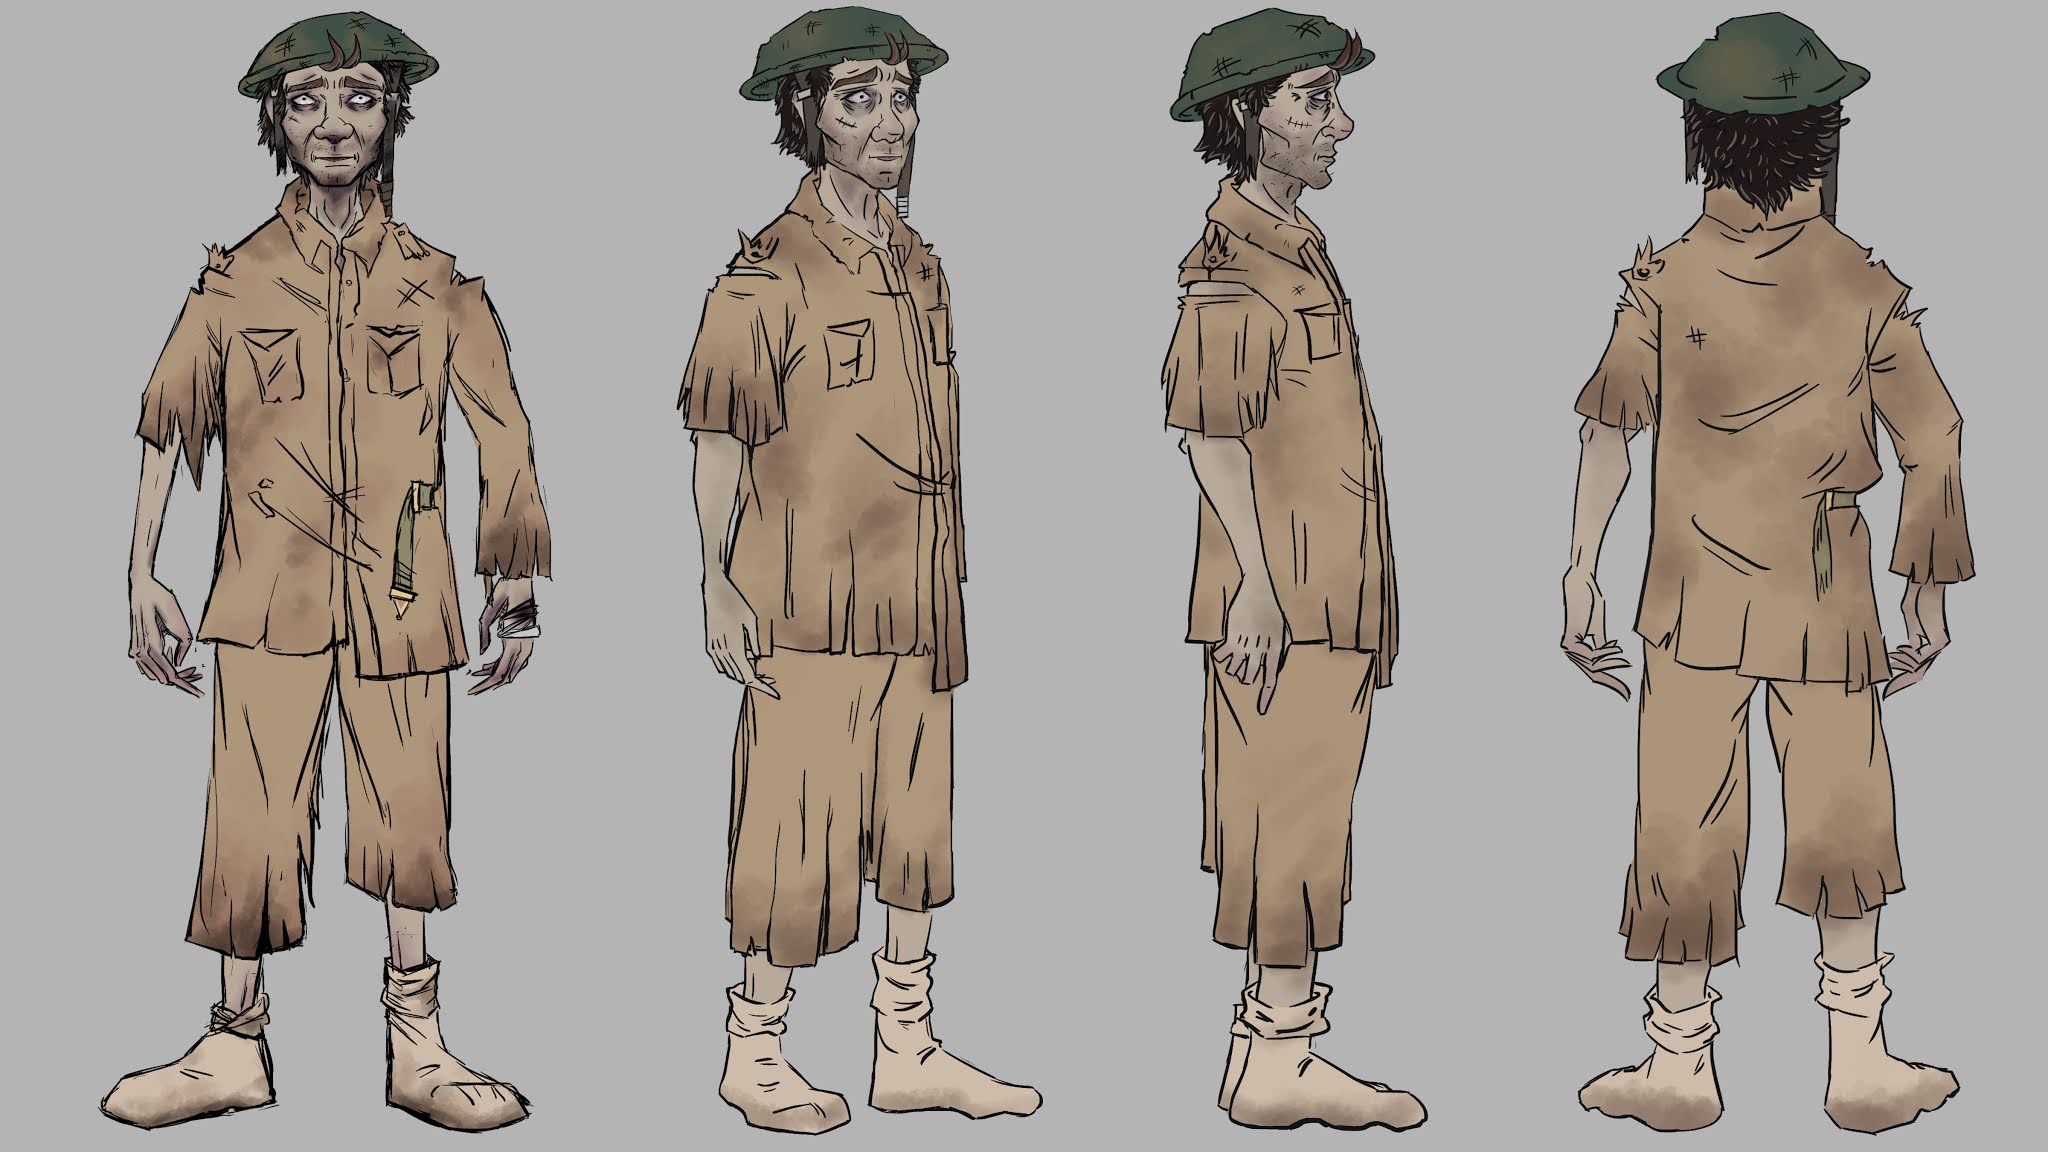
  Still working on the Character Design bible, I've now finalised the wife "hallucination" turn around. Although she does become more monstrous as my character's mental states changes, I may not get time to do more, there is still other elements that need to be done. This turnaround was very hard to complete and took the most time.

  Also, I have made the first animation layout, I'm not sure if this is correct but it's a good start. Depending on time, I would like to make more. However, I feel getting a small storyboard down would be more beneficial. 

  I have made a start on the gesture sheets but am really struggling with them, I had to put them aside and continue on with something else. Currently my sleep is quite erratic, which may not be helping with design and drawing. moving on, completing the gesture sheets and making a storyboard will be the next step. 

Animation Layout 1

Cell Line Work Cleaned Up

Thursday, January 28, 2021

Pipeline 1: Jetpack Jones - Building a Skeleton

  In order to build the Skeleton, we need to understand that the joints chains in the legs need to have a slight bend in order to move in the correct direction. This is best obtained via the joint orient rather then the the channel box. If the bend is in the wrong direction or too much, it will give inaccurate results and odd movements. In terms of values, joints need to be clean to stop any interference when skinned to the model. 

  Using Locators again, marking locations for the joints will make creating the skeleton much easier. Working from the hip (on the right left hand side) to place the first one, we place another on on the ankle and then one around the knee. Moving up the model, the next is place were ideally the pelvis would be (in JPJ's case, around the belt), one about the base of the ribcage, another just in the shoulder point (making sure they are central). Continuing onwards down the arm (elbow, wrist and the bone for the clavicle), the clavicle need to be a bit more forward so as not to interfere with the shoulder jnt. 

  Returning down to the foot, we place the last 3 on the ankle, ball of the foot and the tip of the toes.  Using locators also allows us to removed the geometry so to enable better view. 

  To start the skeleton building, before placing any joint chains we need to make sure that the primary axis is X (studios may use a different axis). Moving into the side view, we create the first chain from the leg. To move the joint, we need to make sure the object orientations (not the channel box) is being used, in this case in axis X. 

  Snapping the first joint to the the top locator, we rough out the knee location and use the joint orientation in the attribute editor to place a slight rotation. (We do not want to use the channel box!). With these done, the ankle is placed and the same process is repeated in the front view. We continue to position until we are happy with the placements.

  Testing can be done by using a IK to ensure the correct bending, then removing it afterwards. Every joint needs to be named as the correct position, being l_location_jnt. (l for left hand side and to help coordinate joints)

  For the feet, a single joint is made at the top and on the ball of the foot. These are then parented to the ankle joint, making sure they are named correctly and completing the leg chain,

  Working upwards, a joint is snapped to the locator on the pelvis, naming it a c_pelvis_jnt (c meaning central) and is then parented to the leg joint. 

  Once happy, we then use the mirror joints options to create a copy across the YZ plane, changing the l_ to r_. This now gives us two sets of leg joints connected to the pelvis. 

Completed Legs 

  With the arm, we create a 3 joint chain and point snap to the first locator. As with the leg, we undergo the same process to get the joint into the correct place, but in the rotate Y (joint orietaint). The arm joints are named l_location_jnt. For the clavicle, we use a single joint, check and then parent tot eh shoulder, making sure to rename starting with l_. 

  The left arm will be connect to a chest joint (which is best placed slightly higher then the ribbon upper joint), placing a new joint to the locator and then parented to the clavicle. The upper ribbon joint is then snapped to the chest joint so there is no gaps. 

  For the fingers, we create a chain of 4 joints. They are much too big to begin with, so changing the radius in the channel box or the global scale to 0.1 will help them fit with the model. This chain is then duclipated and then placed where the smallest finger is in 3D space. As with the previous joints, the same process is used to position them correctly. If a character has some bend in their fingers, we will need to place a slight bend to fit. This is then repeated for all 3 of the other fingers. 

  The thumb is only a 2 joint chain, but as it is rotated out and downwards, some time is need to make sure it in the best place for skinning. Another joint is needed further back in the thumb to create maximum movement. Before parenting to the wrist, its best to use the name and replace to give the joints names. The end of the finger joints should be named as end and the knuckle as base. 

  The thumb should be named as Twist on the one furthest back joint, then base onwards. 

  Grabbing the end of end chain and the writs, we parent and then mirror the joints to give us a full skeleton torso. 

Completed Torso 

  Currently, we are not worried about the head, but we will need some neck joints. Creating two new joints, we place them in at the base of the neck and head by eye and then parent them to the chest joint. To finish this section, we remove the locators still hanging around in the viewport.

  To help finish up, we select the pelvis and the lower Position locator and parent them together (with the offset selected). Repeating this for the chest joint, we know that when the joints are moved, it also moves the spine locators. 

  For the wrists, we need another joint in the forearm to give us a 50% twist along the arm. Deleting the right side and selecting the left forearm chain, we insert another joint in the centre (named as l_forearm_jnt) and then remirror to give us a complete torso again. This process is then repeated for the legs. 

  To help with the fall out along the arms and legs, we need a script. Adding a cube to each joint (this allows visual reference to see if the script is working due joint movements not be visible in the maya viewport). Using the the left wrist first, we open the expression editor for the rotate X box. Copying the name (l_wrist_jnt.rotate.) and then going into the forearm rotate x channel and place it into the expression box.  The following script is then used to create our fall off:

l_forearm_jnt.rotateX = l_writst_jnt.rotateX*0.5

(using the notion of divided by 2 will do them same)

  This is then repeated for the right arm and the legs, however in the legs it will be shin rotate X to ankle rotate Y.  When doing this on the legs, the joints will move in opposite directions. To stop this, we need to place a minus sign in the script so they move in the same correlation:

l_shin_jnt.rotateX = - l_ankle_jnt.rotateY*0.5

Once all done, the cubes can be deleted and the skeleton is all ready for binding. 

Added Script

Final Skeleton

Wednesday, January 27, 2021

Pipeline 1: Jetpack Jones - Creating a Ribbon spine


   There are 3 types of spines that can be created and used for animating characters, the first is a FK (Parent), the second a IK (ribbon) and third being a IK (spline).

  • FK (Parent) - this is like a stop motion putted spine and requires moving every joint the base curving each joint.
  • IK (Ribbon) - Paired with joints and a plane whit is then skinned, highly stretch and flexible.
  • IK (Spline) -  Driven via a curve control, updates with movement.


  The best spine to use for our character (JPJ) will be the Ribbon Spine, however there will be some movement issue that will need to be resolved when before skinning. 

  To measure the space needed for the spine, we use 2 locators, placing one at the base of the rib cage and one at the pelvis. As a whole, this measurement works out about 4 grid spaces in the y axis. Placing them on a layer and colouring them so they don't get lost in 3D space, we make sure they are central to the grid in all views. 

  Creating a Nurbs plane in the front view and rotating so its facing the screen, the plane needs to be 4 spaces in length via the Y axis. Under the Nurb shape channel box, create 3 V patches gives us 3 surfaces planes in the geometry. Next we need to remove any history and making sure it's rename as Ribbon_geo.  (Making sure everything is named correctly is important for the skinning process).

  The geo has CV's attached, so to removes them we use the rebuild option, changing the number of spans in the U to 1 and the V to 3 (so as to match the channel box). For the U Degree, will have to marked as linear and the V degree left blank, then setting it to be rebuilt. 

  Using the nhair options and setting it to nurbs curves, we needed same numbers as in the rebuild options. Adding the follicles caused some crashing issues, so by changing my Maya fromanimation settings from DC to Parallel resolved this issue. Now the hair is attached, the nucleus node, dynamic system, curve nodes and the groups can all be removed, leaving just the follicles.

  Renaming the follicles to their corresponding position and re-arranging them correctly into the outliner, placing them into a groups will help with the joints and locators allocation. Using the joint creation options and creating one single joint, duplicating it 3 (one is extra for future duplication) allows us to drag one to be parented under each follicle. 

  Selecting each joint and removing the values in the channel box enabled them to appearing in the correct co-ordinations to the follicles. Each of these joints needs a bind name, starting the follicle location _rbn_bind_jnt. These now move with the follicles when moving the plane.

  Next is the control joints. Duplicating 3 more joints, one is placed on the centre of the plane, one at the top where the locator is set and the last at the bottom. Changing the radius of the control joint means they can be seen better, giving them colour by placing them onto a layer. This resolves any joint confusion. We also need to rename them also as Location_rbn_ctrl_jnt. 

  The locator is duplicated 3 times and the size reduced to 0.5 in every direction in the local scale (not the channel scale), the bottom two are then parented un the top locator so them move when that one does. As with the joints, these need to be renamed. teh parent is upper_pos_loc, the second as upper_aim_loc and the final one being upper_aim_up_loc. These are the duplicated 2 more times, the second snapped to the middle joint and then the names of the location changed to mid. This is then repeat for the bottom set of locators, names can be altered by selecting groups and using the search and replace options. 

  The middle locator group needs another locators, duplicating the up locator and then reparented underneath the first. This one is the offset locator. to finish this part of the set up, the corresponding joints are then drop under the required locators. The middle joint need to be placed under the offset group.  The locators now move the joints when moved around the screen. Selecting all the aim up locators, we bring them out the side in the viewport and resize them to 0.2 in every orientation via the local scale. These will lock the aim constraints. 

  We require different constraints for the actions desired. The mid locator needs to stay at 50% between the top and bottom when moving. Selecting the top, bottom and then mid, we create a point constraint with the offest selected. In order for them to point toward each other when in movement, a aim constraint is needed. Selecting the upper_pos_locator and then the lower_aim_locator, we use the aim options to change the aim vector to what the controlled locators needs. In this case the controlled is the bottom locator and needs to face towards the controller (upper_pos_loc), meaning we have to change the X aim vector to 0 and the Y to 1. The "Up vector" axis need to face the Upper_pos_loc  in the X axis, so the X will need to be 1 and the Y as 0. So to lock it so when the aim locator moves, the joint moves, the world up type needs to be object up. In the "World up Object" box, typing in a controlled value (lower_aim_up_loc) always associated the up locator to the controlled. These all now point up towards the upper_pos_locator when moves and twists with the lower_aim. 

This process has to be repeated but in the opposite direction.

  Working on the middle locator and selecting the lower_pos_loc (its best to use this one rather then the upper), the aim constraint "world up" option needs to be changed to mid_aim_up_loc. All the configured joints and locators point in the correct directions when moved around. 

  When twisting the upper or lower pos locators, we need the mid_pos_loc to move at 50%, as it does when being stretching the horizonal.  Selecting both the upper and lower aim up locators and then the middle, applying a point constrain give the desired movement when rotating in Y. 

  For the rotation functions in  X and Z, we can use the connection editor. Bringing in the the upper_pos_loc in the left and the upper_rbn_ctrl_jnt into the right, we then connect the rotate X's and Z's together. When tested, there is currently no movement but this is due to not being bound to the nurb plane but does update in the channel box. This is now repeated for the lower joint. 


  To bind the control joints to the ribbon, we select all three joints, the nurb plane and then change the "bind skin" options to "selected joints". The current bind isn't great. To fix this, we place the spine in to a bell shape (this enables us to keep track of the changes being made), choose the CV's in the middle and open the component editor. The weights on the mid_rbn_ctrl_jnt needs to be 1, typing this in changes them to the correct weight. The is then repeated for the four CV's at the top and bottom of the ribbon. however, the inner set of the bottom and top CV's needs to weights 50% towards the mid_rbn_ctrl_jnt. When changing the CV's to 100% its removed access to the mid joint weight, to get them back we can select one of the mid joint CV's so it shows up in the editor and then relocate weights as needed.  The ribbon should have a nice flex when moved around.

  Selecting all the locator group and regrouping, we rename as ribbon_spine_loc_grp. The follicles and ribbon are also regroup and then called ribbon_spine_misc_grp. The bind joint are currently in the Misc, at this point if place into a group with the spine, there will be inherited transformations and will cause deformations on movement. So currently, its best to keep them separate.

  Finally, for the volume control (in order to maintain volume as the character stretches) we need a driver curve. At this point, we only need the curve as the driver will be added later. Choosing "Isopalm" when right clicking on the nurb and selecting the left sided Isopalm, using the Duplicate Surface Curve tool in the curve menu will make the Isopalm into a curve (we need the CV to match the current CV's in place on the Nurb geometry). Selecting the new curve, centring the pivot and snapping back to the centre, we name it as ribbon_vol_driver_crv.

  This curve is then placed into the misc group and the transformations wiped clean. Selecting the 3 joints, the curve and then the geometry, binding the skin will connect them all together. As with the joints, there is some skinning issues. To resolve this, using the component editor and reallocating the weights will make a better curve. 

  To finish this section, we bring back the torso and position the ribbon into the correct place. Selecting the upper_pos_loc, we bring it forward and create some slight offset with the middle_loc. 

Completed Ribbon Spine

Positioned into Place


Tuesday, January 26, 2021

Toolkit 2: Character Design - Turnarounds

  So far, I have created two turnarounds. I am hoping to move onto the third and final before drawing up gesture sheets. Creating Turnaround was a new experience and took me awhile to really understand, hopefully making the next one will be much faster.

Chester Turnaround


"Zombie" State Turnaround

Premise: Starting Project Proposals


Possible Project Proposals


Proposal 1:  Premise/ Minor/ Major

The Idea:  Documentary style animation around odd phenomenons that happen in the house, inventing creatures that make them happen. E.g a creature that opens the tumble dyer and steals one sock, or one that enjoys havoc by hiding keys. 

Outcome: Exploration of creature design and learning advanced rigging/skinning techniques.

The Goals: To expand in creature design, learn rigging techniques for future career.

Technical pipeline/process:


Proposal 2:  Premise/ Minor/ Major

The Idea: Character animated short.

Why do cats stay awake all night? Character creation and modelling/rigging behind short narrative.

Outcome: Exploration of character design and learning advanced rigging/skinning techniques.

The Goals: To expand in character design, learn rigging techniques for future career.

Technical Pipeline/Process:  Creating a short narrative leading to bigger event with empathise on characters.


Proposal 3:  Premise/ Minor/ Major

The Idea: Futuristic style program explain discovered creatures on new planet.

Outcomes: Exploration of creature and world design and employing advanced rigging/skinning techniques.

The Goals: To expand in creature design, learn rigging techniques for future career.

Technical Pipeline / Process: Allowing time to create a range of creatures.


Saturday, January 23, 2021

Toolkit 2: Character Design - Expression Work Continued

  Having finished the collaboration project, I wanted to get back into Character Design after having a few days rest. It has been so long since I've even had chance to pick up a pencil, starting the expressions was quite difficult. I had become very rusty.

  However, after a few hours of doodling I started to loosen up and drawing started to become easier again. As I have already done a few emotions for Chester, these are extra.

  Out of all of these, the wife hallucination was the hardest to do. I still had to give her expressions that would reflect the wife, meaning the main character would trust it. The sharpness due to the German Expressionism made drawing her expressions quite a challenge.

  As with "Zombie" state, as he wouldn't always be "zombified", he would still have some normal emotions. Sadly, I doubt he would have many happy emotions, maybe one or two slightly hopeful ones. If I have time, I will do more but next will be turnarounds and gestures sheets.

  Expressions is something that still needs improvement, mainly trying to make sure they keep the represent of the character. Some of these have move away slightly but I enjoyed drawing them, it made a nice change. 

Chester  "Pre-Zombie" State


"Zombie" Expressions


Wife Hallucination Expressions


Wednesday, January 20, 2021

Submission: Collaboration Project

"Art of" and Presentation

https://kimberleydavis32.blogspot.com/2021/01/to-end-of-collaboration-project-art-of.html


Final Animation:

https://kimberleydavis32.blogspot.com/2021/01/collaboration-rendered-images-and-videos.html

https://kimberleydavis32.blogspot.com/2021/01/collaboration-rendered-scenes-pt-2-and.html

https://kimberleydavis32.blogspot.com/2021/01/collaboration-final-animation-end.html


3D Development:

https://kimberleydavis32.blogspot.com/2020/12/collaboration-final-hotel-lobby-set.html

https://kimberleydavis32.blogspot.com/2020/12/collaboration-bell-hop-orthograpthics.html

https://kimberleydavis32.blogspot.com/2021/01/collaboration-final-3d-previsualization.html


3D Pre-Viz:

https://kimberleydavis32.blogspot.com/2020/12/collaboration-hotel-bell-hop-skit-3d.html

https://kimberleydavis32.blogspot.com/2020/12/collaboration-hotel-bell-hop-skit-3d_4.html


OGR:

https://khamaeleon88.blogspot.com/2020/11/the-worlds-worst-cctv-online-green.html


Scripts, Storyboards, Concepts and Animatics:

https://kimberleydavis32.blogspot.com/2020/11/collaboration-hotel-new-storyboards.html

https://kimberleydavis32.blogspot.com/2020/11/collaboration-script-version-1.html

https://kimberleydavis32.blogspot.com/2020/11/collaboration-video-store-skit-script.html


Pre-Development:

https://kimberleydavis32.blogspot.com/2020/11/collaboration-finaisation-on-scenerios.html

https://kimberleydavis32.blogspot.com/2020/10/collaboration-scenario-ideas-and-post.html

https://kimberleydavis32.blogspot.com/2020/10/collaboration-brainstorming-pt-2.html

https://kimberleydavis32.blogspot.com/2020/10/collaboration-brainstorming-and-job.html


 Studio Development:

https://kimberleydavis32.blogspot.com/2020/10/collaboration-developing-studio-blog.html

https://kimberleydavis32.blogspot.com/2020/10/collaboration-studio-logo-and-branding.html

https://kimberleydavis32.blogspot.com/2020/10/collaboration-briefing-and-sentense.html


Project Reflection:

  When starting this project, there was a lot of initial emotions. The first was being nervous. Being in a team with so many good people, I was anxious about being about to produce work to a high enough standard as my peers, leading me to be worried about letting them down. However, I was also quite excited. Having the opportunity to work with others enabled new learning experiences.  Gaining knowledge in how others approached work help to expand on how I approach my own. It also presented the chance to learn more about my peers and created closer connections.

  Once becoming settled into the project, as a team we gelled really well together. We seemed to bounce well off each other and come up with a lots of idea quite early on. However, about half was though, we seemed to fall into a slump due to story changes. Returning back to the drawing board to re-evaluate the comedy did cause some issues in moral, but a jump back presented itself with Saskya's outline of a distraction highlighting Moom's antics. Towards the end, I felt mentally and physically exhausted, but was quite happy with being able to continue working and the overall outcome of the project. 

  Participating in this project helped me to understand my weaknesses and strengths a bit more. Something that came apparent was my personal preference to working schedules, whilst expecting others to work at the same pace. This experience help me understand that everyone has there own pace of working and these individual patterns can produce brilliant results but at a pace that suits them. Also, my confidence with Maya has grown more. When facing the pre-viz set modelling, I felt slightly panicked. After a tutorial with Alan and actually starting to build the set, though feelings melted away. As my worked continued, I felt I was becoming more confident. Creating the final set was the most surprising part, I found it to be the most enjoyable task and was quite proud of its final rendered outcome. 

   However, I found the animating aspect highly frustrating. Creating animation that is both flowing and smooth was very difficult, not to mention time consuming. I feel managed to create a ok-ish effect considering the time constraint. It may have been more beneficial to have started animation earlier, saving me being up late in the night in the latter stages.

  Moving on from his project, I have a deeper insight to the production pipeline. This experience will help to make the workflow in premise and year 3 much smoother. 

Tuesday, January 19, 2021

Collaboration: Final Animation and End Credits

 Final Animation Outcome, Collaboration Project, UCA. 20/21.


Credits:

Studio: https://khamaeleon88.blogspot.com/
Roller Diner Scene: Jessica Crosby - https://www.jesssarahlouise.co.uk/
Bell Hop Scene: Kimberley Davis - https://kimberleydavis32.blogspot.com/
Jasmine Masters - https://jasminemasterscaa.blogspot.com/
Laundrette Scene: Saskya Olsen - https://computeranimationsaskyaolsen.blogspot.com/
Moom Rigging: Jasmine Masters - https://jasminemasterscaa.blogspot.com/
Intro/Outro: Kimberley Davis - https://kimberleydavis32.blogspot.com/
Final Composition: Jessica Crosby - https://www.jesssarahlouise.co.uk/

Music:
Driftmaster by shane Ivers: Silvermansound.com.
Dreaming Out Loud - AdobeStock
Synthwave - AdobeStock
Shut the World Out - AdobeStock
Sound Effects:
Freesounds.org
Zapsplat.com
Final Animation Without Intro/Outro


  To help with finalising the animation, I made some end credit slides from the original OGR presentation. These also fit in well with the introduction. 

Final Animation End Credits Slides


Monday, January 18, 2021

Collaboration: Final Bellhop Skit, "Art of" and Presentation Documents

  Coming to the end of the collaboration project, the bellhop skit is now fully rendered. This was a joint animation between Jasmine Masters and Myself, the YouTube thumbnail was create by Jasmine to bring a more professional finish. I have also completed the Art of and presentation documentations ready for the critique.

Final Rendered Bellhop Skit


The Art of "CCTV Mishaps"


"CCTV Mishaps" Presentation

Collaboration: Rendered Scenes Pt 2 and Isolated Animations

  Continuing on with animating, I have now completed the fourth and final scene for the Bellhop skit. These have been placed into premier and edited, static placed to help with timing/ transitions. Animating with the trolley was quite a challenge, Moom had to be duplicated and the invisibility keyframe so to have a smoother movement. I have also isolated some animations to show clearer movements.

Rendered Bell Hop Scene 04


Rendered Bell Hop Scene 05


Isolated Animations


Sunday, January 17, 2021

Collaboration: Rendered Images and Animation Scenes Pt 1

   At present, work for the Collaboration project is still underway. After sorting out my Arnold Lighting in Maya, I was able to get some fully rendered images of the hotel set, which will also be seen in the "Art of".  On the animation side, Currently scenes one and three are completed, I am hoping to finish the forth scene today. Once all they are done, it will be a case of putting a simple sound track overtop and amalgamating them all together to make a final product.  

  In terms of the "Art of", this is 95% completed and is just needing a bit more writing. 

Front Camera

Lobby Camera


Rendered Bellhop Scene 01
Parts of these scenes will be sped up for the final product.


Rendered Bellhop Scene 03

Thursday, January 7, 2021

Toolkit 2: Character Design Lesson - Storytelling

   Before moving on to Storyboarding, we need to have a basic understanding of angles and composition. Although this project won't be made into a animation, we design out storyboard as if we want to create a cinematic experience.


Camera Angles and Composition

Establishing Shot - These set the scene for where the story is going to take place. They don't always have to have the main characters in, or be overly grand.


Establishing Shot

Long Shot - These often place the character in scene and incorporates the whole body. Long shots are best used for action motions or moments of clarity. 


Long Shot

Mid Shot - Based on showing just the upper part of the body, often a natural or conversational shot.

Mid-Shot


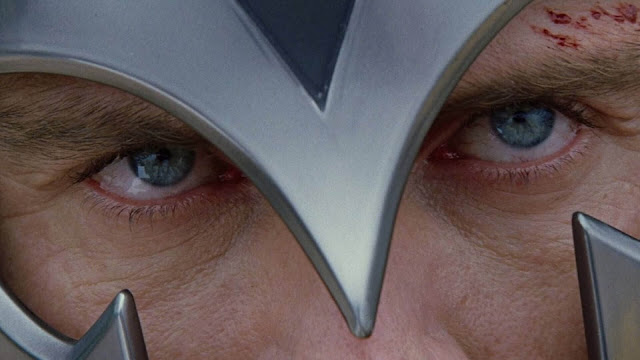
Close Up - These are emotional and intense, the closer to the subject, the more emotional. These don't always have to be on the face, they can focus on something that is important to the story.

Extreme Close Up - The same as close up but more intense, these shots will slow in and out to show tension.

Close up


Downwards Shot - Normally the POV of the character. A downwards shot gives the intentions of something more powerful looking down at the main protagonists and can bring the emotions vulnerability, threatening presence or foreshadowing.

Downwards Shot


Up Shot - The same at the downwards but from the POV of the main characters, transferring power to what is being seen. 

Upward Shot


Over the Shoulder Shots - Associated with dialog, these shot places empathises on how characters react to each other, stopping the jarring motion of backwards and forth camera movements. 

Over the Shoulder Shot


POV Shot - These are quite extreme and takes on the POV of the main protagonist. It brings the audience into the scene, the camera being the eyes. 

POV Shot


Tilted Shot/ Dutch Angle - Strange and unsettling, these can show a warping sense of reality and emotion. These also bring in elements of danger.

Dutch Angle


Composition

  How objects/ characters are placed in a scene can portray what is happening, anything that is placed in the front and middle of the screen can be considered quite static/dull. Front and centre shows stability, but changing the positions to be slightly off set can give more interesting emotion.

  Objects that are locked into the corners of the screen gives stability but feel locked in. If using a mountain, placing it in a not so locked position can give the feeling of a world beyond the frame.

  Asymmetry is also more natural rather then being symmetrical, giving a more natural feel to the composition. This is the same with Horizon Lines, placing it higher or lower changes the attraction to the eye. 

Horizon Lines


Tangents - These can make a scene messy by having too may lines intersecting. To avoid these, uses overlapping techniques.

Tangents


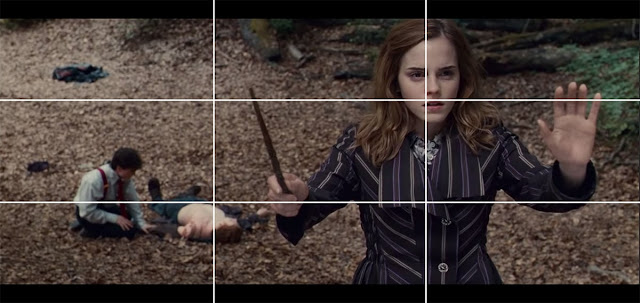
The Rule of Thirds  - This grid help to create dynamic and powerful compositions, using the offset can create natural poses whilst bringing intensity to the foreground. This positioning also allows for the eye to explore events that are happening in the background.

The Rule of Thirds


Staging - Drawing the eye to the most import point of the shot, creating strong lines using other characters and the background elements. 

Staging


Contrast - Using silhouettes and tone can bring empathises to what is happening. Animation allows more freedom with character/object placements, contract and drawing the eye.

Contrasting


Acting Up - Storyboarding

Storyboards - These do not have to be complex, but have to be readable and convey what is happening. 
Storyboarding


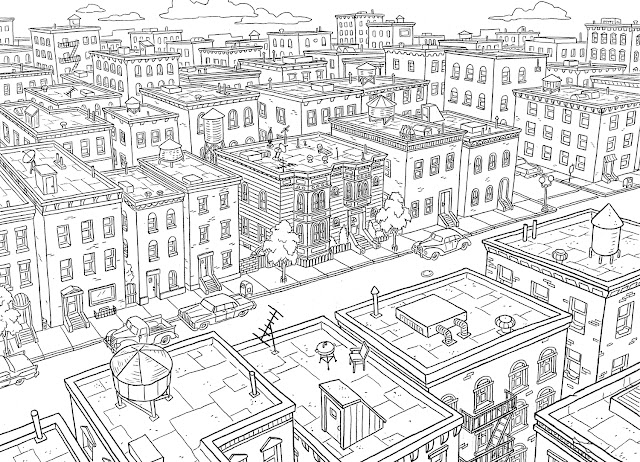
Animation Layout - Shows how the camera and characters move though a scene. In these, it's important to think about the grounding. The Foreground can be used for framing and be more abstract, midground will have more details, whilst the background sets the scene. Making a clean outline of the environment can help with turnarounds. 
Animation Layout

Clean Environment Layout


Depth - Using light and shadow can bring emotions in the area, whilst showing what is important more forefront. With colour, muted ones will be seen in the background, whilst darker tones are more forefront. Using objects to frame a shot will bring the audience into the scene.

Depth


  Perspective involves using a horizon line and guide lines to draw in the eye and create interesting compositions. The higher the line, the bigger the ground area. The lower, the more items above eye line are in show.  Perspective lines helps to bring in emotions, making a character feel empowered, threated or a changing sense of perception. 

1 Point Perception

2 Point Perspectives

Major - Submission Post: Final Animation, Reflective Statement and Links

Final Reflective Statement When starting the Major Project, there was still quite a lot of work left over from Minor for the planned final...